Category: Blog

  • What Are Fabricated Homes? A Builder’s Complete Guide

    What Are Fabricated Homes? A Builder’s Complete Guide

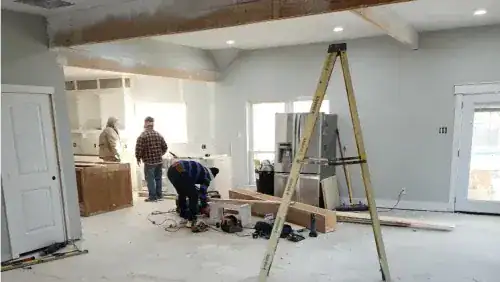
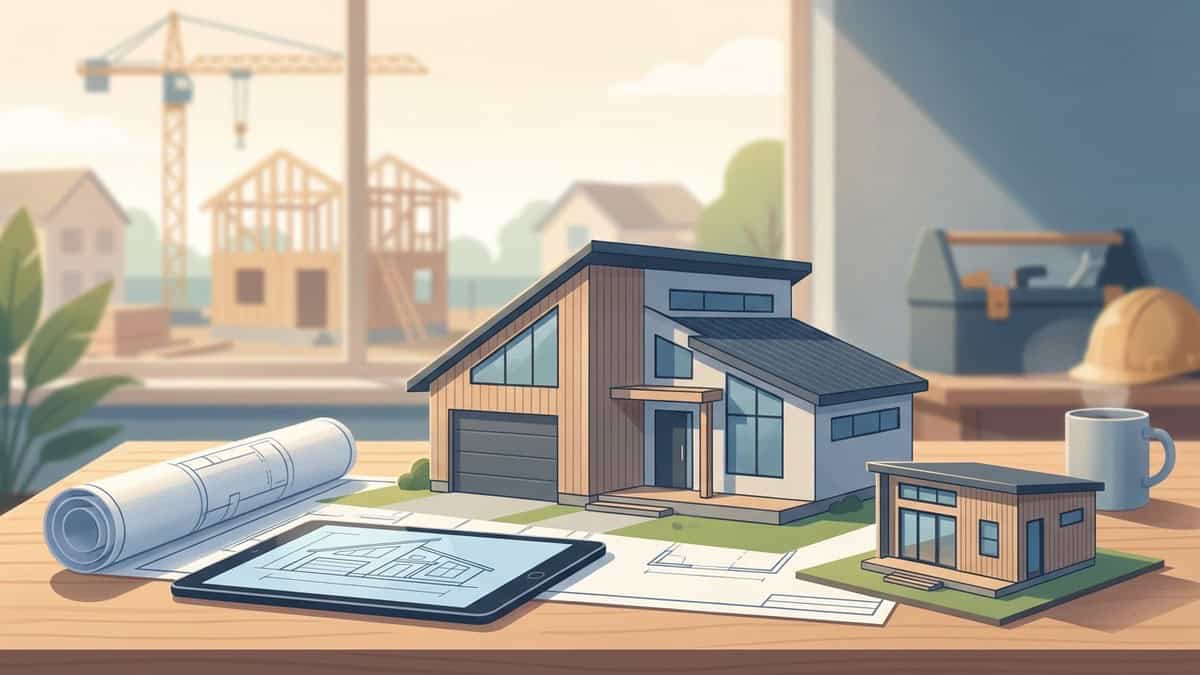
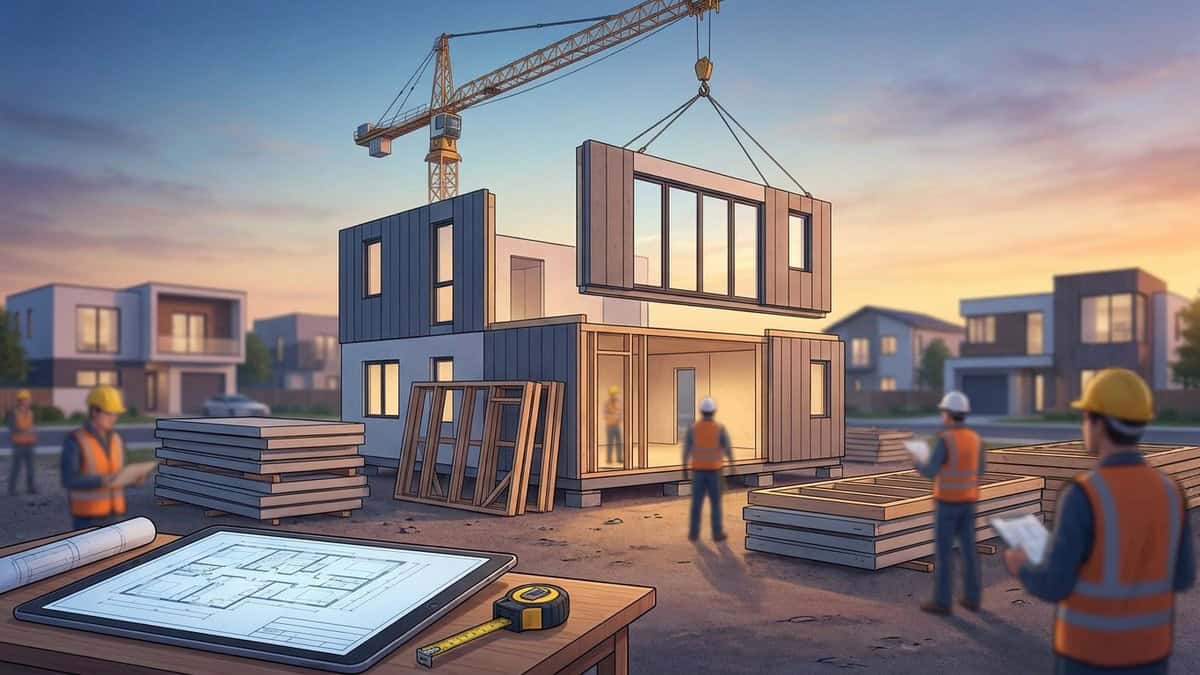
    Fabricated homes are residential structures built from components manufactured off-site in indoor facilities before being transported to a permanent property for assembly. Instead of framing, insulating, and finishing a building outdoors in shifting weather conditions, builders produce structural panels or full three-dimensional modules within controlled plant environments. Once delivered, these systems anchor to a permanent foundation and connect to municipal utility infrastructure under the same local building codes that govern conventional construction.

    What Are Fabricated Homes? A Builder's Complete Guide

    What Are Fabricated Homes and How Do They Work?

    The engineering concept behind fabricated homes centers on moving structural assembly from an unpredictable jobsite into a manufacturing plant. Traditional residential builds rely on sequential field labor where framing lumber, subflooring, and wiring remain exposed to rain, humidity swings, and ground moisture. These exposures routinely cause wood framing to twist, swell, or crown before drywall crews ever step foot on the subfloor.

    Indoor prefabrication eliminates that jobsite exposure. Structural components are assembled on specialized framing tables and pneumatic jigs that maintain true right angles and uniform nailing intervals across every partition. Because raw materials remain dry in warehouse storage, studs and floor trusses cure evenly without dimensional distortion.

    Code compliance establishes a clear legal line between different categories of factory-built dwellings:

    • Modular and Panelized Fabricated Homes: Built directly to the International Residential Code (IRC) or International Building Code (IBC) alongside local city amendments. Municipalities classify these residences as real property, which allows buyers to secure standard residential mortgage financing.
    • Manufactured Housing: Built to federal standards administered by the U.S. Department of Housing and Urban Development. These dwellings sit on permanent steel chassis beams rather than continuous site-cast concrete foundations and follow separate titling guidelines.

    Off-site construction also shortens the development calendar through parallel site and factory workflows. Conventional building requires a linear sequence: soil excavation, grading, formwork, pouring, and concrete curing must finish entirely before framing can begin. Prefabrication allows site contractors to pour the permanent foundation at the exact time the plant constructs the structural shell. When concrete footings reach structural cure capacity, the finished building arrives ready for rigging and tie-ins.

    Plant-built structures undergo strict multi-stage verification. Because factory walls arrive closed with insulation and interior drywall, municipal inspectors cannot evaluate mechanical rough-ins from the exterior. Third-party inspection agencies therefore inspect the modules inside the production facility, verifying plumbing pressure tests, electrical junction boxes, fireblocking, and structural fastening schedules before shrink-wrapping. Local municipal inspectors then inspect foundation depth, anchor bolt embedment, structural marriage joints, and primary utility connections on the site. Homeowners can read more about standard construction sequencing in our guide on modular homes explained.

    How off-site manufacturing differs from traditional stick-built construction

    Field-built projects require trades to measure, hand-cut, and fasten individual boards directly exposed to the elements. That traditional methodology offers on-the-fly flexibility, but it routinely runs into weather shutdowns, trade scheduling conflicts, and site material loss.

    Industrial manufacturing applies standardized assembly workflows to residential framing. Automated cutting equipment, bulk component staging, and dedicated trade stations allow workers to install structural members with consistent accuracy. Field tasks shift from weeks of open-air framing to crane rigging, structural anchoring, and utility connections.

    The Three Main Types of Fabricated Homes

    Prefabrication encompasses multiple engineering formats designed for distinct architectural goals, hauling constraints, and site requirements.

    1. Volumetric Modular Units

    Volumetric modules represent complete three-dimensional room sections delivered directly from the factory floor. One module might contain an entire primary suite, or two halves of an open kitchen and living area.

    Factory crews complete the vast majority of interior finishes before shipping. Sheetrock is hung, taped, textured, and painted; electrical circuits run through wall cavities into distribution panels; rough plumbing stacks are pressure tested; and cabinets, countertops, interior doors, and tile work are installed.

    Highway transit and crane hoisting exert unique dynamic loads on volumetric units. Consequently, builders reinforce these boxes beyond standard framing minimums:

    • Perimeter floor bands utilize doubled structural joists to resist highway transit torsion.
    • Structural sheathing is both glued and fastened according to reinforced engineering schedules.
    • Heavy steel lifting plates are secured directly into corner structural columns for crane rigging straps.

    2. Panelized Wall and Roof Assemblies

    Panel systems deliver flat-packed framing components to the jobsite rather than volumetric boxes. Plants manufacture exterior load-bearing walls, interior partitions, floor cassettes, and engineered roof trusses flat on hydraulic tables. Panels range from open-stud sections ready for on-site wiring to Structural Insulated Panels (SIPs).

    Insulated panels incorporate an expanded foam insulation core bonded between structural sheets of oriented strand board. Joined together using continuous structural splines and expanding sealant, these panels establish a dense building envelope that minimizes air leakage.

    Shipping panel packages is straightforward because flat-stacked assemblies fit on flatbed trailers without requiring wide-load pilot escorts. A local framing crew uses a light mobile crane or telehandler to stand, plumb, anchor, and brace the panels onto the concrete subfloor. Homeowners planning their preliminary room arrangements can explore layout options in our guide on how to choose and design functional floor plans.

    3. Pre-Engineered Kit Systems

    Structural kit systems provide an engineered framework designed for rapid assembly on a concrete foundation. These configurations appear frequently in residential steel buildings, heavy timber framing, and modern barndominiums.

    Suppliers engineer primary structural members—including rigid steel columns, cold-formed steel channels, or heavy glulam timbers—drilling connection holes and welding mounting brackets in the manufacturing plant. The package ships as an un-erected bundle accompanied by detailed architectural assembly drawings.

    Crews bolt the primary structural frame to foundation embed plates, then fasten exterior metal siding and roof decking to establish a watertight shell. Interior framing, rough mechanical work, insulation, and finish carpentry then proceed on-site just like traditional construction. Property owners evaluating large clear-span shells can reference our resource on building a barndominium in Texas.

    Comparing modular units and panelized wall systems

    Selecting between volumetric modules and panel systems depends heavily on site clearance, street widths, and project timelines.

    Construction Element Volumetric Modular Construction Panelized Wall Systems
    Factory Completion Extensive (cabinetry, fixtures, and finishes installed) Moderate (framing, structural sheathing, rough openings)
    Logistics and Hauling Oversized carriers; often requires pilot vehicles Standard flatbed freight; compact transit footprints
    Crane Requirements Large mobile crane required for component setting Small telehandler or mobile boom crane on site
    Design Flexibility Limited by highway transport widths and box geometry High; easily adapts to complex rooflines and footprints
    Field Trade Labor Focused on marriage joints and utility tie-ins Substantial; trades complete rough MEP and interior drywall
    Ideal Property Application Wide access roads, open lots, rapid completion needs Narrow lots, infill locations, complex architectural footprints

    Foundation and Site Preparation Requirements for Fabricated Homes

    Precision groundwork dictates the structural alignment of every factory-built residence. Traditional site carpenters can trim an out-of-plumb stud or shim a low sill plate to mask foundation imperfections, but manufactured modules and pre-cut wall panels offer no such tolerance. When a concrete foundation slab sits out of level or out of square, panels will not align, creating visible gaps and structural stress along load-bearing marriage walls.

    Geotechnical evaluations must establish soil bearing capacity before concrete pours begin. Expansive clay soils demand careful planning because moisture swings cause clay to expand and contract, generating intense uplift pressure beneath structural foundations. Earthwork contractors must strip organic topsoil, balance the building pad with select fill, and compact the subgrade in uniform lifts. Grading crews must sculpt perimeter drainage swales to divert surface runoff away from foundation footings.

    Engineers specify three primary foundation options for manufactured residential systems:

    1. Monolithic Concrete Slabs: Popular for panelized framing and pre-engineered kit structures. The foundation incorporates thickened perimeter footings and an interior slab in a single concrete pour, reinforced with steel rebar or tensioned cables. Slabs designed for modular boxes include perimeter step-downs or steel connection plates to receive the chassis ties.
    2. Stem-Wall Crawlspaces: Poured concrete footings support concrete masonry units or poured concrete stem walls extending upward to a framed floor platform. This format works well for volumetric modular layouts because the crawlspace provides open access for plumbers and electricians to tie primary branch lines together beneath the floor joists.
    3. Drilled Concrete Piers: Reinforced concrete piers extend through unstable topsoil into dense load-bearing strata or solid rock, supporting structural steel beams or treated wood grade beams. Pier foundations serve sloped building lots or sites with protected tree root zones that cannot tolerate open trenching.

    Delivery logistics require detailed verification before the transport trailers leave the plant. Oversized modular haulers require wide street turning clearances at tight neighborhood intersections. Low-hanging power cables, communication drops, and tree canopies along the transit path must be surveyed and temporarily lifted or trimmed by utility providers.

    Crane setup pads also require soil stability reviews. Setting multi-ton building modules at wide radiuses exerts concentrated point loads through hydraulic crane outriggers. Crane pads must feature compacted structural aggregate or heavy timber outrigger mats to prevent shifting during module placement.

    Rough utility stubs must align precisely with factory architectural plans. Conventional slab builds allow plumbers to chip out concrete or shift an interior wall slightly if a pipe emerges off-center. Volumetric modular construction does not permit those field adjustments. Water lines, sewer drops, and electrical conduits must stub out of the foundation slab within tight dimensional tolerances to match the pre-cut chases inside the modules.

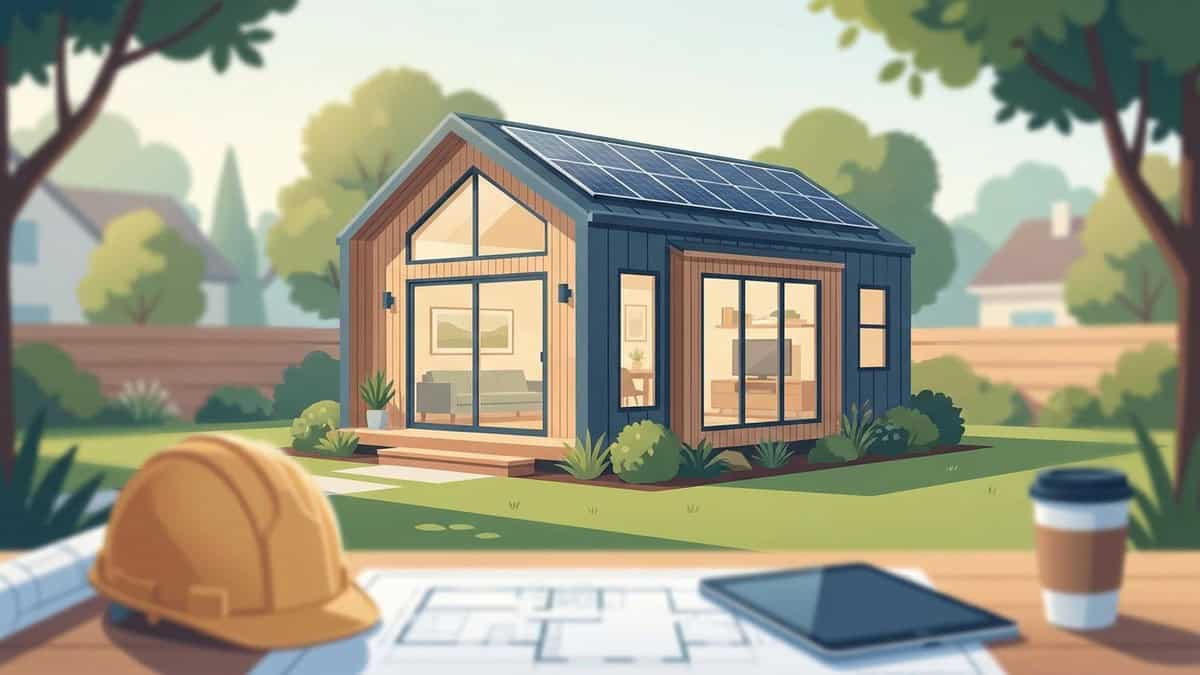
    Using Fabricated Structures for ADUs and Detached Guest Houses

    Backyard auxiliary buildings have become a preferred option for homeowners seeking rental income, home offices, or multigenerational housing. Prefabricated small dwellings appeal to many property owners because the noisy framing and messy trades take place miles away from the main residence. Still, physical lot constraints frequently dictate whether a prefabricated drop or an on-site custom build represents the most practical path forward.

    PRO Construction provides Accessory Dwelling Units (ADU), Garage Conversions, Garage Builds for Homeowners in Keller, TX and surrounding communities seeking additional living space, rental income, or guest accommodations.

    Property owners must carefully assess zoning rules and architectural guidelines when planning a detached backyard structure:

    • Zoning Setbacks and Lot Limits: City zoning codes determine how close a detached structure can sit relative to side and rear property boundaries. Municipalities also limit total impervious lot coverage. A prefabricated shell with fixed dimensions cannot easily change its footprint to work around easements or impervious cover limits.
    • Utility Panel Capacities: Detached living spaces require electrical power, water supply, and waste handling. The main residence’s electrical panel must supply enough amperage for the new structure’s heat pump, water heater, and cooking appliances. Older panels frequently require a service upgrade or an independent secondary utility meter.
    • Homeowners Association Standards: Architectural review committees in planned neighborhoods often demand that detached structures match the primary house in siding type, brick patterns, window style, and roof pitch. If a factory production line cannot supply the specific masonry or trim details specified by your HOA, an on-site build through a local contractor is generally more practical.

    Physical site obstacles like mature shade trees, overhead power service lines, and tight property clearances often block heavy cranes from lifting modules over a primary roof. In those situations, standard site framing or panelized packages allow contractors to carry materials into the backyard manually without damaging existing landscaping. Property owners can review the contractor selection process in our guide on hiring a builder contractor near me.

    Critical Construction Realities and On-Site Finish Work

    Base prices shown on factory websites represent only a portion of the real investment required to finish a liveable dwelling. An uninstalled shell sitting on a flatbed trailer cannot function without extensive site engineering, civil groundwork, and local trade craftsmanship.

    Turnkey site work involves several necessary budget categories:

    1. Permits, Plan Reviews, and Municipal Fees: Every build requires property boundary surveys, architectural plan submittals, energy calculations, and municipal tap fees for water and sewer connections.
    2. Transportation Escorts and Permits: Hauling oversized structural modules requires state transportation permits, designated route planning, and dedicated escort vehicles to escort trailers safely through traffic.
    3. Rigging and Crane Day Operations: Deploying an all-terrain hydraulic crane and an experienced rigging crew represents a significant daily expense. Wind gusts or lightning storms can delay lifts, requiring contingency planning.
    4. Site Utility Infrastructure: Connecting utilities demands deep trenching for water lines, sewer connections, electrical conduits, and low-voltage lines from the street or primary residence.
    5. Exterior Hardscaping and Grading: Flatwork such as driveways, walking paths, patio slabs, porch steps, and final finish grading must be handled entirely by field crews.

    Volumetric modular builds join separate boxes together along structural mate lines known as the marriage line. Securing this interface requires skilled field labor once the crane releases each module.

    Structural lag screws, steel tie straps, and shear plates must be bolted across the marriage joint according to the structural engineer’s fastening schedule to ensure the unified structure resists wind shear and seismic forces. Mechanical trades then connect duct trunks, balance air return systems, solder plumbing supply jumpers, and connect electrical junction boxes bridging the modules.

    Cosmetic finishes along the central mate line demand experienced finish carpenters and drywallers. Sheetrock seams along the joint must be taped, floated, and painted so that the marriage line blends cleanly into the factory-finished ceiling and walls. Flooring transitions across the marriage line must also be installed evenly to avoid hollow spots or raised lips along the floor plane.

    Transit movement inevitably affects factory modules during highway hauling. Road vibrations and bridge transitions can produce hairline cosmetic cracks in drywall returns around door frames and window sills. Finish trades repair, texture, and touch up these hairline settlement marks during final punch-out work.

    Weatherproofing during installation is just as critical. While modules travel wrapped in protective membranes, high-speed winds can tear protective coverings. General contractors maintain heavy commercial-grade tarps and pumping gear on the jobsite so that unsealed roof lines remain protected against sudden rain showers until ridge caps and underlayments are fastened. Exploring our areas we serve helps homeowners connect with field teams familiar with local municipal building departments. Project owners can also submit preliminary project questions through our contact page.

    Frequently Asked Questions

    Is it cheaper to buy a fabricated home or build?

    Overall turnkey costs for fabricated homes generally balance out to match site-built homes once all site work, transportation, crane rigging, and utility tie-ins are calculated. While indoor manufacturing reduces lumber scrap and framing hours, those operational efficiencies are offset by highway freight fees, route escort services, crane rental overhead, and specialized marriage-line finishes. The clear financial benefit of prefabrication is schedule efficiency: overlapping the foundation pour with indoor manufacturing reduces total build time, which limits temporary housing expenses and builder’s risk insurance costs.

    How much does a 2000 ft modular home cost?

    Total project investment for a modular home of this footprint varies based on local site conditions, foundation engineering, interior trim specifications, and utility distances. The manufactured factory modules represent only a baseline cost; sitework, excavation, concrete foundation construction, crane operations, and local trade finishes make up the remainder of the turnkey budget. Getting a detailed, itemized estimate from a general contractor that covers both factory modules and complete on-site civil work is the only reliable way to project the complete investment.

    Can I put a fabricated home in any residential neighborhood?

    Municipal zoning designations, local development ordinances, and private subdivision deed restrictions determine where factory-built structures can be installed. While state laws in many jurisdictions prevent cities from banning IRC-compliant modular homes solely because their framing was assembled off-site, local governments still enforce setback limits, roof pitches, and square footage maximums. Private Homeowners Associations also maintain architectural controls that routinely mandate specific proportions of masonry, brick, or stone on exterior elevations before plans receive approval.

    How long does it take to assemble a fabricated home once delivered?

    Setting structural modules onto the prepared foundation with a hydraulic crane typically takes a few days. However, converting those raw structural boxes into a finished, move-in-ready residence requires additional weeks of active on-site trade work. Licensed subcontractors must tie structural marriage plates together, complete rough plumbing and electrical crossovers, link HVAC ducting, cap the exterior roof ridges, and finish cosmetic drywall joints before municipal building officials conduct final inspections and issue a certificate of occupancy.
  • 7 Things to Vet in Barndominium Builders Near Me

    7 Things to Vet in Barndominium Builders Near Me

    Finding reliable barndominium builders near me comes down to vetting structural engineering, slab design, and local building code compliance. A successful build requires a general contractor who executes complete turnkey construction rather than merely dropping off a prefabricated steel shell package. Evaluating trade networks, foundation specifications, and municipal permitting history before signing keeps your custom home on schedule and structurally sound.

    7 Things to Vet in Barndominium Builders Near Me

    7 Critical Qualifications to Demand from Barndominium Builders Near Me

    Selecting the right partner requires digging past sales brochures and inspecting practical construction methods. When evaluating local builders, use these seven structural, legal, and operational benchmarks.

    1. Full Turnkey Management vs. Shell-Only Erection

    Many companies advertising metal building construction only deliver and bolt together the exterior steel framing and metal siding. Once the shell stands, they pack up their equipment, leaving you to manage interior framing, mechanical installations, and drywall contractors. A genuine turnkey builder oversees the entire lifecycle: clearing the land, pouring the engineered foundation, erecting the structural frame, coordinating all interior build-outs, and delivering a move-in ready certificate of occupancy. Choosing turnkey management prevents the costly finger-pointing that occurs when an interior framing crew blames a steel erector for out-of-square perimeter walls. Review our guide on hiring a builder contractor near me to understand general contractor oversight standards.
    2. Engineered Foundation Specs for Steel and Post-Frame Loads

    Barndominiums impose point loads vastly different from standard stick-built homes. Because clear-span steel buildings eliminate interior load-bearing walls, the entire structural weight transfers down through perimeter columns to isolated foundation points. Your builder must provide engineered foundation plans that account for:

    • Concrete slab thickness appropriate for both residential living and heavy shop equipment.
    • Deep, reinforced concrete piers beneath primary structural columns to counter uplift forces from high winds.
    • Thickened perimeter footings designed to carry continuous dead loads from steel siding and roof trusses.
    • Precise anchor bolt placement set before the concrete pour, matching manufacturer tolerances down to the fraction of an inch.

    3. In-House Permitting and Municipal Zoning Experience

    Local jurisdictions vary wildly in how they regulate metal-framed dwellings. Some rural county zones require minimal building oversight, while incorporated cities enforce strict residential energy codes and architectural guidelines. Ask candidates about their specific track record handling residential permits in your target municipality. A qualified general contractor prepares site plans, submits engineered drawings for plan review, coordinates required third-party inspections, and resolves local zoning inquiries without halting jobsite progress.

    4. Thermal Envelope and Spray Foam Insulation Standards

    Metal framing conducts exterior temperatures rapidly, making thermal bridging a severe hazard for barndominium owners. Traditional fiberglass batt insulation often sags against metal wall panels, allowing warm, humid interior air to strike cold exterior steel. This creates condensation, interior moisture issues, and long-term rot within wall cavities. Experienced builders use closed-cell or open-cell spray foam applied directly to the metal roof deck and exterior siding panels. This creates an airtight vapor barrier, seals thermal leaks, and stiffens the sheet metal against vibration.

    5. Integrated MEP (Mechanical, Electrical, Plumbing) Rough-In Planning

    Because a barndominium slab serves as the finished floor or structural subfloor, every under-slab utility trench must be positioned perfectly before the pour. Moving a plumbing stack or electrical conduit after hundreds of square feet of concrete cures requires costly saw-cutting and structural patching. Your builder must cross-reference your architectural layout with mechanical, electrical, and plumbing schematics early in pre-construction. You can read more about spatial coordination in our guide on how to choose and design functional floor plans.

    6. Milestone-Based Draw Schedules Tied to Inspections

    Never sign a contract requiring large upfront deposits disconnected from completed work. Professional custom home builders use draw schedules structured around verified milestones:

    1. Completion of site work, pad preparation, and plumbing undergrounds.
    2. Foundation pour and post-pour inspection sign-off.
    3. Structural steel erection, siding, and roofing installation.
    4. Interior wall framing and rough-in trade installations.
    5. Drywall, interior finishes, and final municipal inspection.

    Tying payments directly to passed municipal or third-party engineering inspections ensures your financial outlay mirrors tangible progress on your site.

    7. Verified Regional Track Record and Active Jobsite Access

    Request addresses of active and recently completed builds within your region. Walk an active jobsite to assess cleanliness, material storage, and trade supervision. Ask previous clients about how the builder handled schedule disruptions, supply chain delays, and change orders. A builder with deep local roots maintains steady relationships with regional subcontractors, ensuring trades arrive as scheduled rather than disappearing for weeks between construction phases.

    Turnkey General Contractor vs. Metal Building Kit: What Is the Difference?

    Many property owners consider purchasing a prefabricated metal building kit directly from an online manufacturer, assuming it saves money. However, an unerected kit is simply raw building material sitting on flatbed trailers.

    Project Responsibility Prefabricated Metal Building Kit Turnkey General Contractor
    Architectural & Foundation Engineering Standard shell drawings only; foundation left to buyer Stamped, site-specific foundation and residential plans
    Site Prep & Concrete Pour Homeowner secures separate dirt and concrete crews Fully managed grading, soil compaction, and slab pour
    Structural Shell Erection Buyer hires independent erector or self-builds Builder crew erects frame, panels, trim, and flashing
    Interior Framing & Finishes Not included Custom interior layout, drywall, cabinetry, and flooring
    Plumbing, HVAC, Electrical Homeowner finds and coordinates individual trades Fully integrated trade scheduling and code compliance
    Structural & Water Intrusion Liability Split between manufacturer, erector, and foundation crew Single point of accountability under general warranty

    Ordering a kit places full operational liability on your shoulders. If an anchor bolt cast by your concrete contractor misaligns with the pre-punched base plate of a steel column, the steel erector will stop work and bill standby charges. When you work with a turnkey builder, a single company bears responsibility for tolerances, structural alignment, and weatherproofing from start to finish. For more details on the state-specific nuances of these builds, read our breakdown of building a barndominium in Texas.

    Essential Site Prep and Foundation Requirements Before Framing

    A barndominium is only as reliable as the dirt beneath it. Site work begins with soil testing to identify expansive clay, high water tables, or loose aggregate. In areas with high clay content, soil swells during heavy rains and shrinks during dry spells, exerting extreme pressure on concrete slabs.

    The builder must excavate native topsoil down to stable ground, import select structural fill dirt, and compact the pad in lifts using heavy compaction equipment. Pad elevation must sit high enough above surrounding natural grade to direct rainwater away from the perimeter walls.

    Once the building pad passes soil compaction testing, trenching crews dig under-slab utility runs. Main sewer lines, water supply pipes, electrical entrance feeds, and floor drain systems must drop into place before slab forming.

    Ground Level
      │
      ├── Finished Concrete Slab (Engineered Thickness)
      ├── Vapor Barrier (Heavy Mil Sheeting)
      ├── Compacted Sand or Crushed Base
      └── Deep Drilled Concrete Piers (Under Structural Columns)

    Perimeter forms, post footings, and moisture barriers follow. Installers place heavy-gauge poly sheeting beneath the entire slab footprint to block ground moisture from rising through porous concrete into your living areas. Once steel reinforcement rebar grids and column anchor cages pass pre-pour inspections, concrete trucks pour the slab monolithically to ensure structural continuity.

    Zoning, Deed Restrictions, and Building Code Hurdles for Barndominiums

    Navigating local regulations requires understanding the legal distinctions between municipal codes, county rules, and private deed restrictions:

    • Incorporated City Limits: Cities typically enforce residential versions of the International Building Code (IBC) and International Residential Code (IRC). They often require minimum roof pitches, maximum exterior wall heights, and architectural exterior finishes. Some city councils ban exposed exterior metal fasteners or mandate a percentage of brick, masonry, or stone veneer along street-facing elevations.
    • Unincorporated County Land: County regulations generally focus on septic tank placement, floodplain management, and driveway culvert permits rather than architectural cosmetics. However, county fire marshals may still review commercial-residential hybrid layouts for life-safety measures, egress window sizing, and smoke ventilation.
    • Deed Restrictions and HOAs: Buying acreage in a rural subdivision does not automatically clear the way for a steel home. Many rural subdivisions carry restrictive covenants drafted to preserve traditional stick-framed aesthetics. These documents may explicitly ban post-frame structures, specify minimum square footage requirements, or restrict detached shops and outbuildings.
    • Easements and Utility Setbacks: Steel clear-span homes require wide clearances for crane access during erection. Overhead power lines, underground pipeline easements, and property setbacks dictate precisely where a large structural shell can sit on your land.

    Review our available services to see how structural planning integrates with site conditions, or explore our past builds across our gallery.

    Why Work with PRO Construction for Your Custom Build

    PRO Construction provides Accessory Dwelling Units (ADU), Garage Conversions, Garage Builds for Homeowners in Keller, TX and surrounding communities seeking additional living space, rental income, or guest accommodations.

    With over 25 years of local construction experience serving Keller and surrounding North Texas communities, our team understands the structural demands, soil dynamics, and municipal standards unique to our region. Ranked in the top 1% of Texas contractors with a BuildZoom score of 137, we eliminate the stress of coordinating fragmented trade crews.

    Our end-to-end management spans architectural planning, engineered foundation work, structural framing, utility installations, and final municipal inspections. Learn more about our background, explore flexible financing solutions for your ground-up construction, check our service footprint across areas we serve, or contact our team today to start designing your custom project.

    Frequently Asked Questions

    Can I build a barndominium inside city limits?

    Building within incorporated city limits depends on local zoning classifications, municipal architectural guidelines, and neighborhood deed restrictions. Many cities allow steel-framed residential structures provided they satisfy specific residential building codes, meet minimum roof pitch standards, and incorporate required amounts of exterior masonry or traditional siding along the front facade.

    Do banks finance barndominium builds the same as traditional homes?

    Banks finance barndominium projects using construction-to-permanent loans, but appraisal hurdles can arise if your area lacks comparable sales of metal-framed homes. Working with a licensed turnkey general contractor who provides fully engineered plans, detailed cost breakdowns, and transparent draw schedules significantly speeds up lender underwriting and approval.

    How does barndominium construction time compare to standard home builds?

    Erecting the primary structural steel shell and exterior metal siding takes significantly less time than framing a traditional stick-built home. However, once the exterior structure is weather-tight, interior processes—including plumbing rough-ins, electrical wiring, spray foam insulation, drywall hanging, and trim carpentry—follow the standard timeline of custom residential construction.

  • Bathroom Renovations Near Me: Local Remodel Guide

    Bathroom Renovations Near Me: Local Remodel Guide

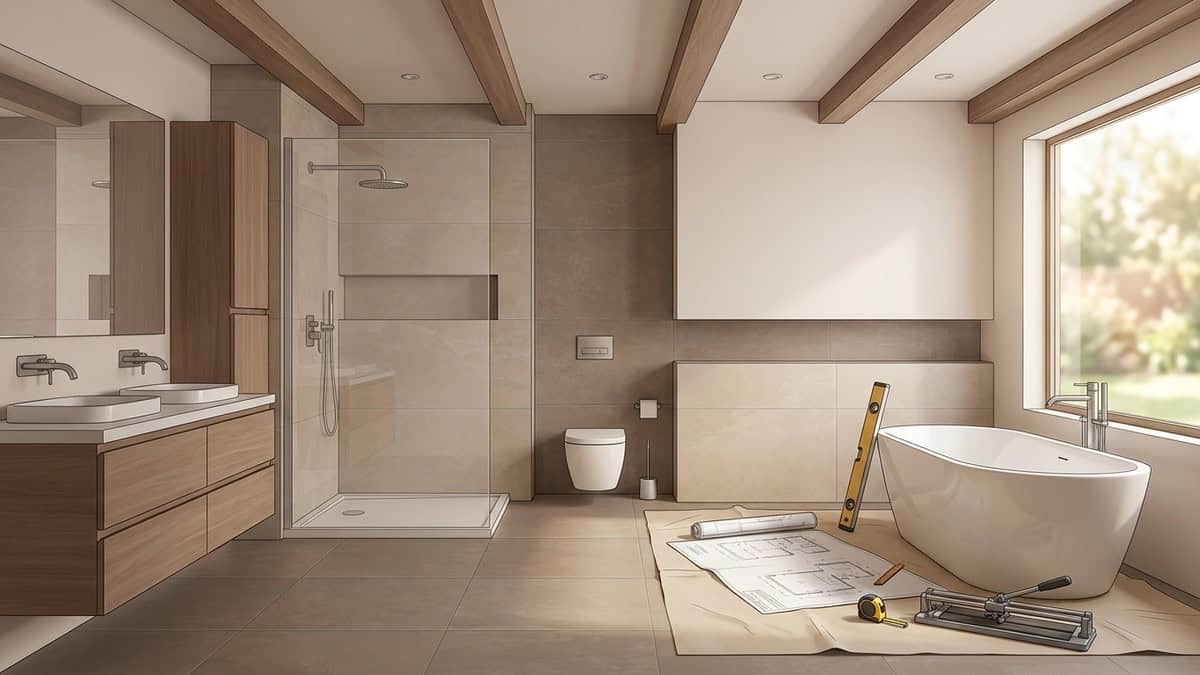
    Planning bathroom renovations near me requires balancing municipal building codes, foundation structural limits, and wet-area waterproofing long before selecting tile or plumbing fixtures. A successful remodel demands a clear scope that accounts for underground drain lines on concrete slab foundations or joist deflection on framed subfloors. Evaluating these technical parameters early ensures the space remains structurally sound, code-compliant, and watertight through decades of daily use.

    Bathroom Renovations Near Me: Local Remodel Guide

    How to Plan Bathroom Renovations Near Me

    Every bathroom renovation begins with understanding what lies behind the drywall and underneath the flooring. In North Texas and surrounding areas, homes are frequently built on slab-on-grade concrete foundations or pier-and-beam crawlspaces. Each structural type dictates how easily a contractor can alter plumbing supply lines, waste stacks, and vent pipes.

    When you research local bathroom renovations, the first design fork is deciding whether to work within the existing footprint or reconfigure the floor plan. Keeping existing fixture locations reduces labor time, avoids concrete slab trenching, and simplifies trade permitting. Conversely, relocating a toilet or expanding a primary shower requires cutting through concrete or sistering floor joists, expanding both project complexity and construction timelines.

    To balance aesthetics against structural demands, build your remodel plan around these essential phases:

    1. Structural assessment: Verify whether any partition walls targeted for demolition carry roof or upper-floor loads.
    2. Plumbing and drain mapping: Locate main soil stacks, secondary vent branches, and incoming water supply lines.
    3. Moisture barrier evaluation: Determine how existing wet walls were constructed and whether past moisture penetrated subflooring.
    4. Mechanical ventilation pathing: Plan a dedicated exterior exhaust run rather than terminating ductwork inside an attic space.
    5. Electrical load calculation: Confirm the home electrical panel can accommodate dedicated circuits for high-draw fixtures.

    Careful sequencing prevents costly backtracking. For homeowners evaluating structural adjustments, our guide on planning a bathroom remodel explains how to align architectural design with real-world trade scheduling.

    Assessing Existing Plumbing and Slab Conditions

    On a monolithic concrete slab, moving a drain line even a few inches requires saw-cutting the slab, jackhammering concrete, excavating base soil, and reconnecting into the main sanitary line. If the slab is post-tensioned, cutting into the foundation carries extreme structural risk. Post-tension cables must be mapped with ground-penetrating radar before any concrete demolition begins.

    For homes with pier-and-beam framing, access underneath the subfloor offers more flexibility for moving waste lines. However, joist spacing and structural integrity must be checked. Older properties frequently conceal decades of minor leaks around wax rings and tub overflow gaskets, which softens wood framing and requires replacing rotted rim joists or subfloor decking before setting new tile.

    Defining Scope: Cosmetic Refresh vs. Structural Reconfiguration

    Clarifying project scope protects your timeline from ballooning out of control. A cosmetic refresh focuses on surface elements: replacing an outdated vanity, swapping plumbing trims, updating vanity mirrors, and painting drywall. These projects rarely require opening walls or altering underlying infrastructure.

    A structural reconfiguration involves tearing down walls to merge a cramped water closet into the main room, building an expanded walk-in shower, or shifting plumbing rough-ins. This tier requires pulling trade permits, bringing electrical configurations up to current code standards, and rebuilding wall framing. Choosing the right scope means recognizing whether your primary frustration is aesthetic wear or a fundamentally dysfunctional floor plan.

    Project Factor Cosmetic Refresh Full Structural Reconfiguration
    Plumbing Changes Fixture trim and direct faucet swaps Relocated drain lines, new waste arms, modified vent stacks
    Electrical Upgrades Direct light fixture and outlet swaps Dedicated branch circuits, rewired wet-location lighting
    Wall Framing Unaltered drywall and existing partitions Framing demolition, load-bearing headers, pocket doors
    Permit Requirements Rarely required for basic surface swaps Mandated by municipal building departments
    Primary Substrate Existing drywall and subfloors retained Cementitious backer boards, uncoupling mats, new subfloors

    What Permits and Local Building Codes Apply to Bathroom Remodels?

    Local municipal building departments exist to ensure residential construction meets safety, fire, and structural standards. When planning bathroom renovations near me in Keller, Fort Worth, or neighboring North Texas municipalities, trade permits are mandatory whenever supply plumbing, drainage lines, structural framing, or electrical branch circuits are altered.

    Municipalities enforce local variations of the International Residential Code (IRC) and National Electrical Code (NEC). Skipping permits might seem like a time-saver, but unpermitted work can complicate future property sales, invalidate homeowner insurance claims in the event of water damage, and lead to stop-work orders from city inspectors.

    Waterproofing and Pan Liner Inspection Milestones

    City building inspectors typically inspect a bathroom project at two primary phases: the rough-in stage and the final stage. The rough-in inspection occurs while wall cavities are exposed, before insulation, backer board, or drywall are installed.

    During the rough plumbing inspection, inspectors check:

    • Shower pan water-tightness: The shower receptor must be plugged at the drain and filled with standing water up to the threshold for a set inspection window to prove the pan liner does not leak.
    • Slope to drain: The shower sub-pan must provide continuous pitch toward the weep holes of the clamping-ring drain without low spots that pool water.
    • Pipe sizing and venting: Waste arms must maintain appropriate grade, and vents must tie into the main soil vent stack without back-pitching.

    Closing up a wall before an inspector signs off on the shower pan liner or plumbing rough-in can force a contractor to demolish newly hung tile to expose the connections, causing severe delays and unnecessary costs.

    Electrical Code Requirements for Wet Locations

    Bathrooms introduce moisture into close proximity with electrical circuits, making strict adherence to the NEC non-negotiable. Modern building codes require that all bathroom receptacle outlets be protected by Ground-Fault Circuit-Interrupters (GFCI).

    Standard practice requires a dedicated branch circuit serving only bathroom receptacles, preventing circuit overloads when high-draw heating appliances like blow dryers or curling irons operate simultaneously. Light fixtures installed directly above bathtubs or within shower zones must be specifically listed and labeled for wet locations. If a fixture is subject to shower spray, surface-mounted hanging pendants or non-rated recessed trims will fail inspection immediately.


    Managing Structural Framing and Wet-Area Waterproofing

    Tile and grout are not waterproof. Grout absorbs moisture, and hairline cracks in cementitious grout lines are normal as buildings expand and contract. The longevity of any bathroom renovation relies entirely on the hidden waterproofing assembly installed behind the finish surfaces.

    When walls are stripped down to the studs during demolition, contractors frequently uncover hidden water damage, rusted drywall screws, or mildewed framing from failing tub surrounds. Any rotted studs must be sistered or replaced with fresh framing lumber before beginning wall construction.

    [Finish Tile Layer]
             │
    [Modified Thin-Set Mortar]
             │
    [Bonded Waterproofing Membrane / Sheet System]
             │
    [Cement Backer Unit or High-Density Foam Board]
             │
    [Kiln-Dried Wall Studs & Structural Blocking]

    Subfloor Preparation for Large-Format Tile

    Large-format porcelain tiles demand rigid subfloor assemblies. As tile dimensions increase, the floor system’s tolerance for deflection decreases. If a floor joist system flexes under foot traffic, rigid stone or porcelain tile will pop loose, crack, or fracture along grout lines.

    Proper subfloor prep requires calculating joist span and spacing. Standard plywood subfloors must be evaluated for thickness, secured with structural screws to eliminate floor squeaks, and paired with an appropriate substrate:

    • Cementitious Backer Boards: Nailed or screwed into a wet bed of thin-set mortar to eliminate voids between the backer board and subfloor plywood.
    • Uncoupling Membranes: Polyethylene mats featuring geometric cutouts that neutralize shear stresses between the subfloor and the tile layer, preventing substrate movement from transferring into the stone surface.
    • Self-Leveling Underlayments: Poured over primed subfloors to correct dips, humps, or sloping floors before snapping layout chalk lines.

    Cutting corners on floor leveling leads to severe lippage, where one edge of a tile sits higher than its neighbor. Once mortar cures, lippage cannot be ground down on glazed tile and requires complete tear-out.

    Curbless Shower Transitions and Linear Drains

    Curbless walk-in showers deliver clean aesthetics and aging-in-place accessibility, but their execution requires precise structural carpentry. To create a shower entrance that sits flush with the dry bathroom floor, the shower receptor must slope downward toward the drain without stepping over a raised threshold.

    Achieving a flush transition requires one of two structural approaches:

    1. Recessing the Concrete Slab: In slab foundations, the shower area must be saw-cut and trenched down to permit a sloped pre-pan below the main floor elevation.
    2. Dropping Joist Elevations: In crawlspace framing, floor joists under the shower footprint are sistered, cut down, or rebuilt lower than the adjacent subfloor to accommodate the sloped mortar bed.

    Pairing a curbless transition with a linear drain allows for single-plane floor grading. Unlike traditional center drains that require a bowl-shaped four-way slope (restricting tile choices to small mosaics), a linear drain allows large-format floor tiles to run continuously across the sloped shower floor.


    How to Vet Local General Contractors for Bathroom Projects

    Hiring the right partner is the most critical decision in any remodeling project. Vetting general contractors requires moving beyond polished portfolio photos to evaluate trade licensing, insurance limits, permitting workflows, and verified project records.

    A reputable builder coordinates specialized trades—licensed master plumbers, master electricians, framing carpenters, and master tile setters—while managing city inspections and vendor supply chains. For broad advice on screening home professionals, consult our complete resource on hiring a builder contractor near me.

    PRO Construction provides Accessory Dwelling Units (ADU), Garage Conversions, Garage Builds for Homeowners in Keller, TX and surrounding communities seeking additional living space, rental income, or guest accommodations.

    Verifying Builder Qualifications and Track Records

    Before signing a construction agreement, verify that your builder maintains active general liability insurance and local contractor registrations across your specific city jurisdiction. Building departments maintain lists of registered contractors permitted to pull permits within municipal boundaries.

    Review third-party platforms such as BuildZoom to evaluate a contractor’s real permit history, verified license status, and historical project values. A consistent track record of pulled and completed municipal permits demonstrates that a builder operates transparently with code enforcement officials.

    Key screening questions to ask during an initial site consultation:

    • Site containment: How do you isolate construction dust from the rest of the living space? (Look for mentions of plastic zipper walls, negative-air HEPA scrubbers, and floor protection runners.)
    • Project oversight: Will an assigned site supervisor be on-site daily to manage trade subcontractors?
    • Trade licensing: Are plumbing and electrical rough-ins performed by licensed trade subcontractors holding master-level oversight?
    • Change management: What is the specific written protocol when concealed framing rot or broken cast-iron pipes are discovered behind walls?

    Contract Clarifications: Allowances vs. Fixed-Scope Bids

    Contract structures vary widely among builders. Understanding how material allowances work is critical to keeping project finances predictable.

    • Fixed-Scope Bids: The contractor specifies exact materials, fixture models, finishes, and labor costs upfront. The price does not change unless you alter the scope via a formal, written change order.
    • Allowance-Based Estimates: The contractor includes placeholder sums for variable items like plumbing trims, custom vanities, wall tile, and light fixtures. If your actual material selections exceed the stated allowance, you pay the difference out-of-pocket, along with any contracted builder markup.

    Review every allowance line item before executing a contract. If an allowance is set unrealistically low for basic porcelain tile or standard brass rough-in valves, the bid price is artificially deflated, creating budget surprises once design selections begin. For larger remodels involving room reconfigurations, our guide on how to choose and design functional floor plans provides valuable context for spatial allocation.


    Common Pitfalls During Local Bathroom Renovations

    Bathroom remodels involve more trades per square foot than almost any other home project. This concentration makes the workspace susceptible to scheduling conflicts, mechanical oversights, and finish failures if details are overlooked.

    Homeowners and inexperienced crews frequently stumble into predictable pitfalls:

    1. Ordering Specialty Plumbing Trims Too Late: Concealed rough-in valves must match the decorative exterior trim kit. If you purchase an imported or custom thermostatic valve with extended supply chain lead times, your plumbing rough-in stalls, preventing drywall installation and halting the entire project.
    2. Undersizing the Exhaust Ventilation Fan: A standard builder-grade exhaust fan often fails to move enough air to clear moisture generated by large walk-in showers. Exhaust fans must be sized based on room cubic volume, ducted through smooth rigid metal piping, and vented directly outdoors through a roof or soffit cap—never loose into an unconditioned attic space.
    3. Skipping the Shower Pan Flood Test: Rushing straight from pan liner installation to tile mortar without performing an extended water isolation test invites disaster. A minor puncture in a waterproof membrane or a compromised clamping drain seal will seep moisture into the subfloor, rotting structural wood long before water appears on a ceiling below.
    4. Neglecting Electrical Placement for Modern Fixtures: Modern vanities frequently incorporate illuminated anti-fog mirrors, internal drawer outlets, or bidet seats. Adding these features requires roughing in electrical junction boxes inside wall cavities before tile or cabinetry is installed.
    5. Ignoring Tile Substrate Deflection Standards: Setting natural stone or large porcelain panels over bouncing subfloors without uncoupling mats or structural blocking inevitably leads to cracked grout and sheared tiles.

    Frequently Asked Questions

    What is the 30% rule for renovations?

    The thirty percent rule is a planning guideline suggesting homeowners avoid spending more than roughly one-third of their home’s total property value on comprehensive renovations. In the context of single-room projects like bathrooms, it is commonly adapted to reserve approximately twenty to thirty percent of the targeted project budget as a dedicated structural and plumbing contingency fund. This cushion covers unavoidable concealed repairs—such as subfloor dry rot, corroded cast-iron pipes, or framing settling—discovered once demolition exposes the wall cavities.

    Do I need a building permit to remodel a bathroom?

    A building permit is typically required whenever a bathroom remodel involves structural framing changes, moving drainage pipes or water supply lines, or extending new electrical branch circuits. Direct cosmetic updates—such as replacing an existing vanity in the same position, changing a mirror, repainting, or swapping a light fixture onto an existing junction box—usually do not trigger municipal permit mandates. Always check with your local city building department, as trade requirements vary by jurisdiction.

    How long does a full bathroom tear-out and renovation typically take?

    A full bathroom tear-out and renovation generally requires several weeks of active construction, depending on project scale and material complexity. The process involves multiple sequential steps: selective demolition, mechanical rough-ins, municipal framing and plumbing inspections, mortar cure times, waterproofing flood tests, tile installation, cabinetry, and final plumbing and electrical trim-out. Specialty items like custom-tempered glass shower enclosures cannot be accurately measured until finish tile is fully set, often adding an extra fabrication window near the end of the project.

    Can existing plumbing remain in place during a complete bathroom remodel?

    Yes, keeping your existing drain, waste, and vent stack locations in place is one of the most effective ways to manage labor costs and reduce project duration. You can completely replace bathtubs, showers, vanities, and toilets with modern, high-performance fixtures while connecting directly into existing rough-in locations. This eliminates the need to cut into structural concrete slabs or alter framing joists, allowing you to invest more of your budget into premium finishes, waterproofing systems, and custom cabinetry.

  • Home Additions in Tarrant County: Creating More Space Without Leaving Home

    Home Additions in Tarrant County: Creating More Space Without Leaving Home

    What happens when your home still sits in the right neighborhood, near the right schools and the people you love, but no longer fits the way your family lives? And what if the biggest risk in adding space is not the finish selection, but an overlooked load-bearing wall, shifting North Texas soil, or a permit requirement discovered after construction begins?

    A well-planned home addition can give you the family room, bedroom, kitchen, attic conversion, or second story you need without forcing you to leave Keller, Southlake, Fort Worth, Colleyville, or North Richland Hills. The key is treating the project as a structural and logistical undertaking: not simply a larger remodeling job.

    At PRO Construction, A Boomer Group Inc. Company, we guide homeowners through design, engineering, permitting, material coordination, inspections, and contractor oversight. Bruce Laing brings more than 25 years of local North Texas experience to this work, helping protect your investment with honest, steady craftsmanship.

    Key Takeaways

    • Home additions require early attention to site feasibility, foundation conditions, structural integrity, setbacks, and utilities.
    • Permit requirements depend on whether your property is inside a city or in unincorporated Tarrant County.
    • A design-build process gives you one accountable team for planning, construction, communication, and inspections.
    • The right addition should look and feel like part of the original home: not an afterthought.
    • PRO Construction offers transparent planning and flexible financing options to help you evaluate your project responsibly.

    Which Type of Home Addition Is Right for Your Family?

    Every property has different limitations, and every family has different priorities. During the initial consultation, we look at how you want to use the space now and how that use may change over time.

    Family Room or Living Space Addition

    A family room addition can relieve pressure on an undersized living area while creating a better connection to the backyard. Thoughtful window placement, roofline integration, insulation, and HVAC planning help the new room feel comfortable through North Texas summers and winters.

    Bedroom or Primary Suite Addition

    A new bedroom wing can provide privacy for children, guests, or aging family members. A primary suite addition may also allow you to remain in a neighborhood you value while creating a more functional bedroom, bathroom, and closet arrangement.

    Kitchen Expansion

    Many homeowners in Tarrant County want a larger kitchen with improved circulation, expanded storage, or wider connections to the living and dining areas. These projects may involve removing load-bearing walls, relocating plumbing, upgrading electrical service, or installing engineered LVL beams or steel headers.

    Attic Conversion

    An attic conversion can be a practical way to create an office, bedroom, studio, or retreat without expanding the home’s footprint. Before design begins, we evaluate headroom, stair access, roof framing, insulation, egress, HVAC capacity, and structural loading.

    Second-Story Addition

    Building up can preserve a backyard, pool, or outdoor living area when lot coverage is limited. However, a second story requires a careful review of the existing foundation, framing, roof structure, stair location, and utility systems. Post-tension slabs and other foundation conditions must be identified before any cutting, drilling, or structural modification takes place.

    Three-car garage addition with Craftsman-style architecture by PRO Construction

    The PRO Construction Design-Build Process

    A successful addition is built through decisions made in the correct order. We manage the process step by step so you are not left coordinating multiple disconnected professionals.

    1. Consultation and Site Feasibility

    We begin by listening to your goals and reviewing the existing home. This includes evaluating the lot, access, drainage, easements, setbacks, utilities, rooflines, foundation type, and potential HOA requirements.

    For a second-story addition, we also consider whether the existing structure can support the proposed loads. For a ground-level addition, we evaluate soil conditions, foundation transitions, grading, and the connection between old and new construction.

    This early review helps identify challenges before they become expensive surprises.

    2. Design, Engineering, and Scope Development

    Once the project appears feasible, we coordinate the drawings and technical documentation needed to move forward. Depending on the addition, plans may include:

    • Site plans and surveys
    • Floor plans and exterior elevations
    • Foundation and framing details
    • Load-bearing wall modifications
    • HVAC, plumbing, and electrical layouts
    • Roofline and weatherproofing details
    • Energy-code and insulation information

    We also review materials and finish selections early enough to keep the design aligned with your priorities. Transparent planning is important here. A beautiful concept is only useful if it can be built safely, permitted properly, and maintained within a realistic budget.

    3. Permitting and Approvals

    Permit requirements vary across North Texas. The first question is jurisdiction: is the property inside the city limits of Fort Worth, Keller, Southlake, Colleyville, or North Richland Hills, or is it in unincorporated Tarrant County?

    Fort Worth’s published residential additions checklist and packet identifies items such as a site plan, floor plan, foundation information, wall bracing details, and applicable mechanical, electrical, and plumbing documentation. Larger additions or special foundation designs may require engineered plans.

    In Southlake, the city’s residential accessory and addition guidelines state that attached structures require permits. Keller, Colleyville, and North Richland Hills each have their own current application procedures and local amendments, which we verify before submission.

    Unincorporated Tarrant County follows a different process. The county generally does not issue residential building permits or certificates of occupancy, but construction must still meet applicable code requirements. The county’s development guidelines also describe required notifications and third-party inspections for qualifying residential construction.

    If your property is in Denton County, including areas near Flower Mound or Denton, the responsible city or county authority must likewise be confirmed before plans are finalized. We carry this administrative burden for you by identifying the proper jurisdiction, preparing submittals, and coordinating corrections.

    4. Material Coordination and Procurement

    Material delays can affect a project just as much as weather or inspections. We coordinate selections and ordering for framing materials, windows, doors, roofing, cabinets, flooring, paint, fixtures, and specialty finishes.

    Our local relationships with Builders FirstSource, ProSource, and Sherwin-Williams help us coordinate materials with the project schedule. We also recognize the value of trusted financial guidance, including our relationship with Gus Moreland at First United Bank. Flexible financing options may be available for qualified homeowners, allowing you to explore ways to manage the investment without relying on a one-size-fits-all approach.

    5. Construction, Oversight, and Inspections

    During construction, our team oversees the work of each trade and monitors the details that are easy to miss when contractors work independently. We coordinate excavation, foundation work, framing, roofing, windows, rough-ins, insulation, drywall, cabinetry, flooring, painting, and finish installation.

    Inspections occur at defined stages, often including foundation, framing, electrical, plumbing, mechanical, insulation, and final inspection. We schedule and prepare for them so required work is not concealed before approval.

    You should also expect consistent communication. We provide milestone updates, clarify decisions before they affect the schedule, and explain changes in plain language. A construction project should not require you to chase your own contractor for basic information.

    Modern farmhouse kitchen and living area completed by PRO Construction

    Local Experience That Helps Additions Feel Natural

    A home addition should respect the architecture and proportions of the original house. That may mean matching brick and mortar, replicating trim profiles, aligning window heights, or extending the roofline with careful attention to drainage and flashing.

    Our local work includes a workshop and patio project at 6612 Rhea Ridge Dr, a custom kitchen and slider improvement at 2502 Hillside Ct, and a garage and living-space project on Belaire Drive. Each project required a different response to the property, the homeowner’s goals, and the existing structure.

    That same practical approach applies whether you are planning a family room in North Richland Hills, a kitchen expansion in Colleyville, a second story in Southlake, or a bedroom addition in Keller or Fort Worth.

    Why Homeowners Choose PRO Construction

    Bruce Laing’s more than 25 years of North Texas experience provides perspective that cannot be replaced by a checklist alone. Local construction means understanding expansive clay soils, heat exposure, drainage patterns, established neighborhoods, municipal processes, and the expectations homeowners have for their properties.

    PRO Construction is also ranked in the top 1% on BuildZoom. More important than any ranking, however, is the way we work: clear communication, transparent pricing, careful oversight, and durable craftsmanship.

    We do not promise that every project will be simple. We do promise to explain the difficult parts, identify risks early, and stay accountable throughout the build.

    Frequently Asked Questions

    Do I need a permit for a home addition in Tarrant County?

    If your property is inside a city, additions and structural work generally require approval from that city’s building department. Unincorporated Tarrant County follows a separate notification and inspection process. We verify the requirements for your specific address before construction begins.

    Can I stay in my home during construction?

    Often, yes: particularly for an addition that does not remove your only kitchen or bathroom. However, major structural work, extensive utility shutdowns, or a second-story addition may make temporary relocation safer and more comfortable. We discuss these impacts during planning.

    How do you protect the existing home during construction?

    We use site protection, dust-control practices, weatherproofing measures, and planned tie-in work to reduce disruption. Structural connections, flashing, drainage, and utility transitions receive careful attention because the new space must protect the original home as well as expand it.

    How can I start planning?

    Begin with a conversation about your goals, property, and preferred timeline. You can contact PRO Construction or call 8173720211 to discuss your addition. We can help you determine whether building out, building up, or reworking existing space is the most responsible path.

    Let’s Talk About Your Home Addition

    More space does not have to mean leaving the community you call home. With thoughtful design, accurate permitting, coordinated materials, and disciplined contractor oversight, your existing property can continue to serve your family for many years.

    If you are considering a family room, bedroom, kitchen, attic conversion, or second-story addition in Tarrant County, let’s talk. PRO Construction, A Boomer Group Inc. Company, is ready to help you begin with a clear plan and honest guidance.

    Start a conversation with PRO Construction

  • How to Choose and Design Functional Floor Plans

    How to Choose and Design Functional Floor Plans

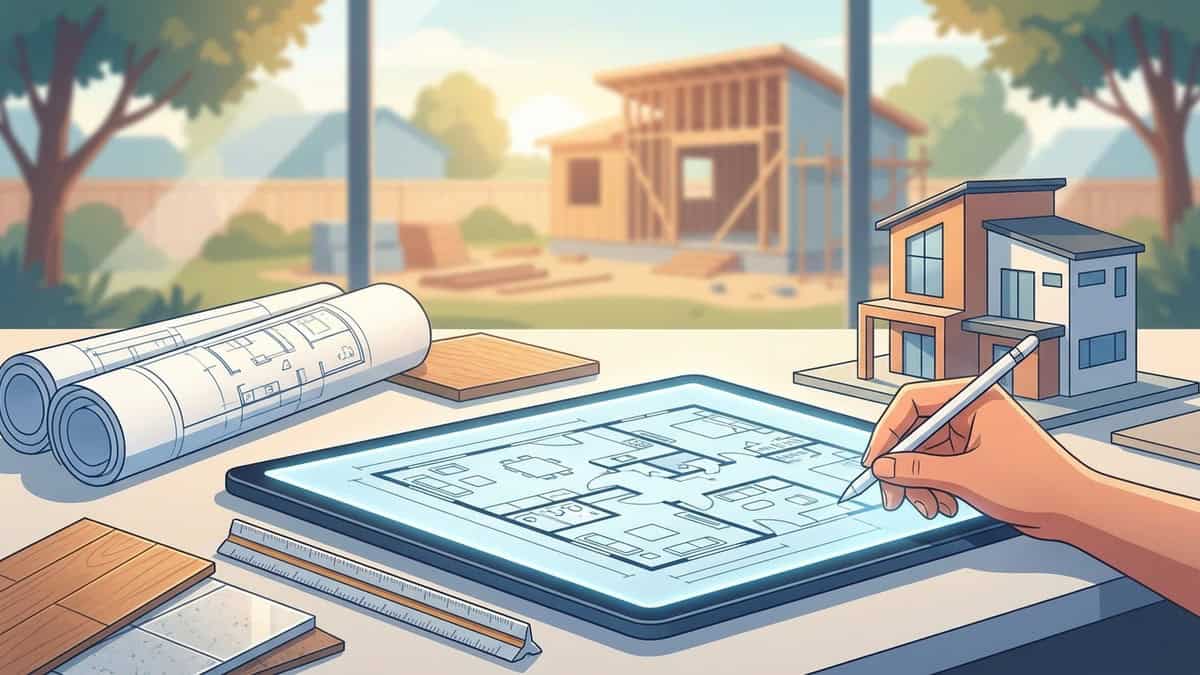
    A practical floor plan balances daily traffic patterns, structural efficiency, utility routing, and property zoning boundaries rather than just arranging rooms on paper. Choosing functional floor plans requires analyzing how people move through living areas, aligning wet walls to control mechanical costs, and ensuring structural spans work with your foundation and roofline. Prioritizing functional square footage over raw footprint size ensures the finished home or accessory structure remains comfortable and economical to build.

    How to Choose and Design Functional Floor Plans

    What Makes a Practical Floor Plan?

    A successful floor plan serves as an operational map of how a structure functions daily. In residential construction, the most effective layouts account for structural engineering, mechanical runs, natural light paths, and local zoning requirements long before framing begins. Evaluating blueprints requires looking closely at how daily routines translate into physical, buildable geometry.

    Many stock plans found online create significant obstacles during construction because they are drawn in a vacuum. Generic designs often ignore real-world property constraints such as setback lines, soil bearing capacities, utility easement access, and local municipality building codes. A layout that appears balanced on a screen can lead to expensive site modifications if the structural load paths or foundation footings do not match the specific building site.

    Understanding Traffic Flow and Dead Space

    Traffic flow refers to the clear walking pathways between doorways, furniture zones, and high-use fixtures. A well-designed layout establishes primary travel lanes that bypass working zones like kitchen prep triangles or quiet conversation areas.

    Excessive hallways and poorly placed entryways generate dead space—square footage that costs money to frame, finish, heat, and cool without offering usable living area. Functional planning requires specific spatial choices:

    • Hallways should remain short and centrally located to allocate maximum square footage to primary living zones.
    • Door swings must be mapped so they never collide with closet doors, cabinetry, or walking paths.
    • Sightlines should be intentional; front entryways should direct views toward primary living areas or outdoor vistas rather than directly into powder rooms or private bedrooms.

    Aligning Plumbing and Electrical Infrastructure Early

    Plumbing efficiency depends heavily on vertical and horizontal alignment. Grouping wet areas—such as kitchens, laundry rooms, and bathrooms—along shared walls (known as wet walls) or stacking them directly above one another in multi-story structures significantly reduces the labor and material costs of supply lines, drain-waste-vent (DWV) stacks, and cleanouts.

    Early MEP (mechanical, electrical, and plumbing) planning prevents awkward structural compromises later in the construction process. When plumbing drops and large HVAC return ducts are integrated into the initial layout, builders avoid dropping ceiling soffits through open living areas or notching structural floor joists in ways that compromise their integrity. For detailed insights on coordinating layouts with mechanical runs, review our guide on house construction design.

    Comparing Common Floor Plan Layouts for Living Spaces

    Different architectural layouts serve distinct family dynamics, lot shapes, and structural budgets. Selecting the right layout style early directly influences framing complexity, beam sizing, and total construction timelines.

    Layout Type Best Suited For Key Structural Advantage Primary Trade-Off
    Open Concept Entertaining, modern living, small footprints Minimizes interior partition walls; maximizes visual space Requires engineered headers or steel beams for wide spans
    Split-Bedroom Families, multi-generational living, privacy Uses central living space to buffer primary and secondary bedrooms Requires more distributed hallway and ductwork routing
    Compact Multi-Use ADUs, garage apartments, guest suites Maximizes dual-purpose rooms and consolidated utility runs Requires built-in storage solutions and smaller appliances

    Open Concept vs Traditional Partitioned Layouts

    Open concept designs eliminate non-load-bearing partition walls between the kitchen, dining, and main living areas. This arrangement makes modest square footage feel substantially larger and allows natural light from exterior windows to penetrate deep into the core of the home. However, creating large open spans without intermediate posts requires engineered lumber, such as laminated veneer lumber (LVL) or steel beams, to carry the ceiling and roof loads.

    Traditional partitioned layouts divide spaces into dedicated rooms with standard framed walls. While these layouts offer superior acoustic privacy, zoned thermal control, and designated wall space for furniture and art, they can make smaller homes feel compartmentalized. When altering an existing home to create an open layout, homeowners must evaluate structural supports carefully; see our detailed breakdown on removing load bearing walls to understand how weight is safely redistributed.

    Specialized Floor Plans for Detached ADUs and Garage Apartments

    Secondary structures demand a different design approach than primary residences. In accessory dwelling units (ADUs) and garage conversions, every square foot must serve a defined, practical purpose.

    Key strategies for compact secondary layouts include:

    1. Consolidated Core Utilities: Place the bathroom and kitchenette along a shared wall to simplify tie-ins to the existing property sewer and water lines.
    2. Pocket and Sliding Doors: Replace traditional swinging doors with pocket doors to reclaim floor clearance in tight bathrooms and laundry closets.
    3. Vertical Storage Integration: Utilize tall ceilings for lofted storage or mechanical platforms above closets to keep floor areas clear.

    PRO Construction provides Accessory Dwelling Units (ADU), Garage Conversions, Garage Builds for Homeowners in Keller, TX and surrounding communities seeking additional living space, rental income, or guest accommodations.

    When planning secondary spaces, you can evaluate property suitability through our guide on ADU guest houses versus home additions and explore ways to configure storage, workshops, and parking.

    How to Adapt Stock Floor Plans to Your Property

    Purchasing a stock blueprint is often the first step for property owners, but stock designs rarely work without customization. A stock plan must be adapted to fit your specific parcel, taking into account topography, sunlight exposure, and municipal boundaries.

    Before finalizing structural modifications, evaluate the following site conditions:

    • Setback and Easement Compliance: Measure from your actual property pins to verify that building corners, roof overhangs, and patio extensions fall within required front, rear, and side setback boundaries. For detailed land assessment techniques, review our guide on how to find and evaluate building lots.
    • Topography and Foundation Transitions: Stock plans assume flat ground. If your lot slopes, your foundation plan must be redrawn for step footings, stem walls, or a raised slab to handle surface water drainage safely.
    • Solar Orientation and Window Placement: Adjust window locations based on the compass orientation of your lot. Placing large windows along southern exposures provides balanced winter light, while western exposures in warm climates require shading or reduced glazing to manage solar heat gain.
    • Utility Tie-In Locations: Locate your main electrical service panel, water meter, and sewer lateral before finalizing room placement. Routing utilities across an entire foundation slab increases excavation and plumbing costs unnecessarily.

    If you are exploring alternative residential framing systems, our guide on building a barndominium in Texas covers how steel clear-span structures impact layout flexibility.

    Key Steps to Take a Floor Plan from Blueprint to Permitted Build

    Transforming a conceptual sketch into an active construction site requires a structured, multi-phase design and engineering process. Missing a single review step can lead to structural change orders or delayed municipal permits.

    Drafting the Initial Functional Layout

    The process begins with schematic design, where room sizes are established alongside realistic interior clearances. Draftspeople and designers block out furniture footprints, door clearances, and appliance rough-ins to verify real-world ergonomics.

    During this stage, designers verify that bedrooms include required emergency egress windows, staircases meet code-specified rise-and-run ratios, and bathrooms maintain minimum clearances in front of plumbing fixtures. If you are preparing for a broader project, our resource on building a custom home walks through early project planning.

    Managing City Plan Reviews and Permitting Requirements

    Once the architectural layout is locked, a licensed structural engineer must review and stamp the plans. The engineering package specifies:

    1. Foundation design based on local soil conditions (such as slab-on-grade, post-tensioned, or pier-and-beam).
    2. Framing schedules, including stud spacing, rafter sizes, and hold-down hardware for shear walls.
    3. Structural load paths that transfer roof and upper-floor weight safely down to the foundation.

    These engineering drawings, combined with MEP layouts and a dimensioned site plan, are submitted to the local building department and applicable HOA boards for review. Working with a cohesive team through design-build project management ensures that code comments from city plan examiners are resolved quickly without redrawing the entire blueprint.

    Costly Floor Plan Mistakes to Avoid Before Construction

    Correcting a design error on paper costs nothing, but correcting it after concrete is poured or framing lumber is nailed in place causes significant expense and delay. Avoid these critical layout mistakes during the planning phase:

    • Scattered Plumbing Stacks: Isolating bathrooms, the kitchen, and the laundry room in four separate corners of the structure creates long horizontal pipe runs. This increases the risk of drainage clogs, delays hot water delivery to fixtures, and drives up sub-slab plumbing labor.
    • Ignoring Door Swings and Walkway Clearances: Standard interior doors need clear swing paths that do not obstruct light switches, block entry into closets, or hit neighboring doors. Main hallways should maintain adequate width to accommodate moving furniture and allow comfortable two-way foot traffic.
    • Neglecting the Mechanical Footprint: Furnaces, heat pump air handlers, water heaters, and whole-home filtration systems require dedicated interior space. Forgetting to allocate space for a mechanical closet forces equipment into unconditioned attics or awkwardly consumes bedroom closet space.
    • Underestimating Bathroom Layout Spacing: Squeezing toilets too close to vanities or shower glass makes daily use frustrating. When updating or adding bathrooms, follow our practical steps for planning a bathroom remodel to maintain proper code spacing and functional ergonomics.

    Selecting the right layout requires balancing your property’s natural contours with structural engineering and functional circulation. When custom floor plans are designed with utility alignment, traffic efficiency, and code compliance in mind, the resulting build is more cost-effective to construct, easier to maintain, and comfortable for decades to come.

    Frequently Asked Questions

    What is the cheapest floor plan to build?

    A simple rectangular or square footprint with a standard gable roof is the most budget-friendly shape to construct. Every extra corner, jog in an exterior wall, or complex roof valley increases framing labor, foundation formwork, and exterior flashing requirements. Keeping the exterior perimeter straightforward allows maximum budget allocation toward interior finishes and high-efficiency mechanical systems.

    Is there a free program to draw floor plans?

    Several free or entry-level computer-aided design tools and online room planners allow homeowners to sketch basic layouts, test furniture arrangements, and visualize spatial flow. While these programs are helpful for initial brainstorming and communicating ideas to a builder, building departments require formal construction documents drafted to scale and stamped by a licensed structural engineer for permit issuance.

    How do floor plans differ between main homes and accessory dwelling units?

    Main home designs prioritize dedicated rooms, expansive entertaining zones, formal entryways, and generous storage spaces. ADU layouts focus on compact efficiency, utilizing multi-functional living areas, combined kitchen-dining zones, pocket doors, and vertically stacked utilities to maximize limited square footage.

  • Container Homes: A Builder’s Guide to Steel Construction

    Container Homes: A Builder’s Guide to Steel Construction

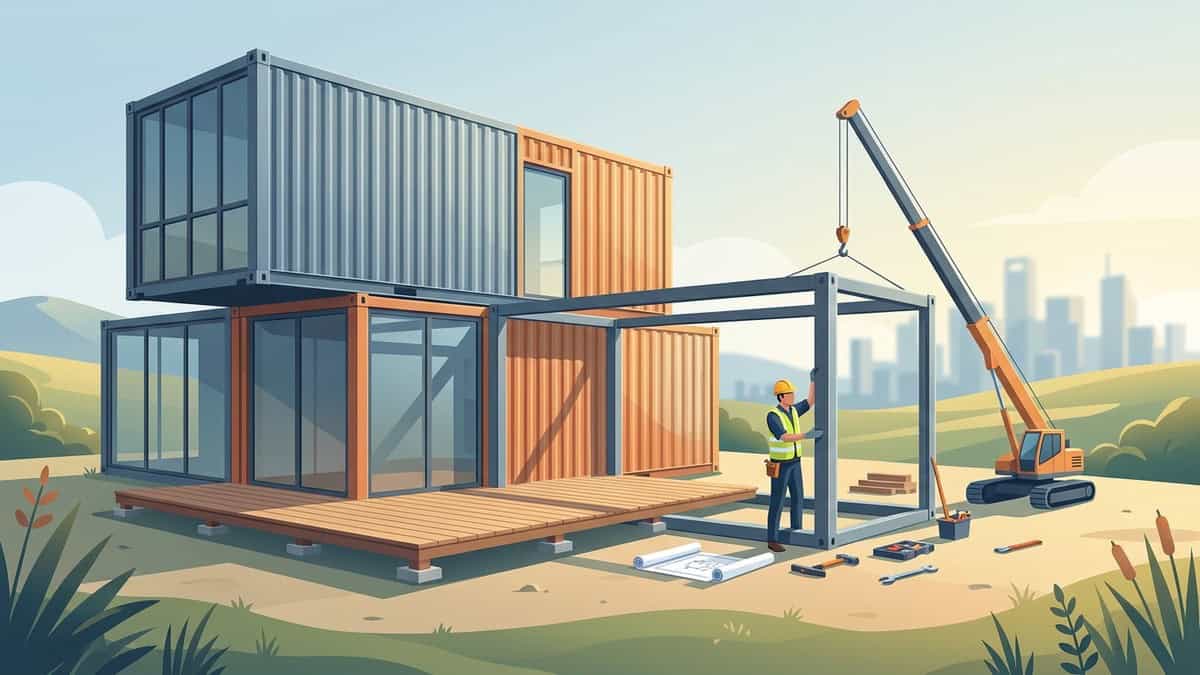
    Container homes are residential dwellings constructed from modified ISO shipping containers that serve as structural steel building modules. By combining high-strength Corten steel shells with custom interior framing, mechanical rough-ins, and performance insulation, these structures function as durable single-family residences, detached offices, or backyard suites. Successful builds require precise structural engineering, level foundation tie-ins, and continuous thermal breaks to transform industrial shipping boxes into code-compliant living spaces.

    Container Homes: A Builder's Guide to Steel Construction

    What Are Container Homes and How Are They Engineered?

    Repurposing shipping containers for residential living involves converting heavy-duty cargo boxes into habitable, code-compliant structures. Modern container architecture uses standardized intermodal units built from Corten steel—a weathering steel alloy formulated to develop a protective oxide layer that resists atmospheric corrosion.

    [Corner Post: Primary Load Bearing]
           ┌───────────────────────────────┐
           │   Corrugated Steel Roof       │
           │                               │
           │                               │
           │   Corrugated Side Panels      │
           │   (Monocoque Structural Web)  │
           │                               │
           │                               │
           └───────────────────────────────┘
    [Bottom Rail & Corner Castings: Anchoring Points]

    These units come primarily in two standard modular sizes:

    • 20-Foot Modules: Exterior dimensions measure 20 feet in length, 8 feet in width, and 8.5 feet in height (or 9.5 feet for high-cube models). They provide an efficient footprint for single-room guest suites, studio apartments, or backyard offices.
    • 40-Foot Modules: Measuring 40 feet in length with standard 8-foot widths and either 8.5-foot or 9.5-foot heights, these provide enough continuous area for one-bedroom or two-bedroom layouts. High-cube variants are preferred for residential conversions because the extra foot of vertical space leaves ample clearance for ceiling insulation, ductwork, and recessed lighting.

    The engineering behind container homes relies on monocoque construction. The corrugated side walls, roof panels, bottom cross-members, and corner posts work together as a rigid structural envelope. When multiple units are joined together or stacked, the primary vertical loads transfer down through the corner posts into the corner castings. Understanding how these components distribute weight is essential before drawing floor plans or initiating site work. You can explore how these modular envelopes fit into wider building strategies in our guide to house construction design.

    Reinforcing Corten Steel After Cutting Openings

    The moment you cut into a container to install picture windows, patio sliders, or interior passageways, you disrupt the structural web of the corrugated steel. Removing corrugated wall sheets reduces the container’s ability to resist shear and downward vertical loads.

    To maintain structural integrity, every rough opening requires an engineered steel frame:

    1. Steel Header Installation: Weld structural steel tubing, commonly hollow structural sections (HSS) or heavy channel iron, across the top horizontal cut of the opening to act as a structural lintel.
    2. Jamb Stiffeners: Weld vertical steel tubes from the top rail to the bottom side rail at both sides of the cutout. These vertical members replace the lost vertical load-bearing capacity of the corrugated panel.
    3. Sill Bracing: Tie the bottom of the opening into the container’s lower perimeter rail using welded rectangular tubing to prevent panel deflection.

    When joining two or more containers side-by-side to create a wide living room, full side walls are removed. In these designs, heavy structural steel columns and wide-flange beams must be welded between the remaining corner castings to carry the roof loads across the wide open span. For broader insights on removing structural wall elements safely, see our breakdown on removing load-bearing walls.

    Container Homes vs. Traditional Framing: Structural Pros and Cons

    Choosing between steel container construction and standard stick-built wood framing requires evaluating long-term durability against architectural flexibility.

    +------------------------+-----------------------------------+----------------------------------+
    | Feature                | Steel Container Construction       | Traditional Wood Stick Framing   |
    +------------------------+-----------------------------------+----------------------------------+
    | Shell Durability       | Resists pests, rot, and impact    | Vulnerable to termites and rot   |
    | Interior Width         | Fixed (roughly 7 to 7.5 ft clear) | Fully customizable framing bays  |
    | Off-Site Fabrication   | Fast modular fabrication timeline | Built on-site in sequential steps|
    | Condensation Control   | Requires closed-cell spray foam   | Managed via standard housewrap   |
    +------------------------+-----------------------------------+----------------------------------+

    Durability and Resistance

    Corten steel shells are built to endure harsh ocean environments, heavy stacking loads, and rough transit. When converted into a home, the steel envelope offers superior resistance to rot, subterranean termites, carpenter ants, and physical impacts compared to traditional softwood lumber. The non-combustible exterior shell also provides built-in resistance against embers and surface fire exposure.

    Spatial Dimensions and Interior Clearances

    The primary physical drawback of a single container module is its narrow exterior width of 8 feet. After framing interior walls, running electrical conduits, applying insulation, and hanging drywall, the finished interior width drops to roughly 7 feet to 7.5 feet. This narrow profile demands careful interior space planning for kitchens, bathrooms, and corridors. To achieve conventional room dimensions, builders combine two or more containers or incorporate traditional stick-built hybrid additions. For similar steel-framed structural concepts, review our guide to sea can homes.

    Thermal Bridging and Moisture Control

    Steel is an aggressive thermal conductor. Uninsulated container walls transfer outdoor heat and freezing temperatures straight into the interior, causing extreme temperature swings. More critically, warm, humid indoor air striking cold interior steel surfaces produces heavy condensation, which leads to hidden rust, mold behind drywall, and ruined finish materials.

    To stop thermal bridging and condensation:

    • Apply continuous closed-cell spray foam insulation directly to the interior steel surfaces at a sufficient thickness.
    • Closed-cell foam adheres directly to the corrugated profile, sealing off air gaps and preventing humid interior air from reaching the cold steel face.
    • Build interior wood or light-gauge steel framing inward from the insulated shell, creating a thermal break between the metal exterior and interior living surfaces.
    [Corten Steel Shell] -> [Closed-Cell Spray Foam Barrier] -> [Interior Stud Cavity] -> [Drywall]
                            ______________________________/
                              Stops Interior Air from 
                              Touching Cold Steel Skin

    Foundation Types and Site Preparation for Container Builds

    Even though shipping containers are inherently rigid, they cannot simply be set on bare dirt or gravel pads for permanent residential use. Soil movement, frost heave, and moisture accumulation will cause the container to shift over time. If a container shifts even slightly out of square, interior doors bind, window seals fail, and inter-unit connections can tear loose.

           [Container Corner Casting]
                       │
                       ▼
           [Embedded Steel Weld Plate]
           ┌────────────────────────┐
           │   Concrete Pier / Wall │
           │                        │
           │   Below Frost Line     │
           └────────────────────────┘

    Selecting the right foundation depends on soil bearing capacity, site topography, and the overall layout of the home:

    1. Concrete Pier Systems

    Concrete piers are the most efficient foundation system for single-unit and basic multi-unit builds. Drilled or poured piers are positioned directly beneath the four corner castings of each container, with intermediate piers placed beneath mid-span load points on 40-foot units. Piers lift the steel structure off the ground, promoting continuous airflow underneath to keep the undercarriage dry and free from corrosion.

    2. Strip Footings (Stem Walls)

    Strip foundations consist of a continuous concrete perimeter footing poured around the footprint of the container. This approach provides level, continuous support along the bottom side rails, making it well-suited for stepped foundation layouts on sloping hillsides or sites with uneven terrain.

    3. Continuous Concrete Slabs

    A monolithic slab foundation offers a level, reinforced base for complex, multi-container configurations. Slabs are ideal when you want ground-level entry without elevated exterior staircases, or when combining container modules with traditional slab-on-grade wood framing.

    Structural Anchoring Methods

    Once the foundation is cured and verified level, the container must be permanently tied to the concrete. This is accomplished using embedded steel weld plates cast directly into the top of each pier or footing.

    Once a crane sets the container in place, structural welders bond the container’s bottom corner castings directly to these embedded plates. In high-wind areas, heavy mechanical anchor bolts and specialized intermodal twist-locks are installed to provide absolute resistance against wind uplift and lateral shifting. You can review pre-construction planning fundamentals in our residential construction checklist.

    Permitting, Zoning, and Using Containers as ADUs

    Building with shipping containers requires navigating local municipal zoning codes and obtaining structural building permits. Most municipalities assess container structures under the International Residential Code (IRC) or International Building Code (IBC).

    Because containers are non-traditional structural systems, building departments require stamped architectural and structural engineering plans that prove the modified steel shell meets or exceeds local load requirements for:

    • Roof snow and live loads
    • Seismic resistance
    • High-wind shear and uplift forces
    • Minimum ceiling height and egress clearances

    Modified containers make practical Accessory Dwelling Units (ADUs), detached home offices, and rental suites. A single 20-foot or 40-foot container provides a clean, independent footprint that can sit inside backyard setback boundaries without overwhelming the main home. For homeowners evaluating detached living options, comparing structural approaches is a critical early step; see our analysis on ADU guest houses versus home additions.

    PRO Construction provides Accessory Dwelling Units (ADU), Garage Conversions, Garage Builds for Homeowners in Keller, TX and surrounding communities seeking additional living space, rental income, or guest accommodations..

                        ┌─────────────────────────┐
                        │   Primary Residence     │
                        └─────────────────────────┘
                                     │
                 ┌───────────────────┴───────────────────┐
                 ▼                                       ▼
        [Underground Power Trench]              [Direct Sewer / Water Tie-In]
                 │                                       │
                 └───────────────────┬───────────────────┘
                                     ▼
                        ┌─────────────────────────┐
                        │   Container ADU Suite   │
                        └─────────────────────────┘

    When planning a container ADU on your property, three utility factors require early engineering:

    • Electrical Service: Most container suites require a dedicated sub-panel fed from the main house service panel or a second meter base to power high-draw appliances like mini-split heat pumps, water heaters, and cooktops.
    • Plumbing and Waste Lines: Drainage slopes must be engineered to connect into the primary residential sewer lateral or private septic system. Because container floors sit over a steel chassis, plumbing runs are framed beneath the subfloor or run through interior utility raceways.
    • Zoning Setbacks and Easements: Every municipality enforces specific rear and side-yard setbacks, maximum lot coverage ratios, and rules governing detached living quarters. Verifying these limits before purchasing container modules prevents costly permitting denials. For additional modular building ideas, read our overview on modular homes explained.

    Common Construction Mistakes to Avoid in Container Projects

    Container construction introduces unique engineering challenges that differ from standard residential building. Avoiding common job-site mistakes ensures the project stays on schedule and structural integrity remains intact.

                       CRITICAL PLANNING CHECKLIST
     ┌──────────────────────────────────────────────────────────────┐
     │ [X] 1. Engineer Steel Headers for All Openings               │
     │ [X] 2. Verify Crane Reach and Overhead Utility Clearances    │
     │ [X] 3. Pre-Drill MEP Utility Chases Before Spray Foam        │
     └──────────────────────────────────────────────────────────────┘
    1. Removing Wall Panels Without Installing Engineered Headers: Many owner-builders cut out steel panels for windows or double doors without adding structural steel tube framing around the perimeter. Over time, the roof line sags above the cutout, pinching window frames, cracking glazing, and weakening the entire box. Always weld structural tube or channel headers around every opening before removing the cut panel.
    2. Ignoring Delivery Access and Crane Radius Constraints: A 40-foot container requires heavy transport trucks and a commercial crane to lift into backyard spaces. Low-hanging overhead power lines, mature tree canopies, narrow property access roads, and long boom reaches can make delivery impossible if not surveyed beforehand. Always conduct a professional site access check before ordering steel modules.
    3. Failing to Plan Utility Chases Before Applying Spray Foam: Drilling through heavy Corten steel or fishing wires through cured closed-cell spray foam after the fact is labor-intensive and damages the air barrier. Plan all mechanical, electrical, and plumbing (MEP) pathways in advance. Install conduit, plumbing vents, and electrical back-boxes before applying foam insulation so the thermal envelope remains unbroken. For larger framing considerations, explore our complete guide to custom home building.

    For those balancing various construction pathways and custom designs, working with an experienced team makes all the difference. Learn more about organizing complex structural builds with our guide to design-build project management.

    Frequently Asked Questions

    Can severe storms or high winds move a shipping container home?

    Unanchored, empty shipping containers can slide or overturn during extreme wind events. However, a fully finished container home anchored to an engineered concrete foundation using welded steel plates, heavy anchor bolts, or mechanical twist-locks will resist displacement from severe storms and high-wind shear.

    Is it cheaper to build a traditional house or a container home?

    While purchasing an empty shipping container shell costs less than rough wood framing, finishing a container home requires comparable investments in mechanical systems, electrical wiring, plumbing, insulation, drywall, and interior finishes. Savings are primarily realized in shortened construction timelines and off-site fabrication rather than major reductions in material costs.

    How long do container homes last compared to stick-built houses?

    Container homes built with Corten steel shells, sealed with exterior protective coatings, and insulated with closed-cell spray foam can last for decades. Protecting the metal skin from standing water, maintaining the foundation drainage system, and preventing interior condensation ensures the steel remains rust-free and structurally sound over a multi-decade lifespan comparable to conventional stick-built structures.

  • Affordable Tiny Homes: Practical Guide to Small Living

    Affordable Tiny Homes: Practical Guide to Small Living

    Planning affordable tiny homes requires balancing efficient space planning, durable site-built construction, and local building code compliance. True affordability comes from low long-term utility and maintenance expenses rather than just a low upfront shell price. For most property owners, constructing a permanent accessory dwelling unit (ADU) on a dedicated foundation offers the best balance of affordability, livability, and lasting equity.


    Affordable Tiny Homes: Practical Guide to Small Living

    What Defines Truly Affordable Tiny Homes?

    The phrase "tiny home" covers a wide spectrum of structures, ranging from movable travel trailers to permanent, fully engineered residential backyard dwellings. When evaluating affordability, you must distinguish between initial sticker price and the total lifecycle cost of the building. A low-cost structure that deteriorates quickly, lacks adequate insulation, or violates local municipal zoning codes becomes an expensive liability over time.

    Achieving true affordability means keeping per-square-foot construction and maintenance costs manageable while maintaining full habitability. This requires standard ceiling heights, residential-grade electrical service, proper thermal insulation, engineered drainage, and functional plumbing. When a structure meets these standards, it adds tangible equity to your property and provides dependable living space for family members or rental tenants.

    Feature / Consideration Permanent Foundation ADU Movable Tiny House (THOW)
    Legal Classification Permanent Accessory Dwelling Recreational Vehicle (RV) / Personal Property
    Foundation Type Concrete slab or engineered pier-and-beam Steel trailer chassis with axles and wheels
    Zoning & Permitting Permitted under local residential building codes Governed by RV parking rules and campground regulations
    Utility Connections Hardwired electrical sub-panel, tied sewer/water lines Temporary hookups (hoses, extension cords)
    Property Value Impact Adds direct appraised real estate value to the parcel Depreciates similarly to a vehicle over time
    Longevity Multi-decade lifespan matching standard home builds Requires ongoing chassis and weatherization upkeep

    Permanent Foundation ADUs vs. Movable Tiny Houses

    Movable tiny homes on wheels offer mobility, but they face strict zoning limitations in established suburban neighborhoods. Municipalities rarely allow full-time residency in wheeled structures parked in residential backyards. They classify them as recreational vehicles, which severely limits where you can legally park, connect utilities, and live year-round.

    In contrast, permanent accessory dwelling units anchor directly into the ground using monolithic concrete slabs or engineered pier-and-beam foundations. Constructing on a permanent foundation allows the build to conform to the International Residential Code (IRC). This compliance enables you to legally connect separate electrical meters, tie into the municipal sewer main, and insure the structure under a standard homeowner policy.

    The Hidden Trade-offs in Cheap Prefab Kits

    Internet retailers and catalog distributors frequently advertise flat-pack cabin kits and imported metal shells at seemingly attractive prices. These packages rarely include the components required to make a structure habitable. Most bare-bones kits supply only the exterior wood framing or thin metal wall panels, leaving out critical building elements:

    • Thermal Envelopes: Bare framing kits often lack insulation channels, proper moisture barriers, and continuous exterior sheathing, leading to severe condensation issues in humid climates.
    • Door and Window Flashing: Budget kits frequently include single-pane windows without proper nailing flanges or sill pans, causing hidden wall-cavity leaks during heavy rainfall.
    • Mechanical Accommodations: Prefabricated panels without pre-drilled chases make rough-in plumbing and electrical wiring labor-intensive to retrofit on site.
    • Structural Engineering: Many catalog kits lack stamped engineering seals required by city building departments to verify wind-load and roof-load compliance.

    Purchasing insulation, subflooring, weatherproofing membranes, structural fasteners, and interior finishes separately drives the real cost of a catalog kit close to the cost of a custom, site-built structure.


    Is It Cheaper to Buy a Prefab Shell or Build on Site?

    Homeowners exploring affordable tiny homes often weigh purchasing a prefabricated modular shell against hiring a general contractor for a custom stick-built project. While prefabricated units promise quick factory assembly, the logistical realities of delivery and utility integration frequently shift the financial balance in favor of traditional on-site construction.

    Before purchasing any modular unit, you must evaluate the entire scope of work, including site preparation, access routes, and structural assembly. Reviewing our modular homes explained overview can help you understand how factory-built components compare to traditional framing methods on residential properties.

    Where Prefab Pricing Models Fall Short

    Prefabricated structures require extensive site-specific labor before and after delivery. The advertised price of a modular unit covers only the factory manufacturing cost. Once the unit leaves the factory floor, several significant expenses arise:

    1. Crane and Transport Logistics: Delivering a completed modular box into a suburban backyard requires specialized freight trucks and heavy-duty cranes. If overhead utility lines, mature trees, or narrow side yards obstruct access, delivery costs escalate rapidly.
    2. Substructure Alignment: Prefabricated units require an uncompromisingly level foundation built to exacting tolerances. If a site-poured slab or pier layout is off by even an inch, the factory-built structure will not seat properly, requiring costly on-site structural modifications.
    3. Utility Stitching: Connecting water, sewer, and electrical lines to a pre-assembled module requires trades to work inside restricted access panels, which can increase labor time compared to roughing in utilities during open-frame construction.

    The Advantages of Custom Stick-Built Small Homes

    Custom site-built construction gives you complete control over materials, floor plan orientation, and phasing. Framing on site allows the crew to adapt the structure directly to the natural contours and drainage patterns of your yard, eliminating the need for expensive delivery equipment.

    Stick-built construction also lets you implement cost-saving design choices from the start. You can size the perimeter to match standard dimensional lumber lengths, align structural openings with off-the-shelf window sizes, and stage material purchases to match your project cash flow. Working through a clear design-build project management framework ensures every trade completes their work in logical sequence, preventing costly tear-outs.


    Core Expenses That Determine Your Real Tiny Home Budget

    Establishing an accurate budget for a small home or backyard ADU requires looking beyond basic framing materials. The total cost of construction splits across three distinct phases: substructure site work, rough-in mechanical infrastructure, and interior envelope finishing.

    Phase Core Construction Tasks Primary Cost Drivers
    Site Prep & Foundation Excavation, grading, soil compaction, formwork, rebar reinforcement, concrete pour Soil composition, property slope, tree root mitigation, setback accessibility
    MEP Rough-Ins Trenching sewer lines, water line supply, electrical conduit, panel upgrades, gas lines Distance from main home or utility meters, trench depth, soil rockiness
    Building Envelope Framing, roof trusses, vapor barriers, spray foam or batt insulation, siding, roofing Roof pitch complexity, insulation R-value specifications, window energy ratings
    Interior & Finishes Drywall, wet-area waterproofing, cabinetry, multi-split HVAC, fixtures, flooring Fixture density, custom built-in cabinetry, durable surface selections

    Foundation and Site Preparation Logistics

    Structural stability and longevity depend entirely on the foundation. In regions with expansive clay soils, improper ground preparation can cause structural settling, cracked drywall, and binding doors within months of completion.

    Clearing the site of organic topsoil, grading to direct surface water away from the structure, and compacting the base are necessary steps before pouring concrete. Depending on your lot’s soil report and topography, you will typically choose between two foundation methods:

    • Monolithic Concrete Slab: A continuous pour that forms the footing and floor slab simultaneously. Monolithic slabs provide a sturdy, pest-resistant base that sits low to the ground, minimizing the step-up height into the home. All under-slab plumbing drains must be positioned with precision before the pour.
    • Engineered Pier-and-Beam: Concrete piers drilled into stable subsoil support a treated timber or steel beam grid. This foundation type works well for sloped terrain or lots with significant tree roots. It also leaves a crawlspace that allows easy access to plumbing lines for future maintenance.

    Carefully assessing your parcel before starting work prevents unexpected engineering costs. For detailed steps on verifying lot conditions before construction, review our guide on how to evaluate building lots.

    Mechanical, Electrical, and Plumbing (MEP) Infrastructure

    Utility tie-ins represent a significant portion of the total budget when building a detached living unit. A fully functional living space requires independent supply and waste lines, climate control, and adequate electrical capacity to run modern appliances safely:

    1. Sewer Line Trenching: Waste lines require a continuous downward slope to function via gravity. If the ADU sits lower than the main sewer lateral or septic tank, you must install an exterior sewage ejector pump system.
    2. Electrical Sub-Panels: Most small homes require a dedicated sub-panel connected back to the primary household electrical panel. If your main service panel is already fully loaded, upgrading the primary service ensures it can support additional HVAC and appliance loads.
    3. Ductless Mini-Split Heat Pumps: High-efficiency mini-split systems are the standard choice for small homes. They eliminate bulky ductwork, provide zoned heating and cooling, and operate with low energy consumption.
    4. Hot Water Systems: Tankless electric or gas water heaters provide continuous hot water on demand while occupying minimal interior wall space.

    Understanding these structural components helps you plan realistic project timelines. For a comprehensive walkthrough of trade sequencing, consult the ultimate residential construction checklist.


    How Local Zoning and Permitting Impact Affordability

    Constructing without required permits might seem like a way to cut upfront costs, but unpermitted work carries severe long-term financial risks. Municipalities can issue stop-work orders, impose fines, and mandate the complete demolition of non-compliant structures. Unpermitted structures cannot be legally rented to tenants, do not add appraised value during property refinancing, and complicate future real estate sales.

    PRO Construction provides Accessory Dwelling Units (ADU), Garage Conversions, Garage Builds for Homeowners in Keller, TX and surrounding communities seeking additional living space, rental income, or guest accommodations..

    Setbacks and Property Easements

    Residential parcels are subject to municipal setback requirements and recorded property easements. Setbacks define the mandatory distance between the exterior walls of your tiny home and the property boundary lines:

    • Rear and Side Setbacks: Most suburban zoning districts require detached accessory structures to sit a specified distance from side and rear lot lines to protect privacy and maintain fire separation.
    • Utility and Drainage Easements: Public utility providers retain rights-of-way along property perimeters for power, water, or drainage infrastructure. Permanent foundations cannot sit over dedicated easements.
    • Lot Coverage Limits: Zoning ordinances establish maximum impermeable surface ratios for residential lots, capping the total square footage covered by your main house, driveway, patios, and detached small home combined.

    Why Permitted Construction Protects Long-Term Property Value

    Completing the formal permitting process ensures that your structure complies with health, life-safety, and fire-resistance standards. Each required municipal inspection acts as a quality-control milestone:

    • Plumbing Rough-In Inspection: Verifies that under-slab drain pipes maintain proper slope and pressure integrity before concrete is poured.
    • Framing and Sheathing Inspection: Confirms that load-bearing wall studs, headers, rafter ties, and structural fasteners meet regional wind-shear engineering specifications.
    • Electrical and Mechanical Inspection: Checks that wire gauges, circuit breaker sizing, ground fault protection, and ventilation pathways prevent fire hazards.
    • Final Inspection and Certificate of Occupancy: Provides the final official sign-off from the local building department granting legal permission for residential habitation.

    Securing a Certificate of Occupancy transforms an outbuilding into verified residential living area on property tax rolls, boosting the resale valuation of your property. Learn more about evaluating construction agreements in our guide to residential construction contracts.


    Practical Layout and Framing Strategies to Keep Costs Manageable

    Constructing an affordable tiny home does not require sacrificing durability or comfort. By applying smart architectural principles, standardizing framing dimensions, and choosing efficient layouts, you can reduce labor hours and material waste significantly.

    Reviewing structural fundamentals in our house construction design guide shows how structural simplicity directly lowers overall construction expenses.

    Efficient Layouts and Wet Wall Alignment

    Plumbing labor and materials represent a sizable share of interior build costs. You can reduce these expenses by consolidating all water supply and drainage fixtures along a single structural wall, known as a wet wall.

    Grouping the kitchen sink and laundry connections on one side of an interior partition wall while placing the bathroom vanity, toilet, and shower directly on the other side minimizes plumbing runs. This layout groups supply lines, vent stacks, and waste lines into a compact footprint, cutting pipe footage and labor time.

    Sticking to simple rectangular footprints also saves money. Adding complex roof hips, bump-outs, or angled architectural nooks multiplies framing labor, creates roof leak points, and increases drywall finishing costs without adding meaningful floor space. Sizing room dimensions around standard 4×8-foot sheet goods (drywall, plywood, and exterior sheathing) further minimizes off-cut waste and installation labor.

    Repurposing Existing Garages vs. Building Detached Units

    Converting an existing detached garage or outbuilding can yield substantial savings over breaking ground on a new detached structure. A garage conversion takes advantage of an existing concrete slab, exterior framing, and roof structure.

    Construction Element New Ground-Up Build Existing Garage Conversion
    Site Excavation & Grading Required across full building footprint Minimal; work focuses on existing perimeter
    Foundation Installation Requires new slab or pier-and-beam pour Uses existing slab (requires vapor sealing & leveling)
    Structural Framing Full framing for walls, ceiling, and roof rafters Retrofit existing framing; infill garage door opening
    Roofing & Trusses Complete new truss installation and shingles Uses existing roof structure (repair/resurface as needed)
    Project Timelines Extended timeline due to foundation cure times Shorter overall construction duration

    Adapting a garage requires specific retrofits to meet residential building codes, including installing thermal vapor barriers over the slab, framing in the overhead garage door opening with insulated walls, and adding dedicated HVAC systems. Homeowners evaluating this approach can explore the differences in our guide on ADU guest houses versus home additions or read about optimizing space in our article on how to maximize detached garages.

    Choosing the right partner for a conversion or a new build ensures the project stays on schedule and on budget. Follow our comprehensive guide on hiring a builder contractor near me to evaluate qualifications, licensing, and insurance before starting work.


    Frequently Asked Questions

    Is it cheaper to buy a tiny home or build a tiny home?

    Building on site is often more cost-effective when you factor in the total cost of ownership. While prefabricated shells seem cheap initially, transport logistics, heavy crane rentals, foundation alignment corrections, and utility tie-ins quickly add significant expenses. Building on site allows you to tailor the structure to your parcel’s natural grade, match standard material dimensions, and avoid specialized delivery fees.

    What is the cheapest tiny home you can buy?

    The lowest-priced options on the market are typically bare-bones wooden shell kits or converted metal shipping containers sold online. However, these budget options exclude essential components like foundations, wall insulation, plumbing rough-ins, electrical wiring, HVAC systems, and interior finishes. When fully finished to meet local residential building codes, their total cost often matches a custom stick-built ADU.

    Can you legally live in affordable tiny homes full-time?

    Legal full-time residency depends on municipal zoning codes and how the home is anchored. When constructed on a permanent foundation as a permitted accessory dwelling unit adhering to the International Residential Code, full-time living is permitted in cities that allow secondary residences. Movable tiny houses on wheels are generally classified as recreational vehicles and face strict municipal limits on permanent residential occupancy.

  • Hiring a Builder Contractor Near Me: Complete Guide

    Hiring a Builder Contractor Near Me: Complete Guide

    Finding a qualified builder contractor near me requires evaluating structural framing capability, municipal registration, and contract clarity rather than just comparing bottom-line estimates. While specialty trades manage isolated cosmetic tasks, licensed building contractors coordinate structural engineering, architectural plans, foundation pours, rough mechanicals, and city code inspections. Choosing the right local partner protects your property value and ensures ground-up structures or major additions stand up to local soil conditions and building codes.

    Hiring a Builder Contractor Near Me: Complete Guide

    What Is the Difference Between a Builder and a General Contractor?

    Homeowners planning structural work often use the terms "builder" and "general contractor" interchangeably, but their operational focus differs significantly on job sites.

    A custom builder typically specializes in ground-up structural construction. Builders maintain dedicated framing crews, manage heavy earthwork, oversee concrete slab pours, and erect primary building envelopes. They focus on load paths, structural integrity, and structural tie-ins to existing homes.

    A general contractor (GC) acts as a prime project manager. While some general contractors perform rough carpentry in-house, their primary role is managing the supply chain, trade schedules, vendor accounts, and specialty trade subcontractors (such as licensed master electricians, mechanical technicians, and master plumbers).

    A specialty trade contractor focuses strictly on a single trade, such as drywall finishing, tile installation, roofing, or painting. Specialty trades work under a builder or general contractor rather than coordinating whole-structure builds.

    Role Primary Focus Best Suited For Typical Management Scope
    Ground-Up Builder Structural framing, foundation pours, building envelopes Custom homes, structural additions, detached garages Direct carpentry crews, concrete sub-crews, heavy machinery
    General Contractor Project scheduling, trade coordination, inspections Whole-home remodels, complex additions, commercial build-outs All sub-trades, municipal permits, material procurement
    Specialty Trade Single construction discipline Surface updates, reroofing, panel swaps, tile setting Independent labor for a defined trade scope
    Design-Build Firm Single-source drafting, engineering, and construction Custom builds, accessory dwellings, structural expansions Architecture, engineering, permits, and full physical build

    If your project involves cutting into load-bearing exterior walls, pouring reinforced slab foundations, or altering roof trusses, you need a builder or structural GC rather than a surface remodeler. For ground-up structural planning, reviewing house construction design helps clarify how early architectural choices influence structural framing.

    Design-Build vs. Traditional Contracting Models

    Under the traditional contracting method (design-bid-build), you hire an independent architect or draftsman to create construction plans. Once completed, you distribute those blueprints to several contractors to collect bids.

    This model frequently creates friction:

    • Architects may draw aesthetic details that prove excessively expensive or structurally impractical to construct in the field.
    • Contractors point fingers at architectural drawings when structural clashes arise during rough framing.
    • Budget overruns happen after months of drafting because the designer never priced real-time lumber or concrete costs during the design phase.

    The design-build model unifies architectural drafting, structural engineering, and carpentry under a single management team. When you partner with a design-build team, your project estimator and construction superintendent review drawings alongside the designer before plans submit to the city. To understand how unified management streamlines site operations, review our breakdown of design-build project management.


    How to Vet a Local Builder Contractor Before Signing

    Hiring a contractor requires concrete verification of local legal compliance, active insurance coverage, and verified historical performance.

    Step 1: Check Municipal Registration & Insurance
    Step 2: Audit Historical Building Permits via Public Portals
    Step 3: Conduct Structured Reference Interviews

    Verifying Texas Municipal Registrations and Insurance

    In Texas, general contracting licenses are not issued at the state level; licensing occurs through individual municipalities. A reputable builder must hold an active contractor registration with the local building inspections department in every city where they operate.

    Before signing a construction agreement, demand certificates of insurance sent directly from the contractor’s insurance provider showing:

    1. General Liability Insurance: Protects your home and property against structural collapse, accidental water line breaks, or job site fires caused during construction.
    2. Workers’ Compensation Coverage: Protects you from financial liability if a framer, concrete worker, or laborer sustains an injury on your property.
    3. Builder’s Risk Insurance: Recommended for large-scale additions and ground-up builds to cover materials on-site against theft, vandalism, or severe weather damage prior to project handover.

    Auditing Past Build Quality and Local Permitting Records

    Never rely solely on curated photo galleries. Dig into objective public records and third-party contractor databases like BuildZoom, which aggregate pulled permits, code compliance history, and municipal violations.

    Ask the contractor for contact details of homeowners whose projects were completed within the past year. When speaking with references, ask targeted operational questions:

    • Did the superintendent maintain daily job site cleanup, including trash bins and sweeping up nails?
    • Did the contractor pull the building permit under their own company name, or did they ask you to pull an "owner-builder" permit?
    • How did the project manager handle structural surprises or unexpected framing adjustments behind existing walls?
    • Were trade crews consistently on-site, or did the property sit dormant for weeks between phases?

    Review our residential construction checklist for more steps to prepare your property before trades arrive.


    What to Look for in Detailed Construction Estimates and Contracts

    A vague estimate is the primary root cause of construction disputes, budget inflations, and project delays. An itemized proposal defines physical materials, dimensions, and labor stages clearly.

    Fixed-Price vs. Cost-Plus Contracts

    When reviewing proposals, determine which contract model the builder uses:

    • Fixed-Price (Lump Sum) Contracts: The contractor provides a set total price for the defined scope of work. The builder absorbs price fluctuations in raw materials, but changes to the layout or finishes require formal change orders. This structure provides price certainty for well-defined additions and detached buildings.
    • Cost-Plus Contracts: You pay the actual direct cost of materials, labor, and sub-trades, plus an agreed-upon builder fee (a percentage or flat management charge). While cost-plus provides complete transparency into receipts, it exposes the homeowner to cost overruns if structural framing or utility trenching takes longer than projected.

    To learn more about protecting your financial interests during major projects, see our guide on residential construction contracts.

    Spotting Red Flags in Vague Bids

    When you compare estimates from different contractors, watch for missing line items. A comprehensive structural scope must explicitly specify:

    [Site Preparation & Grading] -> [Engineered Foundation] -> [Framing & Sheathing] 
      -> [Rough Trades (MEP)] -> [Insulation & Drywall] -> [Finish Fixtures & Trim]

    Watch out for these critical red flags:

    • Missing Foundation Specifications: The bid says "concrete slab" without specifying engineer-designed post-tensioned cables, rebar sizing, vapor barriers, or concrete PSI strength ratings.
    • Low Finish Allowances: Contractors sometimes keep bids artificially low by including tiny allowances for flooring, cabinetry, or plumbing fixtures that cannot cover quality materials. When you select standard fixtures later, the builder charges the difference as a change order.
    • Unclear Demo and Site Prep Clauses: Ensure the contract clearly outlines dirt haul-off, tree protection, utility locates, and final grade leveling rather than listing site work as an open-ended homeowner responsibility.

    Key Project Scopes Handled by Residential Building Contractors

    Residential building contractors manage projects requiring architectural plans, structural engineering, and heavy framing.

    PRO Construction provides Accessory Dwelling Units (ADU), Garage Conversions, Garage Builds for Homeowners in Keller, TX and surrounding communities seeking additional living space, rental income, or guest accommodations.

           Residential Construction Scopes
                          |
        +-----------------+-----------------+
        |                                   |
    Detached Structures              Attached Additions
      - Accessory Dwelling Units       - Primary Suite Additions
      - Detached Garages               - Multi-Room Expansions
      - Workshops & Studios            - Second-Story Additions

    Accessory Dwelling Units and Detached Suites

    Constructing an accessory dwelling unit (ADU) is essentially building a complete, compact custom home in a backyard. Building an ADU involves:

    • Civil Site Planning: Determining setbacks, maximum lot coverage ratios, and rear-yard easements.
    • Utility Trenching: Running separate or sub-metered electrical feeds, underground sewer lateral lines, and dedicated water supplies from main house tie-ins.
    • Independent Foundations: Engineering slab-on-grade or pier-and-beam foundations built specifically for living quarters rather than basic storage slabs.

    If you are evaluating whether an ADU or a home addition matches your property goals, explore our breakdown of building an ADU in North Texas or compare options in our guide on ADU guest houses versus home additions.

    Attached and Detached Garage Builds

    Garage builds require specialized structural expertise, particularly when integrating heavy vehicle bays or upper-level living quarters:

    • Detached Garages: Require thick slab perimeters to support vehicle loads, engineered roof truss packages, and dedicated sub-panels for workshops or electric vehicle chargers. Learn more about maximizing these layouts in our guide to custom detached garages.
    • Attached Garage Conversions: Involve leveling existing sloped garage slabs, insulating unconditioned exterior walls, tying into central HVAC ducting, and matching exterior brick or siding to the primary residence.
    • Structural Home Additions: Ground-floor expansions and second-story build-outs demand structural load calculations, roofline cut-ins, and foundation tie-ins using drilled rebar dowels. Review the financial returns of major footprint changes in our DFW home addition ROI guide.

    Critical Mistakes Homeowners Make When Hiring a Construction Contractor

    Avoiding common hiring pitfalls prevents project stalls, lien disputes, and structural code violations.

    1. Paying Substantial Upfront Deposits Without Milestones

    Never provide large cash sums upfront before materials arrive or permits clear. Professional contracts use a milestone payment schedule tied directly to verifiable production stages and passed municipal inspections.

    1. Permitting Work Under an "Owner-Builder" Designation

    If a builder asks you to pull the city permit under your own name, walk away. When an owner pulls the permit, the municipality treats the homeowner as the general contractor. This relieves the builder of legal liability for code violations, structural defects, and site safety compliance.

    1. Authorizing Scope Revisions Verbally

    Changes happen on construction sites when walls are opened or layouts shift. Never agree to adjustments through casual conversations on the driveway. Every change must be documented in a written change order stating the exact scope alteration, material spec, timeline impact, and associated cost before work starts.

    1. Skipping Lien Waivers

    Even if you pay your general contractor on time, an unpaid lumber yard or concrete subcontractor can place a mechanic’s lien on your home. Require partial conditional lien waivers with every milestone draw, followed by an unconditional final lien waiver upon final project payment.


    Frequently Asked Questions

    What should you not say to a contractor during the initial estimate?

    Do not reveal your absolute maximum emergency budget during the preliminary consultation. If you disclose your top contingency figure upfront, proposals often expand to absorb that reserve rather than reflecting actual labor and materials. Focus your discussions on specific project scopes, material finishes, and desired layouts, while reserving ten to twenty percent of your overall financing for unforeseen structural or underground site conditions.

    Do building contractors handle municipal zoning approvals and city permits?

    Yes, a full-service residential building contractor handles architectural plan submittals, zoning setback verification, HOA approvals, and city building permits. The contractor coordinates all mandatory municipal field inspections—including setback verification, open-trench plumbing, foundation pre-pour checks, framing rough-ins, and final occupancy certificates—under their own contractor registration.

    How do residential contractor payment schedules typically work?

    Payment schedules for additions and detached builds follow milestone-based draws tied to concrete progress phases rather than arbitrary calendar dates. A standard structure includes an initial mobilization deposit upon permit issuance, followed by sequential draws after passed foundation inspection, framing dry-in completion, rough trade mechanical sign-offs, and drywall installation. A final retainage balance is held until you complete the final punch list walkthrough.

  • House Construction Design: A Practical Builder Guide

    House Construction Design: A Practical Builder Guide

    A complete house construction design translates architectural concepts into structural blueprints, engineering calculations, and code-compliant building plans. It unifies spatial layouts, foundation specifications, load-bearing framing, and utility pathways into a single coordinated document set. Getting this design right before breaking ground ensures your project passes municipal permitting, avoids structural rework, and proceeds on schedule.


    House Construction Design: A Practical Builder Guide

    What Is House Construction Design?

    House construction design is the technical and architectural roadmap that governs every phase of a residential build. While an architectural sketch focuses on aesthetics and room flow, a construction design package details how the structure actually stands, resists environmental loads, and functions day-to-day.

    When we create a buildable design, we bridge the gap between creative floor planning and physical job-site execution. A sketch might show a wide-open living area, but the construction design calculates the specific steel I-beam or engineered glulam header required to carry the roof load without intermediate posts.

    Every design decision directly impacts construction sequencing:

    • Foundation Integration: Footings and slab designs must match local soil plasticity and frost lines.
    • Structural Framing: Wall studs, floor joists, and roof rafters must align to transfer loads safely down to the foundation.
    • Utility Routing: Mechanical chases, plumbing drops, and electrical runs must be integrated directly into framing plans to avoid cutting structural members later.

    Selecting the right design strategy early helps you decide whether to hire an architect vs design build firm for custom homes to manage your drawings and structural sign-offs.


    Core Components of a Complete House Construction Plan

    A buildable construction plan set consists of coordinated sheets. Municipal building departments require these drawings to verify structural integrity, fire safety, and energy code compliance before issuing a building permit.

    Plan Sheet Core Purpose Critical Information Included
    Site Plan Property orientation & boundary verification Property lines, setbacks, easements, finished floor elevation, drainage flow
    Floor Plans Spatial layout & interior dimensions Wall locations, window and door schedules, room sizes, fixture layouts
    Foundation Plan Substructure engineering Concrete slab details, footing depths, rebar spacing, grade-beam sizing
    Framing Plan Structural load pathways Stud spacing, header sizes, shear walls, roof truss layout, floor joist spans
    MEP Schematics Mechanical, electrical & plumbing paths HVAC duct sizing, electrical service panel location, drain-waste-vent lines
    Elevations & Sections Vertical relationships & envelope Floor-to-ceiling heights, roof pitch, exterior cladding, insulation assemblies

    Structural Framing and Engineering

    Framing sheets indicate the exact lumber species, engineered wood grades, or steel gauges required. When planning structural openings or long spans, plans detail continuous load paths from the roof ridge down to the ground. If you are retrofitting or reconfiguring an existing layout, consult our guide on removing load bearing walls to understand how temporary shoring and replacement beams work.

    Mechanical, Electrical, and Plumbing (MEP) Layouts

    Plumbing stacks require dedicated vertical wall cavities, usually built with deeper framing studs than standard partition walls. Mechanical drawings map supply and return air trunks through attic framing or dropped soffits so that duct runs do not collide with structural floor trusses.


    Choosing the Right Layout: Custom Homes, Additions, and ADUs

    The layout you choose dictates framing complexity, foundation square footage, and interior lifestyle flow. Whether you are executing a ground-up build, a secondary suite, or a detached structure, the floor plan must balance usable living space with practical structural support.

    PRO Construction provides Accessory Dwelling Units (ADU), Garage Conversions, Garage Builds for Homeowners in Keller, TX and surrounding communities seeking additional living space, rental income, or guest accommodations.

    +-------------------------------------------------------------------+
    |                        SPLIT-BEDROOM LAYOUT                       |
    |  +---------------+     +--------------------+     +---------------+
    |  |   Secondary   |     |    Open Living     |     |    Primary    |
    |  |   Bedrooms    | <-> |    Dining & Kitchen| <-> |    Suite      |
    |  |   & Bath      |     |    (Central Zone)  |     |   (Private)   |
    |  +---------------+     +--------------------+     +---------------+
    +-------------------------------------------------------------------+

    Open-Concept vs. Split-Bedroom Layouts

    Open-concept designs remove partition walls between the kitchen, dining, and main living areas to maximize natural sightlines. While visually spacious, these layouts demand larger structural beams to span wide distances without load-bearing support walls.

    Split-bedroom floor plans place secondary bedrooms on the opposite side of the home from the primary suite, separated by the central living space. This arrangement creates built-in acoustic privacy without requiring long, wasted hallway corridors. For full-scale builds, review building a custom home the complete guide to evaluate how footprint shapes influence construction costs.

    Designing Compact Footprints for ADUs and Suites

    Compact footprints demand disciplined spatial planning. When laying out a secondary suite or detached structure, every square foot must serve multiple functions:

    • Stacked Wet Walls: Align kitchen plumbing and bathroom supply lines along a shared wall to reduce pipe runs and material costs.
    • Pocket and Barn Doors: Replace traditional swing doors to reclaim clearance space in narrow bedrooms and bathrooms.
    • Dedicated Utility Closets: Incorporate tankless water heaters and ductless mini-split systems that fit within standard wall depths or compact closets.

    For regional regulations and planning steps, explore everything you need to know about building an adu in north texas and evaluate our comparison between an adu guest house vs home addition. If you are considering alternative structural framing methods, read our guides on building a barndominium in Texas and modular homes explained.


    The Step-by-Step House Construction Design Process

    Developing an efficient house construction design involves progressive refinement, turning broad ideas into engineered construction documents.

    [ Step 1: Site Evaluation ]
              │
              ▼
    [ Step 2: Schematic Drafting ]
              │
              ▼
    [ Step 3: Structural Engineering & Permitting ]
              │
              ▼
    [ Step 4: Pre-Construction Alignment ]

    1. Site Evaluation and Zoning Constraints

    Before drafting begins, the building site must be surveyed. We check property boundary pins, calculate building envelope setbacks, identify underground utility easements, and inspect surface drainage patterns. If you are shopping for property, our guide on how to find and evaluate building lots in keller tx outlines how zoning and soil profiles impact your foundation choices.

    2. Schematic Drafting

    During schematic design, preliminary floor layouts and exterior elevations are created. This step defines room dimensions, ceiling heights, door and window placements, and exterior cladding styles.

    3. Structural Engineering and Permit Documentation

    Once the floor plan is locked, a licensed structural engineer reviews the plans. They specify foundation reinforcement, beam sizes, and wind-load connections required by local building codes. Complete construction sets are assembled for municipal plan review.

    4. Pre-Construction Alignment

    Before framing starts, the architectural drawings are cross-referenced with vendor material availability, finish selections, and subcontractor scopes. Using established design build project management ensures that the windows, trusses, and mechanical units specified on paper arrive on-site without supply delays. Use the ultimate residential construction checklist to confirm every detail is accounted for before breaking ground.


    Common Design Mistakes That Cause Construction Delays

    Design errors caught during active framing or rough-in inspections lead to schedule halts and costly plan revisions.

    ┌─────────────────────────────────────────────────────────────┐
    │                 COMMON DESIGN FAILURE POINTS                │
    ├──────────────────────────────┬──────────────────────────────┤
    │ 1. Boundary & Setbacks       │ 2. MEP Chases & Clearances   │
    │ Ignored easements require    │ Missing mechanical chases    │
    │ site redesigns or variances. │ force structural header cuts.│
    ├──────────────────────────────┴──────────────────────────────┤
    │ 3. Unadapted Stock Plans                                    │
    │ Generic internet plans fail local wind, soil, and snow loads│
    └─────────────────────────────────────────────────────────────┘
    1. Designing Outside Setbacks and Easements: Drawing an addition or detached garage that crosses municipal side setbacks or utility easements will trigger an instant permit rejection, forcing a complete redesign of the foundation footprint.
    2. Omitting Dedicated Mechanical Chases: Floor plans that do not account for vertical plumbing stacks, electrical panels, and HVAC return ducts force trades to notch structural joists and studs, weakening the frame and failing rough framing inspections.
    3. Using Unmodified Stock Floor Plans: Stock plans downloaded from online catalogs rarely match localized building codes, active soil requirements, or wind-shear criteria. Every stock plan must be adjusted and sealed by an engineer familiar with your specific region.

    Frequently Asked Questions

    What is the difference between a floor plan and a full construction design set?

    A floor plan is a two-dimensional layout showing room arrangements, walls, and doorway positions. A full construction design set includes structural engineering, foundation specifications, framing cross-sections, elevation views, and mechanical, electrical, and plumbing schematics required for building permits and on-site assembly.

    Can I build directly from stock house plans purchased online?

    Stock plans provide an architectural starting point, but they cannot be submitted directly for building permits in most jurisdictions. They must be modified by a design professional or engineer to comply with local wind loads, seismic zones, regional energy codes, and site-specific soil bearing conditions.

    How does site topography influence house construction design?

    Topography determines your foundation design, finished floor elevations, and stormwater management systems. Sloped lots often require stepped footings, stem walls, or walkout basement foundations, while flat lots demand engineered grading to direct water away from the structure. A solid house construction design always adapts to the natural contours of the land.

  • Sea Can Homes: Practical Guide to Steel Container Living

    Sea Can Homes: Practical Guide to Steel Container Living

    Sea can homes are modular residential dwellings constructed from repurposed or one-trip Corten steel shipping containers. These structures bear their primary structural loads through heavy vertical corner posts down to reinforced corner castings rather than along the corrugated side walls. Converting these industrial steel boxes into code-compliant, permanent living spaces requires engineered foundation anchoring, continuous closed-cell spray foam insulation, and welded structural steel framing around all wall penetrations.

    Sea Can Homes: Practical Guide to Steel Container Living

    What Are Sea Can Homes and How Are They Engineered?

    A sea can—commonly known as an ISO intermodal shipping container—is engineered to haul cargo across marine routes, rail lines, and highways. Fabricated from atmospheric corrosion-resistant Corten steel, the container shell resists harsh saltwater environments and supports multi-unit vertical stacking loads.

    In traditional wood construction, structural weight distributes evenly across dozens of vertical studs placed on uniform center lines. By contrast, an unmodified container transfers compressive loads down its four vertical corner posts and cast-steel corner fittings.

    Corrugated steel side and roof panels do not carry vertical floor loads. Instead, they function as shear diaphragms that keep the rectangular structure from racking or twisting under lateral wind pressures. Repurposing these containers for residential housing requires evaluating the structural integrity of the steel, checking for physical deflection, and verifying that the subfloor framing remains intact. Similar to how alternative builds function in our review of modular homes explained, sea can construction relies on modular framing rules that govern layout planning.

    Component Engineering Function Residential Implication
    Corner Castings Primary load-bearing and crane rigging points Serves as foundation anchor and multi-story stacking connection
    Corner Posts Carries vertical compressive loads Must remain plumb, true, and structurally unaltered
    Corrugated Panels Provides shear resistance against lateral loads Openings require welded steel tube perimeter framing
    Crossmembers Supports internal floor payloads Acts as primary attachment grid for underfloor plumbing and wiring
    Corten Steel Skin Forms weather-resistant exterior protective shell Requires continuous vapor management to prevent metal sweating

    Standard Sea Can Dimensions and Layout Configurations

    Standard container construction relies on two primary footprint lengths: twenty-foot modules and forty-foot modules. Both types are produced in standard height profiles and high-cube variations. High-cube containers supply an extra foot of vertical clearance, which provides the necessary space for recessed ceiling joists, subfloor utility runs, finished flooring, and mechanical ducting while maintaining standard interior ceiling clearances.

    Single-container layouts serve efficiently as backyard offices, guest suites, micro-studios, or pool cabanas. Combining two or more units side-by-side or stacking them vertically allows for multi-bedroom floor plans. Creating wide living spaces requires cutting away adjoining corrugated walls and welding intermediate steel columns to carry the transferred roof loads.


    Structural Modifications and Reinforcing Steel Openings

    Every cutout made in a shipping container’s corrugated steel wall alters its engineered load path. Because the corrugated profile provides shear strength, cutting sections out of the side panels causes the remaining steel to lose rigidity, which can result in roof rail sag and out-of-square window openings.

    When joining multiple units together, field crews align, clamp, and weld the containers along their top and bottom perimeter rails. Once the adjoining interior walls are removed, heavy-wall structural steel columns—such as hollow structural sections or structural steel I-beams—must be installed at specified intervals to carry overhead roof weight. Failing to weld proper structural lintels across wide wall openings will cause the container roof to bow under dead and live loads. Understanding these load distributions shares many engineering principles with removing load-bearing walls in traditional site-built homes.

    Reinforcing Cutouts for Windows and Doors

    Properly reinforcing rough openings requires a systematic metal fabrication process:

    1. Layout and Bracing: Mark the rough opening dimensions across the corrugation profile. Tack-weld temporary diagonal steel angle bracing across adjacent wall panels to prevent metal distortion during cutting.
    2. Thermal Cutting: Cut the opening through the corrugated steel using a plasma cutter or oxy-fuel torch, ensuring edges are square, clean, and free of slag.
    3. Perimeter Frame Fabrication: Fabricate a structural perimeter frame from rectangular steel tubing sized to the structural engineer’s schedule for that specific span.
    4. Structural Welding: Position the steel tube frame inside the rough opening. Complete continuous fillet welds connecting the tube to both the inner and outer corrugation folds to seal the wall against water intrusion and restore lateral shear strength.
    5. Interior Framing Integration: Weld steel framing tabs or interior light-gauge steel studs directly to the reinforcement frame to provide mounting points for drywall jamb extensions, window units, and interior trim.

    Foundation Systems and Site Preparation for Sea Can Builds

    Steel shipping containers concentrate their entire weight at their four corner castings, which means foundation requirements differ from continuous trench footings used in light-frame wood construction. Site preparation begins with clearing surface vegetation, establishing engineered soil compaction, and grading the pad to direct surface runoff away from the footings.

    The two most common foundation systems for container structures are concrete pier assemblies and engineered monolithic slabs.

    Drilled reinforced concrete piers placed directly beneath each corner casting offer an efficient foundation method for single-unit and linearly joined layouts. These piers extend into stable subsoil below local frost depths. Pier systems keep the steel chassis elevated above ground dampness and provide clear access underneath for servicing utility connections.

    Monolithic concrete slabs with thickened perimeter grade beams provide a continuous base for complex, multi-container architectural plans. Slabs supply a level mounting surface across the entire footprint and allow plumbing drain lines to be roughed in prior to container placement.

    Delivery logistics require careful advance planning. Transporting a container to the building site requires overhead clearance from tree branches and power lines, along with stable ground conditions for flatbed transport trailers and mobile cranes. The crane must sit on firm, level ground with outriggers fully extended to pick the container from the trailer and place it onto the foundation embed plates.

    Anchoring Corner Castings to Concrete Footings

    Gravity alone cannot hold a container structure in place during high wind events or seismic activity:

    1. Heavy steel embed plates with welded deformed anchor bars are cast directly into the wet concrete piers or slab perimeter at exact corner post coordinates.
    2. Concrete cures until reaching its specified compressive design strength.
    3. Crane operators lower the container corner castings onto the exposed steel embed plates.
    4. Field welders make heavy structural fillet welds connecting the bottom corner castings directly to the embedded steel plates, locking the structure against lateral slide and wind uplift.

    Insulation Strategies to Beat Thermal Bridging and Condensation

    Corten steel is a dense thermal conductor. Without a continuous thermal break, steel container walls transfer exterior heat and cold directly into the interior envelope, increasing heating and cooling loads. Temperature differentials between conditioned indoor air and cold exterior steel panels also generate condensation on the interior metal surface, leading to hidden moisture accumulation, rusted framing, and mold growth.

    Traditional fiberglass batt insulation performs poorly inside steel containers because humid indoor air migrates through batts and condenses against the cold corrugated steel. The standard method for sea can homes is continuous closed-cell spray polyurethane foam applied directly to the interior steel corrugations.

    Spray foam adheres directly to the metal skin, eliminates air voids, and functions as both a high-performance thermal barrier and a monolithic vapor retarder. When framing interior partition walls, builders set light-gauge steel or wood studs slightly away from the container corrugation, creating a physical thermal break that stops the steel shell from conducting outdoor temperatures through the studs into the drywall.

    PRO Construction provides Accessory Dwelling Units (ADU), Garage Conversions, Garage Builds for Homeowners in Keller, TX and surrounding communities seeking additional living space, rental income, or guest accommodations..

    Preventing Interior Condensation and Moisture Buildup

    Moisture mitigation requires coordinated detailing across envelope and mechanical systems:

    • Eliminate Air Pockets: Apply spray foam uniformly across all inner and outer corrugation channels to eliminate dead air cavities where moisture could condense.
    • Under-Chassis Sealing: Coat the container’s underside marine plywood floor with an exterior elastomeric sealant or closed-cell spray foam to prevent ground moisture from penetrating the floor assembly.
    • Mechanical Ventilation: Install dedicated ducted exhaust fans in bathrooms and kitchens, paired with an Energy Recovery Ventilator (ERV) to exchange indoor air without excessive energy loss.
    • Roof Penetration Detailing: Flash and seal all plumbing vent stacks, chimney flues, and electrical conduits with EPDM boots and structural polyurethane sealants.

    Permitting, Zoning, and Code Compliance for Container Structures

    Local building departments evaluate container homes under the International Residential Code (IRC) or International Building Code (IBC), using modular construction guidelines and local amendments. Container conversions must satisfy the same structural, fire safety, mechanical, and energy standards as site-built housing.

    Zoning regulations dictate whether modified container construction is permitted on a given parcel. Municipalities frequently classify container homes as detached Accessory Dwelling Units (ADUs), which requires meeting setback distances, lot coverage maximums, and neighborhood design guidelines. For properties across North Texas, reviewing our guide on building an ADU in North Texas outlines municipal zoning parameters and approval steps.

    Permitting authorities require engineered structural plans bearing the seal of a licensed professional engineer. These submittals must demonstrate that all steel cuts, reinforcing lintels, structural columns, foundation anchors, and envelope details comply with local wind, seismic, and energy regulations.

    Standard inspection checkpoints include:

    • Foundation and Embeds: Inspection of excavation, formwork, reinforcing rebar, and steel embed plate placement prior to pouring concrete.
    • Structural Steel Framing: Visual inspection of load-bearing steel tube reinforcement, lintel welds, and column attachments before insulation covers the steel.
    • Rough-In Trades: Verification of mechanical, electrical, and plumbing rough-ins, confirming conduit runs, drain slopes, pressure tests, and supply line protections.
    • Insulation and Energy Compliance: Inspection of continuous spray foam thickness, thermal breaks, window efficiency ratings, and air barrier continuity.
    • Final Inspection: Issuance of the Certificate of Occupancy following verification of egress windows, smoke and carbon monoxide alarms, exterior handrails, and utility connections.

    Sea Can Homes vs. Traditional Stick-Built ADUs

    Deciding between a converted shipping container home and a traditional stick-built structure depends on site accessibility, architectural preferences, permitting requirements, and project scope.

    Off-site modular fabrication is one of the main structural advantages of container construction. Metal cutting, structural reinforcement, rough electrical installations, and interior spray foam application can occur in a controlled shop environment while site excavation and foundation concrete cure on site. Once the build pad is ready, container modules are transported to the property and set in position via crane.

    Turnkey container conversions, however, do not automatically yield lower total costs than standard wood framing. While raw container shells are relatively affordable, the specialized labor required for plasma cutting, structural welding, heavy crane staging, and closed-cell spray foam brings total turnkey pricing in line with standard wood-framed construction.

    Evaluating long-term property value and functionality is essential; exploring the differences between an ADU guest house vs. home addition can help clarify which structural approach fits your residential goals.

    Project Factor Sea Can Container Build Stick-Built Traditional ADU
    Structural Shell Corten steel shell reinforced with steel tube headers Dimensioned lumber or light-gauge cold-formed steel studs
    Assembly Timeline Off-site shop conversion with single-day crane setting Multi-week on-site framing, sheathing, and drying-in
    Site Access Needs Requires heavy road clearance for flatbeds and mobile cranes Standard material deliveries via residential driveways
    Exterior Appearance Industrial corrugated profile or rainscreen exterior cladding Matches existing home finishes such as brick, stone, or siding
    Permitting Pathway Requires engineered structural weld details and modular review Follows standard prescriptive residential building codes
    Insulation Requirements Continuous closed-cell spray foam to prevent metal sweating Mineral wool, fiberglass batts, or continuous exterior foam boards
    Design Flexibility Limited to standard container widths unless joined together Fully custom dimensions, room depths, and ceiling heights

    Long-term property improvements benefit from evaluating diverse building approaches. Reviewing a guide to building a custom home or reading our breakdown on building a barndominium in Texas helps compare how various construction methods perform over time. Coordinating with an experienced team through design-build project management ensures that structural calculations, foundation design, permitting, and interior finishes align smoothly from preliminary concepts to final occupancy.


    Frequently Asked Questions

    Is it really cheaper to build a shipping container home?

    While purchasing an unmodified steel container shell involves a relatively low upfront material expense, the complete turnkey cost of a finished sea can home is generally comparable to conventional stick-built construction. The expenses associated with professional structural engineering, plasma cutting, structural steel tube welding, crane rental, and continuous closed-cell spray foam insulation balance out the raw shell savings. Cost efficiencies occur primarily when building straightforward single-unit footprints with minimal openings or taking advantage of compressed shop-fabrication timelines.

    Do you have to pay taxes on a shipping container home?

    Yes. As soon as a sea can structure is secured to a permanent concrete foundation and tied into local utilities or a private septic system, local appraisal districts assess it as a permanent real property improvement. It is evaluated and taxed based on its finished square footage, architectural quality, and local market value in the same manner as a conventional detached guest house or site-built home addition.

    How much should I pay for a 20 ft shipping container?

    Pricing for a standard twenty-foot shipping container varies based on market steel values, geographical location, container grade, and global supply chain conditions. Used "cargo-worthy" or "wind and watertight" units cost less than brand-new or "one-trip" containers that have only completed a single ocean crossing. One-trip containers feature cleaner corrugated panels and undamaged floors, reducing the labor needed for structural prep and metal repairs.

    Stacking containers: Can you create a multi-story sea can home?

    Stacking containers is standard engineering practice because their corner posts are specifically designed to carry vertical stacking loads. Multi-story residential configurations require bottom and top corner castings to be secured with heavy-duty structural twist locks or welded connector plates. If upper container modules are offset, turned perpendicularly, or cantilevered over open patio space, secondary structural steel columns and beams must be added below to support the transferred loads safely.