Category: Blog

  • Building a Barndominium in Texas: 6 Key Steps

    Building a Barndominium in Texas: 6 Key Steps

    Planning and executing the process of building a barndominium in Texas requires erecting a durable, clear-span steel or post-frame shell over an engineered concrete slab before completing a fully insulated, code-compliant residential interior. This method combines the structural longevity and open space of metal buildings with the flexible layout and finish quality of a custom home. Successfully completing your build hinges on matching site-specific engineering to expansive regional soils, applying continuous thermal insulation against severe summer heat, and coordinating local municipal or county permitting requirements.


    Building a Barndominium in Texas: 6 Key Steps

    6 Core Steps When Building a Barndominium in Texas

    A barndominium differs fundamentally from standard stick-built construction. Rather than relying on interior load-bearing walls to carry roof loads, a barndominium uses an exterior structural frame—typically rigid red-iron steel, cold-formed steel, or heavy timber post-frames—to create a wide, open shell.

    Because the exterior perimeter carries all structural loads, you can configure the interior layout with complete freedom. The Texas climate, however, presents distinct challenges. Expansive clay soils shift significantly between wet springs and dry summer droughts, while radiant sun turns uninsulated metal into an oven. Following a strict, phased build sequence prevents costly structural revisions and guarantees a durable home.

    Step 1: Land Evaluation, Soil Testing, and Site Preparation

    Every build starts with the dirt. In regions across North and Central Texas, expansive clay soils swell when saturated and shrink when dry. Placing a rigid steel building on improperly prepared ground leads to foundation cracking, binding exterior doors, and racking metal wall panels.

    1. Geotechnical Soil Testing: A geotechnical engineer takes core samples to measure the plasticity index of the soil. High-plasticity clay requires specialized foundation design.
    2. Topsoil Stripping and Excavation: Operators scrape away organic topsoil and unstable material down to stable subgrade.
    3. Engineered Fill Pad: Crews bring in select fill dirt, spreading it in thin lifts and compacting each layer with heavy machinery to achieve the structural density specified by the engineer.
    4. Site Drainage and Grading: Water must flow away from the foundation pad. Cutting swales and grading the building perimeter prevents standing water from undermining the slab edges.

    If you are currently evaluating acreage or an infill parcel, review our guide on how to find and evaluate building lots in Keller, TX to assess topography, utility access, and zoning restrictions before breaking ground.

    Step 2: Engineered Slab and Foundation Pouring

    A barndominium foundation is not a standard residential slab. Steel columns exert high-point concentrated loads on specific perimeter locations rather than distributing weight evenly along continuous stud walls.

    The slab requires deep perimeter grade beams, thickened footings under structural column anchor locations, and heavy steel rebar grids. In areas with volatile soil movement, post-tensioned cable systems or drilled concrete piers anchored into bedrock provide stability.

    Before pouring concrete, plumbers trench and set all below-slab rough-in drainpipes, water supply lines, and electrical conduit sleeves. These penetrations must be measured precisely, as moving a plumbing line embedded in a commercial-grade concrete slab requires concrete demolition. Once lines pass inspection and are backfilled, the moisture barrier is installed, rebar is tied, and the concrete is poured and cured.

    Step 3: Steel Shell Erection and Weatherproofing

    With the slab cured and anchor bolts set, structural shell assembly begins.

    • Primary Framing: For red-iron structures, steel I-beams are bolted together using high-strength structural bolts to form the primary clear-span bents. Post-frame builds use heavy engineered timber posts secured to metal bracket standoffs cast into the concrete.
    • Secondary Framing: Steel girts run horizontally across the walls, and steel purlins span the roof rafters to create a rigid framework for panel attachment.
    • Sheeting and Trim: Exterior metal wall and roof panels—typically heavy-gauge corrugated or standing-seam steel—fasten to the purlins and girts using self-drilling fasteners with weather-sealing washers.
    • Weather Sealing: Mastic tape and custom-formed foam closure strips are installed at all panel overlaps, ridge caps, eaves, and base trims to block wind-driven rain, pests, and ambient humidity.

    Step 4: Mechanical Rough-Ins and Spray Foam Insulation

    Once the outer shell is sealed, the building transitions from an industrial structure to a living space.

    Interior trades run main electrical supply panels, rough-in circuits, overhead water distribution lines, and ventilation ducts. Because the steel shell has no inherent thermal resistance, insulating the exterior envelope correctly is critical.

    Applying closed-cell polyurethane spray foam directly to the backside of the metal roof and wall panels creates a continuous air barrier. This application stops condensation from forming against cold metal and adds structural rigidity to the metal skin. It serves as both thermal insulation and a vapor barrier, preventing moisture from becoming trapped between the metal siding and interior living spaces.

    Step 5: Interior Framing and Living Space Finish-Out

    With the building insulated, interior framing begins. Because the clear-span steel frame carries all structural weight, interior walls act as non-load-bearing partitions.

    • Wall Framing: Carpenters frame interior rooms using traditional wood studs or light-gauge steel framing, anchoring bottom plates to the concrete slab with mechanical fasteners.
    • Acoustic Insulation: Interior partition walls surrounding bedrooms, bathrooms, and utility areas receive mineral wool or fiberglass batts to dampen sound transfer.
    • Drywall and Trim: Drywall is hung, taped, bedded, and textured. Interior trim, cabinetry, solid surface countertops, doors, and custom millwork follow.
    • Flooring: Many homeowners stain and polish the structural concrete slab directly for a durable, low-maintenance finish, while others install luxury vinyl plank or tile over the cured foundation.

    For a comprehensive breakdown of the entire interior finish and planning phase, consult our resource on building a custom home: the complete guide.

    Step 6: Final Municipal Inspections and Utility Connections

    The final stage bridges mechanical readiness and legal occupancy.

    Utility providers complete permanent electrical meter connections, connect to municipal water mains or commission private wells, and tie into public sewers or private septic systems. Municipal or county building inspectors perform final evaluations of plumbing pressure tests, electrical safety, energy efficiency compliance, and life-safety detector layouts.

    Once the local building official approves all mechanical trades and safety systems, the jurisdiction issues a Certificate of Occupancy, clearing the home for move-in.


    Prefabricated Kits vs. Custom Steel Shell Construction

    When building a barndominium in Texas, you must decide between ordering an off-the-shelf prefabricated kit or hiring a general contractor to engineer and erect a custom steel shell on-site.

    Construction Factor Prefabricated Kit Package Custom Engineered Steel Shell
    Design Flexibility Limited to fixed standard spans, heights, and door placements Completely custom floor plans, rooflines, and multi-use spaces
    Engineering Approval Generic stamped drawings that may require local engineering revisions Engineered from day one for your exact soil conditions and wind loads
    Integrated Workshops Difficult to merge deep garage bays with complex residential layouts Simple to integrate wide workshop bays, RV storage, and covered porches
    Material Delivery Shipped as a single bulk flatbed delivery requiring on-site sorting Staged deliveries aligned directly with the on-site construction schedule
    Labor Coordination Homeowner must source, vet, and manage separate erectors and finish crews Managed by a unified design-build team from foundation to final paint

    Off-the-shelf kits can serve simple, standalone storage shells. However, when combining complex living quarters, expansive covered patios, and functional workspaces under one roof, custom-engineered steel construction provides superior long-term results.

    If your vision includes a dedicated shop, large overhead doors, or equipment storage, read our guide on how to maximize every square foot of your North Texas detached garage for layout strategies that translate directly into barndominium floor plans.


    Managing Texas Building Codes, Zoning, and Permitting

    Permitting a barndominium in Texas varies dramatically depending on whether your property sits inside an incorporated city limit or within an unincorporated county area.

    Incorporated City Jurisdictions

    Inside city limits such as Keller, Southlake, or Fort Worth, your barndominium must adhere to standard International Residential Code regulations.

    • Exterior Facade Standards: Many municipal zoning ordinances restrict all-metal exteriors on residential structures, requiring masonry, stone, or brick wainscoting covering a designated portion of the ground-level facade.
    • Setbacks and Easements: Your structure must respect strict front, rear, and side property line setbacks, as well as utility easements.
    • Secondary Structure Rules: If you are building a barndominium as a secondary dwelling behind an existing house, the city will evaluate it under Accessory Dwelling Unit regulations regarding size caps and utility hookups.

    To see how municipal regulations treat secondary residential structures, explore our guide covering everything you need to know about building an ADU in North Texas.

    Unincorporated County Land

    On rural acreage outside city limits, broad municipal building codes are often absent. County oversight still applies to critical health and safety items:

    1. On-Site Sewage Facilities: A licensed professional must conduct a soil percolation test and design a septic system matched to your bedroom count and soil type. The county health department must inspect and permit this system before it is backfilled.
    2. Floodplain Development Permits: You cannot build inside designated flood zones without engineering documentation showing that the structure will not alter natural drainage flows.
    3. Culverts and Driveway Access: County road departments must approve driveway connections to county roads to ensure drainage ditches remain clear.

    Before purchasing rural acreage, check for recorded deed restrictions. Private land developers often record covenants that mandate minimum square footage or prohibit all-metal exterior finishes. Review our ultimate residential construction checklist for North Texas homeowners to keep your due diligence on track.


    Insulation and Climate Control for Texas Heat

    Metal conducts heat rapidly. In a Texas summer, direct sun transfers extreme thermal energy straight through metal roof panels into the structure. Using standard fiberglass batt insulation against metal sheeting creates severe moisture risks; batts allow humid air to reach the metal surface, creating condensation that leads to structural corrosion and mold behind drywall.

    The Function of Closed-Cell Polyurethane Foam

    Closed-cell spray foam insulation represents the most effective thermal envelope for steel structures.

    • Continuous Thermal Break: Applying closed-cell foam directly to the underside of the roof deck and perimeter walls seals joints, fastener penetrations, and panel overlaps.
    • Moisture and Vapor Control: Spray foam forms an impermeable vapor barrier that prevents humid Texas air from contacting metal framing, eliminating interior roof sweating.
    • Structural Reinforcement: Closed-cell foam hardens into a dense material that increases the racking strength of exterior metal wall assemblies.

    Sizing HVAC Systems for Metal Buildings

    High ceilings, open-concept great rooms, and connected shop bays require deliberate mechanical planning:

    • Accurate Load Calculations: An HVAC contractor must perform Manual J load calculations that account for the airtightness of spray-foamed envelopes. Oversized systems cool the space too quickly without removing humidity, leaving the interior feeling damp.
    • Ductwork Placement: All supply and return ducts should remain within the conditioned thermal envelope created by the roofline spray foam, eliminating the energy losses common in hot attics.
    • Zoned Mini-Split Systems: If your barndominium includes an attached workshop or garage bay alongside the living quarters, ductless mini-split heat pumps allow you to condition working spaces independently from the primary residence.

    Financing and Insuring a Texas Barndominium

    Securing financing for building a barndominium in Texas requires a different approach than obtaining a standard suburban mortgage.

    Construction-to-Permanent Loans

    Most barndominiums are financed using a construction loan that converts into a long-term mortgage upon completion. Because traditional mortgage lenders often struggle to classify metal-frame residences, borrowers find higher approval rates with rural lending cooperatives, regional agricultural credit associations, and local community banks.

    Lenders typically require:

    • A fixed-price contract with a licensed general contractor.
    • Complete architectural blueprints with engineer-stamped structural drawings.
    • A detailed line-item budget covering site prep, foundation, utilities, framing, and interior finishes.
    • A structured disbursement schedule for draw inspections throughout construction.

    If you are exploring alternative structural options, read our guide on modular homes explained to compare construction methods, lending structures, and long-term valuation factors.

    Real Estate Appraisals and Insurance Underwriting

    The primary hurdle during financing is the appraisal. Appraisers must identify recent comparable sales of similar size, construction type, and quality within a reasonable geographic area. In areas where barndominiums are less common, appraisers adjust standard custom home comps to establish value.

    For insurance, confirm that your carrier writes standard homeowners policies for steel-framed residential structures. Working with an insurance broker familiar with barndominium construction ensures your policy covers full replacement value, windstorm protection, and liability across both the living quarters and any attached workshop space.

    PRO Construction provides Accessory Dwelling Units (ADU), Garage Conversions, Garage Builds for Homeowners in Keller, TX and surrounding communities seeking additional living space, rental income, or guest accommodations.

    To learn how an integrated delivery model prevents construction delays, read our walkthrough of design-build project management for stress-free construction. If your plans include dedicated custom spaces, explore our guide on planning a bathroom remodel for layout ideas. If you already own land, review our practical guide to building on your lot in Keller, TX.


    Frequently Asked Questions

    What should I know before building a barndominium in Texas?

    Before starting construction, evaluate local soil conditions, zoning restrictions, and financing requirements. Expansive clay soils throughout North and Central Texas demand an engineered foundation with deep grade beams or concrete piers to support concentrated steel column loads. Inside city limits, zoning ordinances often mandate masonry wainscoting on exterior metal walls. Securing financing through rural lenders or regional banks familiar with metal-frame homes prevents appraisal and funding delays.

    What is the primary structural difference between a barndominium and a traditional custom home?

    A barndominium uses an exterior clear-span steel frame or heavy timber post-frame structure to support roof and wall loads, eliminating the need for interior load-bearing walls. A traditional home relies on wood stud framing distributed throughout the interior footprint to support ceiling and roof weight. This structural difference allows barndominiums to feature expansive, open-concept floor plans and combine large workshops or vehicle bays under a single roofline.

    Why is specialized foundation engineering necessary for metal buildings in Texas?

    Texas soils contain active clay that expands when wet and contracts when dry, generating significant ground movement. Because steel buildings transfer heavy structural loads directly to individual perimeter columns rather than distributing weight evenly, standard residential slabs can shift or crack under the concentrated force. An engineered slab incorporates thickened column footings, heavy rebar reinforcement, and moisture barriers designed specifically for local soil conditions.

    Can a barndominium be built as an accessory dwelling unit in municipal areas?

    Yes, provided the project adheres to municipal zoning ordinances governing accessory structures. In suburban municipalities, secondary residences must meet specific lot size minimums, setback distances, height restrictions, and exterior design guidelines. Coordinating with a local general contractor ensures the structure meets International Residential Code standards and receives appropriate city permits.
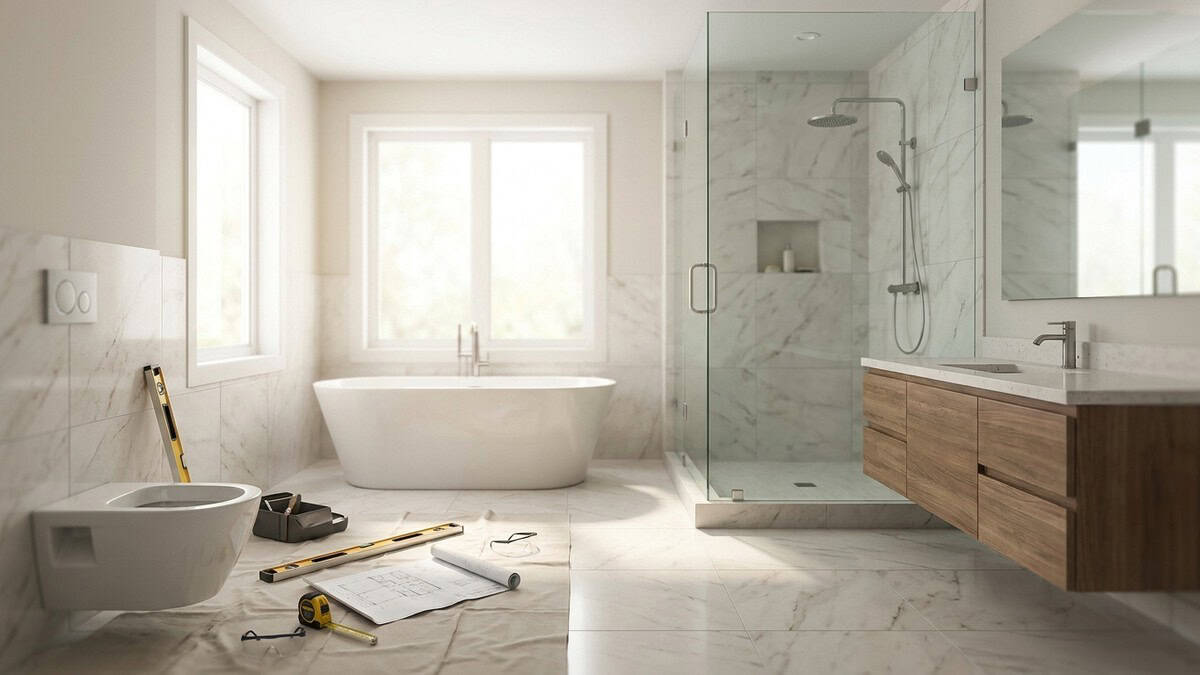
  • Planning a Bathroom Remodel Near Me: Homeowner Guide

    Planning a Bathroom Remodel Near Me: Homeowner Guide

    Planning a bathroom remodel near me requires evaluating structural framing, plumbing rough-ins, electrical load capacity, and continuous waterproofing behind the tile. A successful project strips away outdated surfaces to correct underlying subfloor or moisture issues while upgrading layout flow and ventilation. Working with an established local builder ensures your renovation complies with municipal building codes and delivers durable, everyday performance.


    Planning a Bathroom Remodel Near Me: Homeowner Guide

    What Does a Full Bathroom Remodel Involve?

    A complete bathroom renovation transforms both the visible surfaces and the underlying mechanical infrastructure. Unlike cosmetic updates that simply swap fixtures, a full remodel removes drywall and flooring down to the bare wall studs and subfloor. This teardown gives trade professionals direct access to inspect structural framing, reconfigure waste lines, and modernize electrical circuits.

    Several critical building systems receive comprehensive updates during a structural remodel:

    • Plumbing Supply and Drainage: Aging supply lines are replaced with modern PEX or copper piping, while drain and vent stacks are re-pitched to facilitate gravity-fed drainage toward the main sewer stack.
    • Electrical Branch Circuits: High-draw appliances such as hair dryers, ventilation heaters, and illuminated mirrors require dedicated branch circuits protected by Ground Fault Circuit Interrupter (GFCI) devices.
    • Ventilation and Moisture Management: Ducted exhaust fans sized for room volume carry humid air directly out through an exterior wall or roof cap rather than dumping moisture into the attic.
    • Subfloor Reinforcement: Water damage frequently hides beneath older tub surrounds and sheet flooring, requiring crews to sister weakened joists and install rigid underlayment to prevent tile deflection.

    Property owners planning major spatial changes alongside interior updates can explore luxury bathroom renovation design concepts to see how structural modifications enhance daily function.

    Cosmetic Refresh vs. Complete Layout Reconstruction

    Distinguishing between a surface upgrade and a structural reconstruction helps establish project scopes, trade requirements, and site timelines.

    Project Factor Cosmetic Surface Refresh Complete Layout Reconstruction
    Demolition Scope Fixtures, vanity, and mirrors removed; drywall left intact Complete tear-out to bare wall studs and exposed floor joists
    Plumbing Changes Direct replacement of fixtures in existing locations Relocation of supply lines, waste stacks, vents, and floor drains
    Electrical Scope Swapping light fixtures, switches, and decorative plates Adding dedicated home-run circuits, GFCI outlets, and task lighting
    Waterproofing Topical caulking and standard moisture-resistant drywall Continuous bonded sheet membranes, liquid barriers, and pan flood testing
    Permits Required Rarely required for basic surface replacements Required for plumbing, electrical, and structural modifications

    Surface updates suit bathrooms where the existing layout works well, framing is sound, and supply lines show no signs of corrosion. Conversely, moving a shower, converting a fiberglass tub into a walk-in shower, or adding a double vanity requires opening walls to run new plumbing and electrical lines. Rebuilding from the framing outward guarantees that hidden leaks, moisture damage, or sagging floor joists are resolved before finish materials are installed.


    How to Vet a Contractor for a Bathroom Remodel Near Me

    Selecting a qualified builder requires looking beyond finished portfolio photos. Bathrooms represent high-risk wet environments where improper trade work causes structural rot and hidden moisture intrusion. Vetting local professionals demands verifying their licensing status, insurance coverage, trade coordination, and technical waterproofing protocols.

    PRO Construction provides Accessory Dwelling Units (ADU), Garage Conversions, Garage Builds for Homeowners in Keller, TX and surrounding communities seeking additional living space, rental income, or guest accommodations.

    Interviewing general contractors should center on their end-to-end operational process. A reliable builder manages architectural plans, pulls required municipal permits, schedules specialty subcontractors, and coordinates on-site inspections. Working with a team experienced in design-build project management eliminates communication gaps between initial layout sketches and trade execution.

    Essential Contractor Credentials

    Before signing an agreement, verify that your prospective builder satisfies core operational criteria:

    1. Active Licensing and Municipal Registration: Confirm that the general contractor and their specialty trades carry current municipal registrations and trade licenses within your local jurisdiction.
    2. Comprehensive Insurance: Require proof of current General Liability coverage and Worker’s Compensation certificates directly from the insurer.
    3. Structural and Framing Capability: Projects involving widened entries, recessed storage niches, or relocated partitions demand proven carpentry knowledge. Homeowners undertaking structural alterations should review removing load-bearing walls safely to understand structural load transfer.
    4. Waterproofing System Knowledge: Inquire about the exact waterproofing assemblies the contractor uses, such as bonded sheet membranes, liquid barriers, or foam backer systems, and verify installation adheres strictly to manufacturer specifications.
    5. Detailed Written Agreements: Ensure the contract defines the full scope of work, material allowances, inspection milestones, and warranty terms. Reviewing residential construction contracts helps safeguard your investment before demolition starts.

    The Step-by-Step Bathroom Remodeling Process

    Professional bathroom remodeling follows a sequential trade schedule. Skipping steps or rushing drying periods compromises installation quality and can lead to cracked tile, failed seals, or water damage.

    PHASES OF A BATHROOM RENOVATION
    1. Planning, Engineering, Permitting & Site Protection
    2. Demolition, Stud Inspection & Subfloor Leveling
    3. Rough-In Plumbing, Electrical Circuits & HVAC Ducts
    4. Waterproofing Enclosure, Pan Flood Test & Inspections
    5. Tile Setting, Grouting, Fixture Trim-Out & Final Walkthrough

    Rough-In and Waterproofing Phase

    Demolition clears the workspace so mechanical and structural trades can rough in primary systems:

    1. Plumbing Rough-Ins: Plumbers install thermostatic mixing valves, route supply lines, place shower drain assemblies, and connect waste pipes to existing stacks.
    2. Electrical Rough-Ins: Electricians pull dedicated wiring for vanity sconces, overhead recessed lighting, ventilation units, and GFCI outlets.
    3. Framing and Structural Blocking: Carpenters secure solid wood blocking between studs to provide anchoring for heavy glass doors, floating vanities, and grab bars.
    4. Exhaust Ducting: Mechanical crews run rigid, smooth ductwork from the exhaust housing to the building exterior via the shortest possible path.
    5. Subfloor Preparation: Installers secure structural underlayment, checking deflection ratings to ensure the floor supports tile weight without flexing.
    6. Waterproofing Application: Crews install cementitious or waterproof foam backer boards, tape seams, apply membrane barriers, and perform a multi-hour standing water flood test on the shower pan to confirm zero leakage.

    Managing extensive home updates is easier when using a residential construction checklist to monitor trade milestones.

    Finishes, Trim-Out, and Final Inspection

    Once rough inspections and flood testing are approved, finish trades install decorative surfaces and fixtures:

    • Tile Setting and Grouting: Tile setters apply modified thin-set mortar, align floor and wall patterns, pack joints with high-performance grout, and seal change-of-plane transitions with color-matched silicone.
    • Vanity and Top Installation: Cabinet specialists anchor the vanity into structural wall blocking, shim for level, and secure stone counters with under-mount sinks.
    • Fixture Trim-Out: Plumbers mount showerheads, valve trim, sink faucets, and set toilets. Electricians fit decorative lighting and install trim plates.
    • Glass and Accessories: Installers mount custom glass shower doors, hang mirrors, and secure towel bars into pre-blocked wall locations.
    • Final City Approvals: Municipal building inspectors review mechanical, electrical, and plumbing work to close open permits.

    For broader property improvements that alter residential footprints, check our guide on major structural renovations to see how structural updates connect with interior remodeling.


    Smart Layout and Material Choices for Long-Term Durability

    Material selections for high-moisture rooms must balance aesthetic appeal with resistance to steam, humidity, and regular wear. Non-porous surfaces and proper ventilation protect underlying framing from water exposure over decades of daily use.

    When choosing components, prioritize commercial-grade materials designed for wet zones:

    • Porcelain Tile: Porcelain offers superior density and moisture resistance compared to standard ceramic, making it ideal for wet shower floors and surrounds.
    • Engineered Quartz: Quartz slabs provide non-porous vanity surfaces that resist staining and etching without requiring periodic chemical sealers.
    • Forged Brass Valves: Solid brass valve bodies equipped with ceramic disc cartridges prevent internal corrosion and withstand continuous hot water exposure far better than plastic alternatives.
    • High-Capacity Ventilation: Low-sone exhaust fans remove humid air quietly, encouraging household members to operate them consistently during and after showers.

    Optimizing Floor Plans for Flow and Storage

    Careful spatial planning maximizes usable square footage and improves traffic flow through the room:

    • Zero-Threshold Showers: Recessing shower floor framing creates a barrier-free entry that removes trip hazards and supports accessibility.
    • Double Vanity Spacing: Establishing adequate clearance between dual basins ensures two people can use the vanity simultaneously without crowding.
    • Private Water Closets: Enclosing the toilet in a dedicated compartment provides privacy in primary bathrooms while leaving the main area accessible.
    • In-Wall Niches: Utilizing vertical space between wall studs creates recessed storage for shower essentials without encroaching on standing room.

    What Mistakes Should You Avoid When Renovating a Bathroom?

    Bathroom remodeling errors often lead to subfloor rot, mold growth, and costly structural repairs. Because moisture barriers and supply plumbing remain concealed behind tile, installation shortcuts quickly produce hidden property damage.

    Critical Moisture and Permitting Pitfalls

    Avoiding common renovation missteps protects your home and prevents premature fixture failure:

    1. Skipping Shower Pan Flood Tests: Setting tile over an unverified shower pan risks undetected pan leaks. Installers should always plug the drain, fill the pan with water, and let it stand to confirm complete watertight integrity before tiling.
    2. Venting Exhaust Fans into Attic Spaces: Exhaust ducts routed into unconditioned attics dump warm, moist air across roof framing, causing wood decay and mold formation. Ducts must vent directly outdoors.
    3. Ignoring Subfloor Flex: Heavy tile assemblies crack quickly if installed over bouncy or uneven subflooring. Contractors must verify joist spans and add structural underlayment to prevent movement.
    4. Bypassing Municipal Building Permits: Unpermitted electrical and plumbing work can complicate insurance claims and create hurdles during home resale. Proper permits verify that work meets code.
    5. Using Inadequate Wall Substrates: Standard drywall or basic green board should never serve as a direct tile backer in wet shower enclosures. Install cement backer boards or waterproof foam panels with continuous membrane barriers.

    Evaluating long-term project value across a property is easier with our analysis on home renovation project returns. Additional guides on structural modifications and residential planning are available on our renovation insights blog.


    Frequently Asked Questions

    What is a realistic budget for a bathroom remodel?

    A balanced bathroom remodel budget allocates the largest share to skilled trade labor, including licensed plumbing, electrical rough-ins, structural framing, and waterproofing. Rough infrastructure materials, such as cement backer units, sheet membranes, subfloor underlayment, and drain assemblies, form another key expense. The remaining funds cover finish materials, including vanities, quartz surfaces, porcelain tile, plumbing fixtures, and custom shower glass enclosures.

    What does a basic budget bathroom remodel look like?

    Lower-cost bathroom renovations focus strictly on surface-level cosmetic updates without altering underlying plumbing or electrical infrastructure. This typically involves repainting walls, swapping an existing vanity for a pre-assembled stock unit, replacing light fixtures in their current locations, and installing standard drop-in tub surrounds. Structural framing, wall demolition, layout changes, and custom tile work are excluded at this tier.

    Can I renovate my bathroom on a very tight budget?

    Renovating on a very restricted budget requires limiting work to cosmetic maintenance, do-it-yourself painting, and direct fixture swaps. Homeowners can re-caulk joints, install modern cabinet hardware, change sink faucets, and replace old mirrors without opening walls. Structural alterations, shower pan rebuilds, moving drain lines, or replacing wall tile require licensed trade labor and specialized materials that quickly exceed minimal budgets.

    What to avoid when renovating a bathroom?

    Homeowners should avoid skipping shower pan leak tests, terminating exhaust vents into attic spaces, and tiling over unreinforced, flexible subfloors. It is equally important to avoid working with unlicensed contractors who bypass municipal building permits. Choosing poor-quality plastic plumbing valves or using non-waterproof drywall inside shower enclosures should also be avoided, as these shortcuts frequently lead to hidden leaks and costly structural repairs.

  • Modular Homes Explained: How They Work & What to Know

    Modular Homes Explained: How They Work & What to Know

    Modular homes are permanent residential buildings constructed off-site in individual sections within a climate-controlled manufacturing plant, then transported to a building parcel and assembled on a permanent concrete foundation. Unlike mobile or manufactured units, modular homes follow the International Residential Code and local municipal building standards, making them structurally and legally identical to traditional on-site framing. Once set in place and inspected by local authorities, these structures appraise, finance, and appreciate on the same terms as standard site-built properties.

    Modular Homes Explained: How They Work & What to Know

    What Is a Modular Home and How Does It Differ From Manufactured Housing?

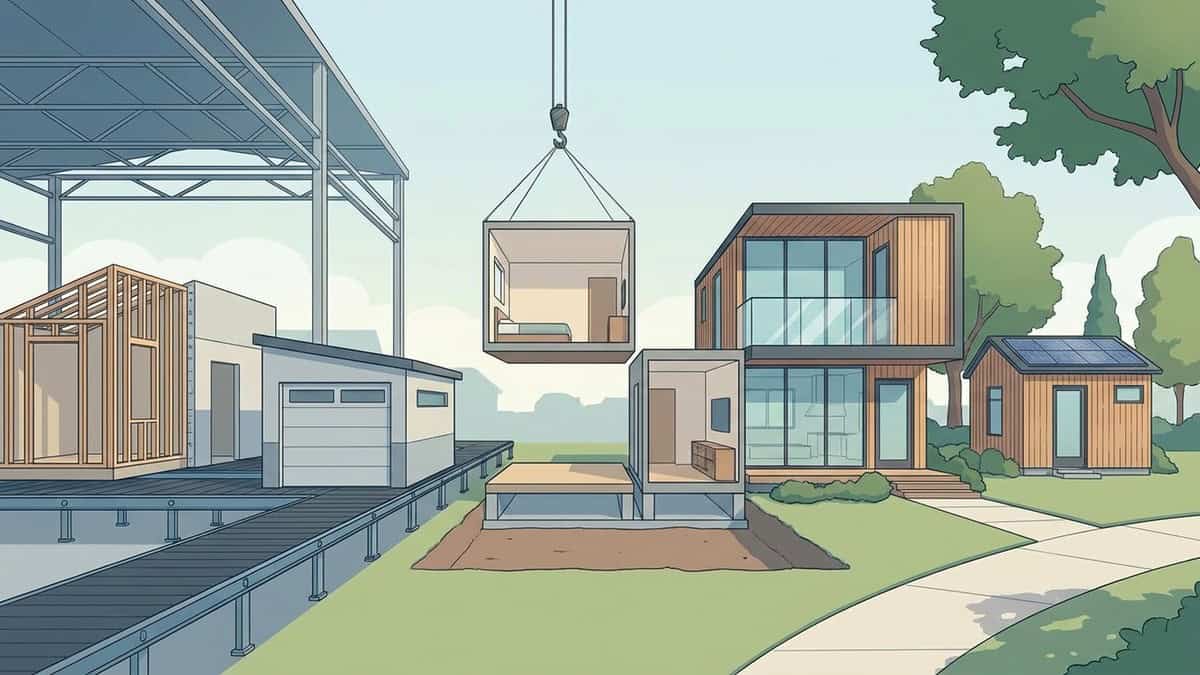
    A modular building begins as separate structural units assembled along an indoor production line. Each module contains dedicated floor framing, wall studs, structural sheathing, rough plumbing lines, electrical wiring runs, insulation, and hung drywall. Transport trailers haul the finished modules directly to the job site. Once there, an industrial crane lifts each box into position on top of an engineered concrete slab or crawl space foundation, where carpenters anchor the modules together and finish interior and exterior connections.

    The fundamental distinction separating modular structures from manufactured housing is the governing building standard and property deed classification:

    • Modular Construction: Built in compliance with the International Residential Code (IRC) and municipal building codes enforced by local city inspectors. Units are permanently secured to engineered concrete foundations, becoming real property tied directly to the land deed.
    • Manufactured Housing: Fabricated to meet the federal Department of Housing and Urban Development (HUD) Code. These structures rest on permanent steel chassis with integrated wheel axles, often classifying them as personal property titled through motor vehicle departments unless a formal real-estate conversion process takes place.

    Because modular structures adhere strictly to regional IRC standards, commercial lenders finance them using standard residential construction loans that convert into permanent mortgages. Real estate appraisers evaluate completed modular homes against local site-built comparable sales, and county tax assessors value them using standard residential appraisal schedules.

    Construction Standards and Legal Classifications

    Construction Feature Modular Homes Manufactured Housing Traditional Site-Built Homes
    Governing Building Code International Residential Code (IRC) & local city codes Federal HUD Code International Residential Code (IRC) & local city codes
    Foundation Requirement Permanent engineered concrete slab, stem wall, or piers Steel chassis on piers, ground anchors, or concrete pad Permanent engineered concrete slab, stem wall, or piers
    Mortgage Options Conventional, FHA, VA, and USDA mortgages Chattel loans or specialized manufactured home financing Conventional, FHA, VA, and USDA mortgages
    Legal Classification Real property attached to the land deed Personal property (unless legally converted to real estate) Real property attached to the land deed
    Appreciation Behavior Appreciates alongside local real estate markets Depreciates similarly to manufactured personal assets Appreciates alongside local real estate markets

    How Modular Construction Works from Factory Floor to Job Site

    The core operational advantage of modular construction is concurrent production scheduling. When building a custom home through standard field framing, tasks follow a linear sequence: lot clearing, excavation, foundation placement, framing, weatherproofing, and interior rough-ins. In modular projects, the factory builds the framing, plumbing, and electrical assemblies while earthmoving crews excavate the lot, trench utilities, and pour the concrete foundation on-site.

    1. Architectural Engineering and Plan Approval: Architects divide the residential floor plan into transportable structural modules. Engineering drawings must receive simultaneous approvals from third-party factory inspection agencies and local municipal building departments before construction begins.
    2. Concurrent Site Development and Factory Fabrication: While factory technicians frame wall panels, pull wiring harnesses, install thermal insulation, and hang drywall in an indoor facility, the on-site general contractor manages soil testing, tree clearing, formwork setting, and foundation curing.
    3. Module Transit and Staging: Flatbed carriers transport the weatherproofed modules across highway routes to the building parcel. A heavy-duty mobile crane arrives on-site and positions its outriggers on reinforced ground pads adjacent to the concrete foundation.
    4. Crane Placement and Anchor Setting: The crane hoists each module by integrated structural lift points, positioning the boxes onto the foundation sill plates. Framing crews install engineered tie plates, hold-downs, and anchor bolts to lock the boxes to the foundation and to adjacent modules along structural marriage walls.
    5. The Button-Up Construction Stage: Field crews complete the marriage lines where separate modules connect. This work involves patching drywall joints, laying continuous flooring across module thresholds, locking roof rafters together, and installing exterior siding across seam lines.
    6. Mechanical, Electrical, and Plumbing Hookups: Licensed trade contractors connect the factory-installed utility chases to the main electrical panel, water supply manifold, municipal sewer line, and exterior HVAC condenser units.
    7. Final Municipal Inspection: Local city building officials evaluate the foundation anchoring, rough utility connections, structural tie-downs, and life safety components before issuing the Certificate of Occupancy.

    Environmental Controls and Framing Precision

    Field-framed lumber often sits exposed to rain, summer sun, and varying humidity levels for weeks before the roof and exterior wrap seal the structure. Wet framing lumber can warp, twist, or crown after installation, which creates uneven subfloors, cracked drywall corners, or sticking interior doors months down the road. Indoor modular facilities store kiln-dried lumber in climate-controlled warehouses. Workers use automated cutting stations, steel jigs, and pneumatic clamping tables, ensuring flat wall surfaces, square corners, and tight structural envelopes that retain interior conditioning.

    Practical Benefits and Structural Trade-Offs of Modular Homes

    Modular fabrication offers major schedule efficiencies, yet lot conditions and transport boundaries introduce clear physical constraints.

    The Primary Advantages

    • Accelerated Project Schedules: Fabricating the home in a plant while preparing the lot and pouring the foundation cuts total construction delivery time by eliminating sequential delays.
    • Dry Material Management: Complete shelter from rain and humidity during framing protects structural components from mold formation, rot, and moisture retention.
    • Staged Quality Checks: Factory inspectors check structural framing, wiring paths, plumbing pressure tests, and insulation coverage at dedicated checkpoints before wrapping the modules for shipment.

    The Physical Trade-Offs

    • Module Transportation Limits: Highway regulations govern maximum module widths, lengths, and heights on public roads. These dimensional caps make extremely wide open-concept spans or steep, complex rooflines difficult without expensive structural steel additions assembled in the field.
    • Crane Footprint and Ground Bearing Requirements: Setting modular units requires a heavy hydraulic crane. The parcel must provide a level, compacted staging pad capable of supporting intense outrigger ground pressure without risking soil collapse.
    • Street Access and Overhead Clearances: Narrow residential roads, sharp turns in cul-de-sacs, low-hanging tree canopies, and low overhead power lines can prevent delivery carriers and crane equipment from reaching the building footprint.

    Site Preparation, Foundation Engineering, and Texas Permitting

    Every modular building requires civil earthwork, engineered foundation designs, and local municipal permits. A modular unit cannot compensate for an unstable subgrade or an improperly engineered concrete pad.

    North Texas features highly active clay soils that swell during wet seasons and shrink during dry spells, making accurate foundation engineering critical. Placing a modular unit on an inadequate slab causes foundation movement, tearing open drywall marriage lines and misaligning interior doors. Geotechnical soil sampling determines whether your building site requires a post-tension concrete slab, drilled concrete piers anchored to bedrock, or an engineered perimeter stem wall.

    Our team coordinates structural engineering, zoning analysis, and site work using a comprehensive residential construction checklist. We manage boundary surveys, setback verifications, excavation, utility lateral trenching, and local city inspections from start to finish. PRO Construction provides Accessory Dwelling Units (ADU), Garage Conversions, Garage Builds for Homeowners in Keller, TX and surrounding communities seeking additional living space, rental income, or guest accommodations..

    Before bringing modules onto your land, your general contractor must execute three core preparatory phases:

    • Zoning and Setback Compliance: Verifying that the proposed footprint satisfies all primary home or accessory structure setbacks from rear, front, and side property boundaries.
    • Civil Drainage and Site Grading: Shaping the subgrade to channel storm runoff away from the foundation perimeter with intentional swales and drainage gradients.
    • Utility Lateral Infrastructure: Excavating trenches to run municipal water lines, sanitary sewer connections, natural gas piping, and underground electrical conduit directly to the designated module tie-in points.

    Modular Homes vs. Site-Built Construction: Choosing for Your Lot

    Deciding between modular fabrication and conventional stick framing depends on physical lot access, architectural complexity, and custom structural requirements.

    Project Factor Modular Construction Traditional Site-Built Framing
    Site Accessibility Requires wide street access, crane staging area, and clear overhead space Can be built on narrow lots, infill properties, and tree-dense parcels
    Architectural Customization Constrained by transportable box dimensions and highway shipping rules Unlimited structural shapes, custom ceiling heights, and complex rooflines
    Weather Risk Minimal framing weather exposure during indoor manufacturing Materials exposed to regional weather until the roof and house wrap are complete
    Labor Coordination Factory-based assembly line with specialized on-site completion crews Local trade contractors perform all structural framing and finish work on site
    Modifications During Construction Rigid floor plans; structural changes cannot occur after factory production begins High flexibility; framing adjustments can be made directly in the field

    Evaluating your property requires analyzing three core spatial realities:

    1. Physical Lot Access: If your building pad sits behind an existing residence, within a heavily wooded area, or along a narrow suburban street, traditional stick framing is usually the practical choice. Standard lumber, trusses, and materials can be carried through narrow side gates without clearing mature trees or dropping utility lines.
    2. Backyard Guest Houses and Detached Suites: When weighing the differences between a detached guest house or home addition, modular boxes work well if crane outriggers can safely operate from the driveway or street. When building on your lot with complex tie-ins to an existing home, hardscaped pool deck, or specific roof pitch, custom site framing delivers the precision needed to match existing exterior brickwork, siding, and trim profiles.
    3. Design and Structural Adjustments: On-site framing allows field modifications, custom vaulted ceilings, architectural window walls, and direct tie-ins with existing structures. Modular plans must remain strictly within the structural geometry of highway-transportable boxes.

    For property owners adding secondary living units, reviewing the process of building an ADU in North Texas ensures your selected building method aligns with municipal zoning, budget targets, and site conditions. Partnering with an integrated design-build project management team guarantees that engineering, foundation preparation, framing, and final finishes are handled through one unified point of contact.

    Frequently Asked Questions

    Is it cheaper to build a house or get a modular home?

    A modular structure often carries a lower base construction cost per square foot at the factory, but total finished costs tend to balance out with site-built construction once you account for land development. Property owners must fund civil excavation, soil testing, engineered concrete foundations, crane mobilization, transit permits, utility hookups, and finish carpentry along marriage seams. The primary financial benefit of modular homes comes from shorter construction loan timelines and reduced carrying costs rather than dramatic material savings.

    What is the downside of modular homes?

    The primary disadvantages of modular homes are shipping size restrictions, heavy machinery access requirements, and limited floor plan flexibility. Highway regulations restrict the width, height, and length of individual modules, making wide open spaces and steep rooflines difficult to achieve without supplemental structural steel. Additionally, narrow neighborhood streets, low-hanging electrical wires, mature trees, or wet soils can prevent delivery trucks and large cranes from accessing the property.

    Can you buy a modular home for $50,000?

    A full-size modular home built to International Residential Code standards cannot be purchased, delivered, and fully installed on a permanent foundation for $50,000. While small prefabricated storage shells or basic mobile units may exist at lower price points, a code-compliant residential modular home requires extensive engineering, engineered concrete foundation work, crane rigging, utility hookups, and municipal permitting that exceed that figure.

    What does it mean to be a modular home?

    Being a modular home means the residence is engineered and built in standardized three-dimensional sections within an off-site manufacturing plant, then transported to a property and permanently anchored to a foundation. Unlike manufactured homes governed by federal HUD rules, modular homes comply with regional and municipal International Residential Code standards. Once assembled and connected to utilities, a modular home is classified, taxed, and financed as permanent real property.

  • Plans for Garage with Apartment Above: Builder Guide

    Plans for Garage with Apartment Above: Builder Guide

    Plans for garage with apartment above designs combine ground-level vehicle storage with self-contained living quarters on the upper floor. Successful layouts require careful coordination of structural floor spans, dedicated utility runs, fire-rated ceiling assemblies, and practical stair placement. Selecting the right blueprint depends on your lot dimensions, local zoning setbacks, and whether the upper level will function as a long-term rental, guest suite, or dedicated home office.

    Plans for Garage with Apartment Above: Builder Guide

    Standard Layout Options for Plans for a Garage with Apartment Above

    Choosing functional plans for a garage with an apartment above starts with aligning the ground-floor structural grid with the upper-level floor plan. Standard two-car footprints generally range from 24 by 24 feet up to 24 by 30 feet. After subtracting exterior wall framing, support columns, and stair enclosures, the upper level provides an efficient studio or a private one-bedroom layout.

    The roof profile dictates the volume of usable standing area and wall space on the upper floor:

    • Standard Gable Roofs: Straightforward and economical to frame, but the ceiling slopes rapidly along the exterior edges, reducing usable headroom unless framed on raised knee walls.
    • Shed or Doghouse Dormers: Framing dormers into a standard gable roof opens up vertical wall space, creating functional alcoves for kitchenettes, bathroom vanities, or work desks.
    • Gambrel (Carriage House) Roofs: The steep lower slope provides near-vertical perimeter walls, maximizing standing room and storage across the entire upper perimeter.
    • Full Two-Story Framing with Low-Pitch Roof: Delivers maximum interior volume and standard wall heights throughout, though it creates a taller exterior profile subject to local height caps.
    Garage Footprint Typical Upper Living Space Best Suited Layout Primary Advantage
    24′ x 24′ (2-Car) 400 – 480 sq. ft. Open Studio / 1 Bath Compact footprint fitting narrow setbacks
    24′ x 30′ (2-Car Deep) 550 – 620 sq. ft. 1 Bedroom / 1 Bath + Kitchen Dedicated bedroom privacy and interior stairs
    24′ x 36′ (3-Car / Workshop) 700 – 800 sq. ft. 1–2 Bedroom / 1–2 Bath Full apartment scale with flexible ground-level shop area

    Two-Car Versus Three-Car Base Dimensions

    Selecting a two-car or three-car base changes the upstairs living layout and the lower structural engineering. A two-car footprint creates an open-concept living zone where the kitchen, dining, and sleeping areas flow together. This layout keeps plumbing fixtures grouped along shared wet walls to preserve open floor area.

    Expanding to a three-car garage footprint widens the upper envelope significantly. The additional width allows for separate bedrooms, a larger bathroom, dedicated laundry equipment, and an expanded kitchen workspace. On the ground floor, the third bay can remain parking, or it can be partitioned during framing to serve as a ground-level foyer, mechanical room, or workshop. Homeowners planning their layout can explore how to choose and design functional floor plans to refine room flow before breaking ground.

    Interior Versus Exterior Staircase Placement

    Stair location represents a key decision in detached adu construction and garage design.

    Interior stairs provide sheltered, secure access and create a cohesive exterior elevation. An interior straight-run or switchback stair assembly requires space on both levels, which can reduce vehicle clearance downstairs or crowd the upper entryway.

    Exterior stairs keep the entire ground-level vehicle bay open and create clear separation between parking and living zones. They also offer independent, private access for guests or tenants. The considerations involve weather exposure, long-term exterior maintenance, and ensuring the exterior landing complies with property setback boundaries.

    Structural and Code Requirements for Living Space Above Garages

    Constructing an apartment over a garage requires different engineering than building standard single-story detached garages. The structure must support substantial residential live loads overhead while preserving an open, column-free ground floor for parking.

    Floor Framing and Load-Bearing Support

    Ceiling joists designed only for light attic storage cannot carry living area loads. Habitable rooms require floor systems engineered to minimize deflection, preventing cracked floor tile, vibrating fixtures, and springy floors.

    Builders use specific framing systems to span wide openings without center support posts:

    1. Engineered I-Joists: Provide high strength-to-weight ratios and consistent dimensions over long spans, ensuring a flat, level subfloor.
    2. Open-Web Floor Trusses: Allow plumbing supply lines, drain lines, electrical conduits, and HVAC ductwork to pass directly through the open framework without drilling holes.
    3. Laminated Veneer Lumber (LVL) or Steel Flitch Beams: Positioned over wide garage door openings and central spans to transfer upper-level structural weights safely down to corner foundation footings.

    Building foundations must be engineered for these combined weights. Standard concrete slabs without thickened perimeter footings or interior point-load pads risk shifting or cracking under multi-story loads. For a closer look at architectural drawings and structural plan sets, read our guide to house blueprints and plans.

    Fire Separation and Air Sealing Standards

    Residential building codes require strict fire and vapor separation between lower parking areas and upper living spaces. Fuel, exhaust fumes, and stored equipment require specific protective assemblies:

    • Fire-Rated Ceiling Drywall: The entire garage ceiling beneath living space requires minimum 5/8-inch Type X fire-rated gypsum board, with all joints taped and sealed.
    • Structural Member Protection: Any framing posts or bearing walls that support the upper story require identical fire-rated wallboard coverage.
    • Air and Vapor Barriers: Carbon monoxide and volatile fumes can migrate through framing gaps. Electrical boxes, pipe pass-throughs, and structural seams must be sealed with fire-rated acoustic sealant or expanding foam before drywall installation.
    • Self-Closing Fire Doors: Any door connecting an enclosed garage bay to an interior stairwell must be a solid-core wood, insulated steel, or 20-minute fire-rated door equipped with self-closing hinges.

    Utility Routing and Climate Control for Garage Apartments

    Routing plumbing, electrical service, and climate control to a garage apartment requires specialized detailing. Unlike standard residential construction where mechanicals sit inside a fully conditioned envelope, garage apartments sit directly above an unconditioned space.

    Mini-Split Heat Pumps Versus Central Ductwork

    Extending a primary home’s existing central heating and cooling system to a detached garage is rarely practical. Duct runs lose thermal efficiency over long distances, and shared ductwork risks transferring garage odors into the main home.

    Ductless mini-split heat pump systems provide the standard heating and cooling solution for garage apartment plans:

    • Zoned Temperature Management: Occupants adjust their own heating and cooling without altering settings in the main home.
    • Compact Installation: Mini-split line sets contain narrow refrigerant piping and electrical wiring that route easily through stud walls.
    • Consistent Comfort: Variable-speed inverter systems deliver steady heating and cooling over an unconditioned garage floor.

    Insulating the floor framing cavity directly beneath the living quarters is essential for thermal stability. Installing high-density mineral wool, dense batt insulation, or closed-cell spray foam isolates the living space from cold concrete in winter and garage heat in summer.

    Electrical Subpanels and Plumbing Runs

    Aligning upper kitchens and bathrooms along common walls keeps drain-waste-vent piping consolidated into a single vertical chase running down an exterior or utility garage wall. Running drain traps horizontally across an unheated garage ceiling lowers vehicle headroom and leaves water pipes vulnerable to freezing. All domestic water supply lines must remain inside the heated side of the floor insulation envelope.

    Electrical planning centers around a dedicated subpanel placed in the garage or upper unit. Sizing this subpanel depends on equipment needs:

    • Cooking Appliances: Electric cooktops and ranges require dedicated 240-volt circuits.
    • Water Heating: Heat pump water heaters or gas tankless systems supply hot water without overloading electrical capacity.
    • Mini-Split Units: Each outdoor condenser requires dedicated electrical disconnects and circuits.
    • Ground-Level EV Charging: Level 2 vehicle charging stations require dedicated capacity planned during panel sizing.

    PRO Construction provides Accessory Dwelling Units (ADU), Garage Conversions, Garage Builds for Homeowners in Keller, TX and surrounding communities seeking additional living space, rental income, or guest accommodations..

    Site Planning: Setbacks, Heights, and Regional Engineering

    Zoning regulations, municipal codes, and site topography dictate how garage apartment plans fit on a property.

    Property Setbacks and Maximum Ridge Heights

    Detached secondary structures must comply with specific local zoning rules that often differ from primary residence guidelines:

    • Side and Rear Setbacks: Municipalities establish required distances between secondary buildings and neighboring boundaries. Two-story structures sometimes carry larger setback requirements than single-story garages to preserve privacy.
    • Height Restrictions: Cities frequently set overall height limits for accessory structures, measured from average grade to the roof ridge. Steep roof pitches may need adjustment to comply with municipal height caps.
    • Impervious Surface Limits: Local lot coverage maximums dictate how much total land can be covered by buildings, concrete driveways, and flatwork.

    Homeowners planning projects can work alongside experienced local general contractors to confirm local building codes across municipal jurisdictions before ordering engineered drawings.

    Adapting Stock Blueprints to Local Soil Conditions

    Stock floor plans purchased online offer useful layout ideas, but they require structural adjustments before receiving municipal building permits.

    Plans must be engineered for regional soil conditions and weather loads. Expansive clay soils shift significantly between wet and dry seasons. A foundation designed for rock or sand will fail in reactive clay without an engineered post-tensioned slab or drilled concrete piers. Structural plans must also verify regional wind resistance, structural bracing, and direct utility trench routing.

    Common Mistakes to Avoid in Garage Apartment Plans

    Addressing small layout details during the design phase prevents costly alterations during framing and mechanical rough-ins.

    1. Placing Sleeping Areas Over Garage Door Openers: The mechanical noise and vibration of ceiling-mounted door openers travel through standard floor framing. Placing living rooms or kitchens over garage doors, while positioning bedrooms over storage areas or quiet bays, prevents sleep disturbances. Wall-mounted jackshaft openers also eliminate ceiling vibrations.
    2. Underestimating Stair Dimensions: Blueprints can look spacious until standard stair runs are factored in. Safe stairs require proper rise and run dimensions, continuous handrails, and clear landings at the top and bottom.
    3. Omitting Floor Acoustic Insulation: Footsteps on an upper subfloor create impact noise in the garage, while ground-level sounds easily travel upward. Placing acoustic sound batts between floor joists, gluing subfloor sheets, and mounting ceiling drywall on resilient channels dampens sound transmission.
    4. Overlooking Ground-Level Mechanical Closets: Water heaters, filtration units, and electrical panels require accessible locations. Building a small utility closet on the ground floor keeps equipment accessible without consuming living space upstairs.
    5. Positioning Windows Without Regard for Privacy: Garage apartment walls sit higher than single-story fence lines. Using horizontal awning windows or elevated sill heights brings in daylight while maintaining privacy for neighbors and tenants alike.

    To evaluate layout options for your property, explore our complete residential construction services, review our approach to second-story additions, or contact our design team to discuss your plans for a garage with an apartment above.

    Frequently Asked Questions

    What is a garage with an apartment above it called?

    A garage with living space above is commonly known as a carriage house, garage apartment, or detached accessory dwelling unit (ADU). Historically, these buildings housed horse-drawn carriages on the ground floor with living quarters for caretakers above. Today, they function as independent rental units, guest houses, in-law suites, or private home offices.

    Can you show me some plans for a 24×24 garage with an apartment?

    A 24-by-24-foot garage provides roughly 576 gross square feet per level, yielding around 400 to 480 square feet of usable upper living space after accounting for framing and stairs. Standard plans for this footprint feature an open studio layout or a compact one-bedroom floor plan with a full bathroom, kitchenette, and open living area. Using exterior stairs or incorporating shed dormers maximizes the usable standing space upstairs.

    How much does it cost to build a garage with an apartment above?

    Total costs depend on foundation engineering, framing choices, utility connection distances, and interior finishes. Detached structures requiring independent sewer connections, upgraded electrical subpanels, and engineered framing cost more than basic ground-level storage buildings. Obtaining a site-specific estimate from a licensed builder ensures accurate budgeting for your specific lot.

    Can I build an apartment above my garage?

    Building an apartment above an existing garage is possible if zoning allows ADUs and the existing structure passes engineering checks. Most single-story detached garages were built with standard 2×4 framing and non-reinforced slabs that cannot support the dynamic weight of a second story without underpinning footings and reinforcing walls. In many instances, building a new, purpose-engineered structure from the ground up proves more cost-effective than retrofitting an older garage.

  • Hiring a General Contractor Near Me: What to Look For

    Hiring a General Contractor Near Me: What to Look For

    Finding the right general contractor near me requires verifying third-party credentials, demanding single-source accountability, and choosing a contract with a clear pricing ceiling. A qualified general contractor manages structural engineering, city permitting, daily trade coordination, and final inspections under one contract. This comprehensive oversight protects your property value and ensures your residential project meets local building codes from foundation to finish.

    Hiring a General Contractor Near Me: What to Look For

    What Does a General Contractor Actually Do on a Residential Build?

    A general contractor serves as the master coordinator, legal permit holder, and central point of accountability for a major residential construction project. Rather than performing every physical task themselves, a general contractor coordinates the complete sequence of construction trades, manages municipal compliance, purchases commercial-grade materials, and enforces job site quality standards.

    When you undertake major structural changes—such as ground-up construction, attached additions, or extensive interior reconfigurations—the construction process involves dozens of separate phases. If these phases are managed without clear oversight, errors occur at the connection points between trades. A general contractor creates a critical path schedule to ensure foundation footings cure properly before framing lumber arrives, rough plumbing passes inspection before insulation seals the walls, and electrical service upgrades align with heating and cooling ductwork installations.

    Planning & Engineering -> Permitting & Code Review -> Site Prep & Foundation -> Structural Framing -> Rough-In Mechanicals -> Insulation & Drywall -> Interior Finishes -> Final Inspections

    Beyond daily logistics, general contractors carry the legal and financial liability for the job site. They maintain commercial liability policies and builder’s risk insurance, collect lien waivers from suppliers, and ensure every worker on your property operates under proper safety protocols.

    General Contractor vs. Specialized Subcontractor

    Understanding the distinction between a specialized trade subcontractor and a licensed general contractor is critical before breaking ground. Subcontractors specialize in a single discipline, such as concrete flatwork, rough framing, electrical wiring, or tile setting. While highly skilled within their specific scope, subcontractors do not manage the broader project ecosystem.

    Factor Specialized Subcontractor Licensed General Contractor
    Scope of Work Single trade (e.g., electrical, plumbing, framing) Complete end-to-end project management
    Permit Management Often pulls only trade-specific trade permits Coordinates master building permits and engineering
    Site Coordination Works only when their trade is scheduled Directs daily sequencing of all trades on-site
    Liability & Insurance Individual trade insurance Master commercial liability, builder’s risk, and site safety
    Design Integration Follows provided plans for single trade Coordinates architecture, structural engineering, and layout
    Schedule Control Responsible only for own arrival and completion Controls critical path timeline across all trades

    If a homeowner attempts to act as their own builder and hire subcontractors directly, they assume all general contractor liabilities. This means the homeowner must coordinate site deliveries, resolve conflicts between the framer and the HVAC installer, schedule city inspections in the proper legal sequence, and assume financial liability if an unvetted worker is injured on the property. Hiring an experienced general contractor consolidates that responsibility into a single point of contact.

    Managing Permitting and Municipal Inspections

    Navigating local building departments is one of the most technical tasks a general contractor handles. Every residential municipality enforces specific building codes, zoning setbacks, impervious cover maximums, and architectural design standards.

    A general contractor prepares the comprehensive submittal package required by the city or county development office, which typically includes:

    1. Architectural Plans: Detailed floor plans, roof framing layouts, and exterior elevations drawn to scale.
    2. Structural Engineering Details: Engineered foundation plans, beam calculation sheets, and shear wall schedules stamped by a registered professional engineer.
    3. Site Plot Plan: A survey showing property lines, utility easements, drainage patterns, and proposed building footprints.
    4. Energy Compliance Documentation: Calculations showing insulation R-values, window solar heat gain coefficients, and HVAC duct testing requirements.

    Once the municipality approves the plans and issues the building permit, the general contractor schedules and passes all mandatory stage inspections. For complex jobs like second-story additions or detached builds, inspectors must physically sign off on the foundation formwork, rough plumbing underground, open-wall framing, rough mechanical/electrical/plumbing (MEP), insulation, and final building finishes before issuing a Certificate of Occupancy. If you want to understand how blueprints translate into municipal permits, review our guide to house blueprints and plans.


    How to Vet a General Contractor Near Me

    Selecting the right professional requires structured due diligence. Online review aggregators often mix verified client feedback with generic testimonials, making it difficult to assess true builder performance. To choose a dependable local builder, you need to verify institutional credentials, review active insurance coverage, and assess past work completed in your specific jurisdiction.

    When researching a general contractor near me, verify how long the business has operated locally under the same legal name. Established general contractors develop long-standing relationships with skilled trade crews, local building inspectors, and regional material suppliers, which prevents costly supply delays and scheduling bottlenecks.

    Verify BuildZoom/State Licenses -> Confirm General Liability & Workers' Comp -> Check Local Municipal Records -> Interview 3 Recent Past Clients -> Conduct In-Person Site Walkthrough

    Key Verification Checklist: Licenses, Insurance, and Scores

    Never rely solely on verbal assurances or clean marketing materials. Ask prospective builders to provide written proof of the following essential credentials before requesting an estimate:

    • Third-Party Verification Scores: Check independent scoring databases such as BuildZoom. These platforms analyze municipal permit histories, state regulatory filings, and verified consumer reports. For example, BuildZoom scores (such as PRO Construction’s 137 score ranking in the top 1% of Texas contractors) provide an objective measure of contractor activity, license standing, and permit volume.
    • Commercial General Liability Insurance: Verify an active policy with sufficient coverage limits per occurrence to protect your home and structure from accidental property damage. Ask for a Certificate of Insurance (COI) issued directly by the insurance broker listing you as the certificate holder.
    • Workers’ Compensation Coverage: Ensure the contractor carries active workers’ compensation insurance covering their direct employees and requires all subcontracted crews to carry equivalent protection. This shields you from financial liability if an injury occurs on your property.
    • Municipal Registrations and Bonds: In many regions, cities require general contractors to register annually with the local building department and post surety bonds before pulling residential permits.
    • Lien Waiver Protocols: Confirm that the contractor issues conditional and unconditional lien waivers alongside each draw request. This document proves that all material suppliers and subcontractors have been paid in full, protecting your property from mechanic’s liens.

    For deeper insights into contractor screening steps, read our detailed guide on vetting construction general contractors.

    Questions to Ask Former Clients Before Signing

    Speaking with three to four previous clients who completed projects similar in scale to your own provides clear insight into how a contractor operates under real-world job conditions. Ask direct, process-oriented questions:

    1. Did the general contractor maintain a dedicated on-site project manager, or did you have to coordinate with sub-crews directly?
    2. How were unforeseen structural or framing issues communicated and priced during the build?
    3. Did the project reach substantial completion within the timeframe specified in the initial contract schedule?
    4. How clean was the job site kept at the end of each working day, especially regarding dumpsters and material staging?
    5. How responsive was the team when handling final punch-list items and warranty requests after final payment was released?

    What Are Red Flags When Hiring a Contractor?

    Identifying early warning signs during initial consultations and bid reviews saves tens of thousands of dollars in property damage, legal disputes, and unfinished construction. Unqualified or financially unstable operators rely on distinct patterns to secure jobs quickly without assuming proper operational liability.

    If an individual claims to manage high-end residential work but lacks basic professional infrastructure—such as an established local office, dedicated site supervisors, or standard digital contracts—step back and reevaluate.

    The Warning Signs in Initial Bids and Estimates

    A professional residential estimate requires days of careful takeoffs, subcontractor pricing checks, and material cost verifications. Be alert to these bidding red flags:

    • The Vague, Single-Page Bid: An estimate that lumps complex structural work into broad categories like "Framing and Finishes – Lump Sum" without itemizing materials, structural lumber dimensions, electrical fixtures, or square footage allowances hides future change orders.
    • Demands for Large Upfront Cash Deposits: Demanding a large upfront deposit before architectural drawings are finalized, structural engineering is approved, or materials are delivered to your property is a major warning sign. Legitimate contractors structure payments around verifiable progress milestones.
    • Unrealistically Low Bids: If one bid comes in substantially lower than two or three other detailed proposals, the low bidder has likely missed critical scope items, underpriced trade labor, or omitted necessary structural engineering and permit fees. They will often attempt to recover this margin through aggressive change orders midway through the project.
    • Absence of a Written Draw Schedule: A clear contract must define what completed work triggers each progress payment, such as "Foundation Pour Inspection Passed" or "Framing and Roof Decking Complete."

    Why Permitting Shortcuts Threaten Your Property Value

    One of the most dangerous red flags is a contractor who asks you to pull the building permit as an "owner-builder" or suggests skipping municipal permits to "save money and time."

    When an unverified builder pressures a homeowner to pull an owner-builder permit, they transfer all legal and financial liability to the property owner. If a structural error occurs, an uninspected gas line leaks, or a worker is injured on the property, the homeowner’s insurance policy may deny coverage because the owner legally confirmed that they were personally supervising the construction work.

    Permit Shortcuts Taken -> No City Rough-In Inspections -> Uncorrected Framing/Electrical Hazards -> Failed Final Resale Appraisals -> Uninsurable Structural Liabilities

    Unpermitted construction creates long-term real estate liabilities. When selling your home, buyers’ lenders and municipal title searches will verify permit records against county tax footprint data. If an unpermitted attached garage or home addition is discovered, the lender may refuse financing until the structure is brought up to code. This can require opening finished drywall so inspectors can review concealed wiring, plumbing, and framing.


    Understanding Pricing Models: Cost-Plus vs. Guaranteed Maximum Price

    The contract structure you select dictates how financial risk is shared between you and your builder. In residential remodeling and custom construction, two primary pricing structures dominate the market: Cost-Plus contracts and Guaranteed Maximum Price (GMP) contracts.

    Contract Feature Cost-Plus Pricing Guaranteed Maximum Price (GMP)
    Price Predictability Low; total cost fluctuates with material and labor changes High; contractor guarantees costs will not exceed the set ceiling
    Risk Allocation Homeowner carries the risk of material price spikes and labor delays Contractor manages trade risk within the agreed budget ceiling
    Change Orders Continuous updates to labor hours and material invoices Used only for homeowner-requested changes in scope or unforeseen conditions
    Material Transparency Invoices provided with a fixed contractor markup fee Fixed allowances established in the contract schedule
    Best Suited For Highly experimental custom builds with undefined scopes Additions, garage conversions, custom homes, and structural builds

    In a Cost-Plus contract, the homeowner agrees to pay the actual cost of all materials, subcontractor labor, equipment rentals, and site fees, plus a specified contractor management fee percentage. While this model offers full transparency into invoices, it leaves the final budget open-ended. If framing labor takes three weeks longer than anticipated or lumber prices shift during construction, the homeowner absorbs every dollar of the increase.

    A Guaranteed Maximum Price (GMP) contract protects the homeowner by establishing a firm financial ceiling. The general contractor produces a detailed scope of work based on approved blueprints and engineering specifications. The contractor agrees that the total project cost will not exceed the agreed-upon ceiling, provided the original scope does not change.

    Inside a GMP contract, finish selections (such as luxury vinyl plank flooring, custom cabinetry, quartz countertops, and exterior siding) are managed through Allowance Schedules. An allowance assigns a specific dollar budget per square foot or unit for selected finishes. If you choose materials within your allowance, your price remains fixed at the agreed contract figure. If you are planning a build and want to explore budget arrangements, review our financing options to align your scope with realistic lending milestones.


    How to Prepare Your Property and Scope Before Your First Consultation

    Preparing your documentation and functional requirements before meeting with general contractors streamlines the consultation and leads to more accurate bids. When builders have clear property parameters, they can assess structural feasibility, zoning allowances, and setback limits during the initial walkthrough.

    Locate Property Survey -> Check HOA Design Guidelines -> Separate Must-Haves from Wish Lists -> Prepare Site Access -> Establish Realistic Project Schedule

    1. Gather Legal Property and Site Documents

    Before your contractor arrives for an on-site evaluation, assemble the following property records:

    • Recorded Property Survey: Shows exact boundary lines, recorded utility easements, building setback lines, and existing structures. This document determines where you can legally expand your footprint.
    • HOA Bylaws and Design Guidelines: If you live in a planned development, your HOA may have strict rules governing exterior brick-to-siding ratios, roof pitch matches, maximum building heights, and material staging locations.
    • Septic or Utility Maps: If your home utilizes an on-site septic system, locate the septic tank and drain field lines to ensure new foundations or heavy equipment do not encroach on the system.

    2. Define Essential Project Goals vs. Wish-List Items

    Classify your requirements into structural necessities and optional finish upgrades. For example, if you are planning an ADU construction project or detached garage, identify the core structural elements you need first:

    • Core Structural Requirements: Square footage, number of bedrooms/bathrooms, ceiling heights, electrical service capacity (e.g., a dedicated 200-amp subpanel), and required plumbing fixtures.
    • Secondary Aesthetic Upgrades: Custom trim work, high-end stone countertops, automated garage doors, or custom outdoor patio connections.

    Separating your scope into core needs and aesthetic options allows your builder to present value-engineering alternatives if initial structural bids come close to your budget limit. If you are comparing single-room expansions with full structural conversions, read our guide on choosing a general contractor in Keller TX to understand how local builders scope complex residential spaces.

    3. Establish a Practical Timeline for Design and Permitting

    Quality construction requires structured design and administrative prep work before framing crews mobilize to your property. Allow adequate time for:

    • Initial architectural floor plans and 3D elevations
    • Structural engineering calculations and foundation design stamps
    • Municipal plan review, historic district approvals (if applicable), and permit issuance
    • Material procurement, including long-lead items like custom windows, structural trusses, and electrical switchgear

    PRO Construction provides Accessory Dwelling Units (ADU), Garage Conversions, Garage Builds for Homeowners in Keller, TX and surrounding communities seeking additional living space, rental income, or guest accommodations..

    To learn more about structural feasibility, zoning regulations, or to discuss an upcoming residential project with our building team, review our full list of construction services or contact our project team to schedule a consultation.


    Frequently Asked Questions

    What do most general contractors charge per hour?

    Residential general contractors manage comprehensive projects and do not bill by the hour for major structural additions or custom builds. Instead, licensed builders price projects using fixed-sum contracts, Guaranteed Maximum Price (GMP) structures, or milestone-based draws tied directly to physical progress (such as foundation completion, framing inspection, and dry-in). Hourly billing is typically reserved for handymen or isolated specialty trade repairs.

    What not to tell a contractor?

    Do not share your absolute maximum borrowing capacity before receiving an itemized scope of work, as this can result in an estimate built to match your maximum loan rather than the true cost of construction. Additionally, avoid demanding an unrealistically rushed completion date during initial talks. Rushing the pre-construction phase often leads builders to compress the time allotted for structural engineering, thorough material procurement, and code review, increasing the likelihood of costly change orders later.

    What is the best way to find a general contractor?

    The best way to find a dependable local general contractor is to cross-reference municipal building permit registries, check verified third-party scoring databases such as BuildZoom, and seek referrals from property owners who have completed similar structural additions. Confirm that prospective contractors have an established presence in your municipality, maintain active commercial liability and workers’ compensation policies, and provide direct access to an experienced on-site project manager throughout the build.

  • Tiny Homes: What North Texas Homeowners Must Know

    Tiny Homes: What North Texas Homeowners Must Know

    Permanent tiny homes built in North Texas are site-constructed accessory dwellings engineered to meet local municipal building codes and withstand regional climate conditions. Unlike temporary recreational vehicles or mobile units on trailers, a permanent backyard build provides dedicated long-term living quarters, anchors to an engineered foundation, and connects directly to municipal or on-site utilities. Homeowners must evaluate municipal zoning allowances, property setbacks, expansive clay soil conditions, and utility capacities before beginning construction.


    Tiny Homes: What North Texas Homeowners Must Know

    What Defines Permanent Tiny Homes on North Texas Properties?

    Across the Dallas-Fort Worth region, municipal building officials make a strict distinction between temporary trailers and permanent residential structures. A permanent backyard dwelling is a self-contained accessory structure built directly on a permanent concrete slab or pier-and-beam foundation. It contains dedicated zones for sleeping, sanitary facilities, food preparation, and year-round climate control.

    When city inspectors review building plans, they evaluate structural permanence, code compliance, and utility independence. Site-built construction ensures the structure satisfies residential safety requirements while adding recognized real estate equity to your parcel.

    Feature Permanent Site-Built Tiny Home Tiny Home on Wheels (THOW) / RV
    Foundation Type Engineered concrete slab or drilled pier-and-beam Steel chassis with axles and tow hitch
    Building Code International Residential Code (IRC) & local amendments Recreational vehicle safety standards
    Zoning Classification Accessory Dwelling Unit (ADU) or secondary dwelling Personal recreational property / vehicle
    Utility Integration Direct underground water, sewer, and electric lines Temporary plug-in shore cords and flexible hoses
    Property Valuation Permanent improvement added to county tax roll Depreciating personal property

    Foundation Systems vs. Wheeled Platforms

    The structural baseline determines whether a municipality treats your build as a legal residence or an unauthorized vehicle. Units built on steel trailer frames are classified under Texas law as travel trailers or recreational vehicles. Most suburban cities across North Texas explicitly prohibit long-term residential habitation in vehicles parked on residential driveways or backyards.

    In contrast, site-built tiny homes rest on structural foundations engineered for local soil movement. Because the framing attaches permanently to the foundation anchor bolts, the building falls squarely under local residential building codes. County appraisal districts assess these structures as taxable real property improvements, creating permanent residential equity rather than a depreciating vehicle asset.

    Habitable Space and Safety Requirements

    Constructing an accessory residence requires following mandatory dimensions for safety and interior air quality. Municipalities enforce specific clearances so that every habitable room provides adequate natural light, ventilation, ceiling height, and emergency exits.

    Standard residential compliance requires addressing several structural elements:

    • Ceiling Clearances: Main living areas and hallways must maintain adequate vertical clearance, with specific allowances for sloped rafters and sleeping lofts.
    • Emergency Egress: Every dedicated sleeping space requires an accessible exterior window or doorway sized for emergency personnel and rapid exit.
    • Plumbed Bathrooms: The unit must feature an enclosed, private bathroom with a toilet, sink, and shower or bathtub plumbed to code-approved sanitary drainage lines.
    • Kitchen Facilities: Dedicated kitchen zones must feature approved food preparation counters, storage cabinetry, refrigeration hookups, and dedicated electrical appliance circuits.

    Homeowners evaluating different construction approaches can explore what fabricated homes are or examine how modular homes work to understand the differences between off-site panelization and traditional on-site framing.


    Zoning, Setbacks, and Permitting for Backyard Tiny Homes

    Local zoning regulations establish what you can build and where the structure can sit on your land. Properties located within incorporated city limits face formal development codes, mandatory building plan submissions, and progressive construction inspections. Parcels in unincorporated county areas generally encounter fewer zoning density restrictions but must still comply with on-site sewage regulations, driveway culvert standards, and flood drainage rules.

    Reviewing your property deed, recorded subdivision plat, and local city zoning map is the essential first step before drafting architectural drawings. Municipal planning departments regulate maximum lot coverage, structure height limits, and the spatial relationship between the secondary dwelling and the primary residence.

    Understanding Setbacks and Lot Coverage Limits

    Building setbacks establish required open buffers between exterior walls and property lines. North Texas cities enforce these buffers to ensure structural safety, preserve neighborhood spacing, and maintain clear access for utility maintenance crews and emergency services:

    1. Rear Yard Clearances: Detached backyard homes must sit behind established rear setback lines, remaining outside all platted utility and drainage easements.
    2. Side Yard Separation: Side buffers prevent structures from crowding neighbor fences, ensuring roof overhangs, gutters, and air conditioning condensers do not cross boundary lines.
    3. Building Separation Buffers: Fire safety codes require a minimum open distance between the exterior wall of the main home and the new detached unit to limit fire spread.
    4. Impervious Surface Caps: Cities limit the total percentage of a lot covered by non-porous surfaces like rooflines, concrete driveways, and patios. Because regional storm events bring heavy rainfall, limiting lot coverage preserves natural ground absorption and prevents localized stormwater flooding.

    Reviewing your house blueprints and plans with a professional builder ensures your proposed footprint fits within legal setback envelopes and lot coverage ratios prior to permit application.

    Managing Deed Restrictions and Homeowners Associations

    Municipal zoning approval does not supersede private subdivision covenants. When a property is governed by a Homeowners Association (HOA) or historic deed restrictions, those private rules remain legally enforceable and can halt a project regardless of municipal permit status.

    Architectural review committees evaluate proposed detached living units against specific neighborhood design standards:

    • Exterior Material Harmonization: Mandates requiring the accessory building to match the brick, stone, siding profile, and roof shingle color of the primary home.
    • Height and Sightline Restrictions: Roofline caps designed to prevent two-story accessory units from overlooking adjoining private backyards.
    • Street Visibility Guidelines: Requirements that secondary units sit fully concealed behind privacy fences rather than in visible side yards.
    • Leasing Rules: Covenants that allow multi-generational family living arrangements while prohibiting short-term vacation rentals or independent tenant leases.

    Site Preparation and Utility Connections

    Constructing a detached residence requires tying independent plumbing, electrical, and mechanical systems directly into your property infrastructure. Proper site planning ensures these underground distribution lines function reliably without exceeding the capacity of your existing utility services.

    PRO Construction provides Accessory Dwelling Units (ADU), Garage Conversions, Garage Builds for Homeowners in Keller, TX and surrounding communities seeking additional living space, rental income, or guest accommodations.

    Electrical Capacity and Subpanel Runs

    Supplying electrical service to a standalone home requires calculating the aggregate load of all major household appliances. The secondary dwelling demands dedicated power for heating, air conditioning, water heating, cooking equipment, interior lighting, and general convenience receptacles.

    • Main Panel Evaluation: When the primary home uses an older electrical panel with limited available breaker space, the service entrance and meter base must be upgraded to support the added load.
    • Dedicated Subpanel Distribution: Feeders run from the main service panel to a secondary distribution subpanel inside the new build. This panel gives occupants quick breaker access while balancing branch circuits across the living space.
    • Underground Conduit Routing: Heavy-duty conduit carries electrical conductors through dedicated trenches, maintaining required burial depths and physical separation from water lines.

    Plumbing Infrastructure and Expansive Clay Soils

    Plumbing layout requires engineering around the highly expansive clay soils that define North Texas geology. Local clay soils swell when saturated by heavy seasonal rains and contract during extended summer droughts. This cyclical ground movement places severe stress on underground piping and unreinforced concrete foundations.

    Installing plumbing for tiny homes on permanent foundations requires strict adherence to regional engineering standards:

    1. Sanitary Sewer Slope: Drain pipes require continuous downward pitch to move waste efficiently toward the municipal sewer main or septic tank. On lots where backyard elevation drops below the street connection, a sealed sewage ejector pump lifts wastewater up to the primary line.
    2. Water Supply Sizing: Water supply piping taps into the main residential supply line past the city water meter, buried below regional frost lines. Correct pipe diameter sizing prevents water pressure drops when multiple fixtures run simultaneously in both structures.
    3. Engineered Foundation Anchoring: Shallow, unreinforced concrete pads crack under shifting clay conditions. Permanent accessory homes require post-tensioned concrete slabs with deep perimeter grade beams or pier-and-beam foundations anchored directly into stable subsoil strata.

    Designing Functional Tiny Homes for Space and Climate

    Creating a livable secondary home within a compact footprint requires combining efficient space planning with properly sized mechanical systems. Eliminating dead floor space and keeping living areas open makes smaller square footage feel comfortable and functional.

    Heating, Cooling, and Thermal Envelopes

    Summer heat waves and sudden winter freezes require robust climate control and insulation. Traditional central ducted systems take up valuable attic or closet space, making alternative mechanical solutions ideal for compact residences.

    • Ductless Mini-Split Systems: Mini-split heat pumps utilize an exterior condenser paired with interior wall-mounted air handlers. These units deliver variable-speed heating and cooling with exceptional energy efficiency, allowing occupants to set targeted comfort levels without bulky ductwork.
    • Spray Foam Insulation: Applying spray foam insulation directly to exterior wall cavities and roof decks forms an airtight thermal envelope. This barrier prevents hot summer air infiltration and locks in conditioned temperatures.
    • High-Performance Glazing: Installing double-pane, Low-E glass windows reduces radiant heat transfer from direct Texas sunlight while providing natural daylight.

    Layout Planning and Universal Design

    Carefully planned floor layouts support changing household needs over time, whether housing adult children, accommodating long-term guests, or providing accessible quarters for aging parents:

    1. Zero-Step Entries: Flush entry thresholds remove tripping hazards and simplify access for visitors with strollers, walkers, or rolling luggage.
    2. Pocket Doors: Installing interior sliding pocket doors eliminates the swing clearance required by standard doors, preserving usable square footage in bathrooms and bedrooms.
    3. Ergonomic Kitchen Design: Continuous countertop runs, full-extension base drawers, and compact under-counter appliances provide complete cooking capabilities without cluttering open living areas.
    4. Walk-In Curbless Showers: Barrier-free shower entries create a spacious bathroom aesthetic while accommodating individuals with varying mobility needs.

    Homeowners exploring blended living and parking solutions can review plans for a garage with an apartment above or examine detached garages to see how vehicle storage integrates alongside upper-level or adjacent residential suites.


    Critical Mistakes to Avoid When Planning Your Tiny Home Build

    Building a secondary dwelling represents a substantial investment in your property. Avoiding standard construction, planning, and management pitfalls prevents costly delays and protects real estate value.

    • Treating a Residential Dwelling Like a Shed: Residential living space requires strict structural framing standards, fire-rated assemblies, vapor barriers, and thorough municipal inspections. Retrofitting an uninsulated utility shed rarely saves money once you account for the structural framing upgrades, egress window installations, and trade work required to pass code.
    • Overlooking Construction Equipment Access: Bringing in excavators, concrete pump trucks, and framing materials requires an accessible pathway from the street to the backyard. Fences, heritage trees, and narrow side yards must be evaluated during design to ensure machinery can enter the work zone.
    • Failing to Locate Underground Utilities: Trenching without private and public utility locates risks severing gas, electric, or irrigation lines. Mapping all existing yard infrastructure protects your primary home from service interruptions.
    • Starting Without Detailed Architectural Plans: Beginning construction without clear structural drawings, engineering stamps, and defined finish schedules leads to design compromises and unexpected change orders. Reviewing our guide on vetting construction general contractors near you helps you select an experienced team with a clear project workflow.

    Property owners considering permanent backyard construction can explore our specialized ADU construction and custom home building services to see how full-service construction management ensures compliant results.


    Planning Your North Texas Secondary Home

    Constructing a permanent accessory dwelling expands the functional living area of your property while providing housing flexibility for multi-generational families or rental tenants. By engineering your foundation for local soil conditions, verifying zoning allowances, and installing dedicated utilities, you build a durable structure that serves your household for years to come. If you want to evaluate your property boundaries, review architectural options, or discuss utility routing, contact our team to start planning your build.


    Frequently Asked Questions

    Is it cheaper to buy a tiny home or build one?

    Buying an unanchored, pre-built shell kit can appear less expensive initially, but kit pricing excludes essential site preparation, foundation engineering, trenching, plumbing ties, electrical infrastructure, and municipal permitting fees. Building a permanent, site-constructed home ensures the structure complies with regional building codes, anchors securely against weather extremes, and appraises as permanent real estate equity on your property tax roll.

    Can you connect a tiny home to an existing septic system?

    Tying a secondary residence into an existing septic system depends on your current tank capacity, drain field surface area, and total bedroom count. County health authorities size residential septic systems based on the total number of bedrooms on the property rather than fixture quantities alone. If your current system cannot support the additional living quarters, county regulations require expanding the drain field or installing a separate, permitted septic tank.

    How do tiny homes impact North Texas property taxes and appraisals?

    County appraisal districts classify permanent site-built accessory homes as real property improvements, similar to standard home additions. Appraisers calculate the value of the added square footage, interior finishes, and bathrooms, adjusting your overall property market valuation accordingly. Mobile units on wheels are categorized as personal vehicles and do not contribute to the appraised real estate value of the land.

  • Tiny Homes: Guide to Building a Permanent Backyard Home

    Tiny Homes: Guide to Building a Permanent Backyard Home

    Building permanent tiny homes in your backyard requires choosing between a movable structure on a chassis or a code-compliant detached dwelling anchored to a foundation. For genuine long-term living and lasting property equity, backyard homes must meet local residential building codes, connect to permanent municipal utilities, and observe property setback lines. Selecting the right foundation, layout, and permitting strategy ensures the new living space serves as a safe, durable guest suite or rental unit for decades.


    Tiny Homes: Guide to Building a Permanent Backyard Home

    What Are Tiny Homes, and How Do They Differ From ADUs?

    The modern concept of compact living covers everything from mobile travel trailers to architecturally engineered secondary residences. While social media often highlights micro-spaces built on road-ready trailers, residential construction evaluates compact structures through building codes, structural engineering, and zoning permanence. Understanding whether a project counts as temporary personal property or a permanent residential structure determines how municipal authorities permit it, how lenders finance it, and how county appraisers value it.

    Feature Tiny Home on Wheels (THOW) Permanent Foundation ADU
    Building Code ANSI recreational vehicle standards International Residential Code (IRC)
    Foundation Type Steel chassis with axles and leveling jacks Poured concrete slab or engineered pier-and-beam
    Utility Hookups Temporary RV-style quick connects Direct-bury conduits, hardwired subpanel, hard-plumbed sewer
    Property Valuation Depreciating personal property Appraised real property adding to home equity
    Zoning Permissibility Restricted or prohibited for permanent living Permitted under local accessory dwelling unit ordinances

    Tiny Homes on Wheels vs. Permanent Foundation Builds

    Movable structures on wheels rely on heavy-duty steel trailers as their structural base. Municipal building departments classify these units as recreational vehicles rather than permanent dwellings because they retain functional axles and hitch assemblies. Most suburban residential zoning ordinances explicitly prohibit continuous, full-time habitation in an RV parked within a standard residential driveway or yard. Temporary hookups like extension cords and flexible drainage hoses do not meet residential safety standards for permanent occupancy.

    Permanent builds follow the International Residential Code along with local city amendments. Builders anchor these secondary structures to engineered concrete foundations or reinforced pier-and-beam assemblies. Because the structure permanently connects to the ground and ties directly into municipal infrastructure, the city classifies it as a primary residential structure. It must satisfy standard structural engineering calculations, continuous vapor barriers, minimum ceiling heights, and local thermal insulation standards.

    When a Backyard Tiny Home Qualifies as an ADU

    A backyard build qualifies as an Accessory Dwelling Unit (ADU) when it provides complete, independent living facilities on the same parcel as a primary single-family home. Local building standards require four core functional elements for ADU compliance:

    1. A dedicated sleeping area equipped with standard egress windows.
    2. A complete bathroom containing a toilet, wash basin, and shower or bathtub.
    3. A permanent kitchen area with a sink, food preparation counter, and dedicated appliance circuits.
    4. An independent heating and cooling system capable of regulating interior temperatures throughout the year.

    When planned around these functional requirements, our adu construction projects convert compact backyard plans into permanent real estate assets. Unlike a mobile unit that depreciates over time, an IRC-compliant detached structure is appraised as part of the overall real property, supporting the long-term value of your home. Homeowners exploring small-footprint living can review our affordable tiny homes guide for additional design ideas.


    Is It Cheaper to Buy a Prefab Tiny Home or Build on Site?

    Homeowners often consider ordering a modular kit or pre-built shell under the assumption that factory fabrication is always more economical. Factory-built shells frequently show lower base sticker prices on catalog listings, but those retail estimates rarely include the full scope of site preparation, delivery, crane placement, and utility connections required to make the space habitable.

    Delivering a factory-built module into an established backyard presents significant logistical challenges. Transporting a completed structure often requires heavy mobile cranes capable of lifting the entire building over power lines, mature trees, and the roofline of the primary home. When narrow side yards, overhead utility lines, or elevation changes prevent crane staging, delivery costs rise sharply. Site-built construction avoids these complications because crews transport standard materials through regular access gates and build the framing directly on top of the prepared foundation.

    Site Preparation and Utility Connection Requirements

    Proper ground preparation establishes the structural integrity of any permanent building. In North Texas, native soils contain high concentrations of expansive clay that expand when damp and contract during dry summer conditions. Setting a small home on concrete blocks or untreated timber skids leads to unlevel floors, binding entry doors, and interior wall cracks as the ground moves.

    Every permanent residential structure requires an engineered foundation plan matched to local soil conditions:

    • Monolithic Concrete Slab: Well suited for level ground with stable subgrades, providing a solid barrier against moisture intrusion and outdoor pests.
    • Drilled Concrete Pier-and-Beam: Necessary for sloping terrain or active clay soils, elevating the framing above moisture while securing structural loads into stable soil strata.

    Utility infrastructure requires careful trenching and installation. A permanent secondary dwelling cannot rely on temporary hoses or extension cords. Connecting utilities requires:

    • Trenching dedicated electrical lines from the main household service panel to an independent secondary subpanel.
    • Laying continuous PEX water supply lines buried below regional frost lines.
    • Excavating and pitching dedicated PVC sewer lines that tie directly into the municipal main or septic system using natural gravity slope.

    Appraisal Value and Long-Term Equity Differences

    The financial distinction between a movable factory unit and an on-site, foundation-anchored build centers on property equity. Structures lacking permanent, site-poured foundations are generally classified as personal property by mortgage underwriters and tax assessors. They often carry shorter loan terms and do not reliably appreciate alongside the surrounding real estate market.

    A custom site-built home, designed to mirror the architectural trim, siding, and roof pitch of the primary residence, becomes part of the deeded real estate. Appraisers evaluate the finished, conditioned square footage as part of the overall property valuation. Homeowners curious about how structural framing impacts long-term valuation can explore our custom home building approach to permanent construction.


    Zoning and Permitting Rules for Tiny Homes in North Texas

    Building tiny homes in North Texas requires careful review of regional municipal codes. Because building guidelines vary substantially between municipalities—such as Fort Worth, Keller, Southlake, and unincorporated county jurisdictions—you must review local ordinances before ordering plans or breaking ground.

    PRO Construction provides Accessory Dwelling Units (ADU), Garage Conversions, Garage Builds for Homeowners in Keller, TX and surrounding communities seeking additional living space, rental income, or guest accommodations..

    Understanding Municipal Setbacks and Lot Coverage Limits

    Zoning offices use specific property standards to regulate where and how large an accessory building can be:

    • Property Line Setbacks: Cities specify minimum distances between detached structures and side or rear property boundaries. These clear zones maintain emergency access for first responders and keep roof drainage from washing across neighboring parcels.
    • Utility Easements: Many residential lots feature underground municipal utility or drainage easements across the rear property boundary. Permanent concrete foundations cannot sit inside recorded easements.
    • Impervious Surface Caps: Municipal rules limit the overall percentage of a lot covered by hard surfaces, including the main house, driveways, swimming pools, walkways, and new outbuildings. If a new structure exceeds the allowable limit, civil plans must incorporate engineered drainage controls like french drains or rock swales.

    Working Around Deed Restrictions and HOA Guidelines

    Even when a municipal building department allows detached residential structures, private subdivision covenants may enforce separate restrictions. Homeowners Associations and recorded deed restrictions hold legal authority to limit outbuilding dimensions, styles, or occupancy rules.

    Architectural Review Committees typically require detached accessory structures to match the exterior materials, masonry ratios, window profiles, and roofing colors of the main residence. Before submitting building plans for municipal review, cross-reference your site drawings with our house blueprints builders guide to ensure all documents satisfy both city plan reviewers and neighborhood boards.


    Essential Design Principles for Functional Tiny Home Floor Plans

    Designing a living footprint between 300 and 800 square feet demands intentional spatial planning. Small layouts leave little margin for wasted space, poor circulation paths, or insufficient storage. Every square foot must serve an active, daily purpose.

    Design Element Traditional Construction Choice Optimized Compact Living Choice
    Circulation Dedicated hallways and foyers Open-concept central living zones
    Interior Doors Standard swinging doors with wide clearance arcs Solid-core pocket doors and sliding partitions
    Plumbing Layout Separated plumbing walls across multiple rooms Consolidated wet wall sharing kitchen and bath lines
    Mechanicals Central furnace and ducted outdoor condenser Ductless mini-split heat pump and tankless water heater

    Maximizing Usable Space with Functional Layouts

    Maintaining an open, comfortable interior in a compact home relies on clear sightlines and efficient spatial transitions. Eliminating interior hallways redirects square footage back into usable living areas.

    Ground-floor primary bedrooms offer greater day-to-day usability than ladder-accessed lofts, making the space practical for aging relatives, guests, and long-term tenants. Bedrooms should provide sufficient space for a standard queen-size mattress, integrated wardrobe storage, and comfortable walking clearance around the bed.

    Grouping kitchen, bathroom, and laundry fixtures along a single wet wall simplifies plumbing routes, reduces pipe lengths, and streamlines rough-in inspections. Replacing standard swinging doors with pocket doors preserves floor area in compact bathrooms, while shallow wall niches between framing studs create functional storage for toiletries, pantry items, and linens. For lots where an attached or workshop space is also desired, reviewing our detached garages can provide ideas on versatile footprints.

    Selecting Mechanical Systems for Small Footprints

    Compact secondary dwellings require properly sized mechanical equipment. Full-size central furnaces and large air conditioning condensers produce too much output for small spaces, causing short-cycling, uneven humidity control, and elevated utility bills.

    Ductless mini-split heat pump systems provide efficient, zoned temperature control for small structures. These units connect an exterior condenser to independent indoor air handlers using slender refrigerant lines. Mini-splits operate quietly and allow occupants to heat or cool bedrooms and living spaces independently. For domestic hot water, compact tankless water heaters deliver endless on-demand supply without taking up the floor space required by conventional storage tanks. Additional regional layout considerations can be found in our tiny homes Texas guide.


    How to Manage Your Tiny Home Project from Concept to Completion

    Building a permanent backyard home requires an organized, step-by-step construction sequence. Skipping site evaluations or starting framing before permits are approved creates expensive project delays, engineering revisions, and inspection failures.

    Site Evaluation & Survey -> Engineered Blueprints & Permitting -> Foundation Excavation & Pour -> Framing & Weatherproofing -> Mechanical Rough-Ins -> Insulation & Finishes -> Final Inspections

    Pre-Construction Feasibility and Property Assessment

    Before creating detailed construction blueprints, a thorough site review must confirm that the property can support a detached dwelling:

    1. Boundary and Topographic Survey: A licensed land surveyor maps property lines, marks easements, and checks ground grade variations.
    2. Electrical Capacity Analysis: Electricians review the main household service panel to verify whether it can supply an additional subpanel without a service panel upgrade from the utility provider.
    3. Sewer Invert Measurement: Plumbers measure the physical drop between the planned building location and the municipal sewer main to confirm reliable gravity drainage.
    4. Tree Preservation Review: City forestry ordinances often protect mature trees. Foundation footings and utility trenches must remain outside critical root zones to prevent tree damage and satisfy tree preservation requirements.

    The Phased Construction Timeline

    After municipal plan examiners approve the construction drawings and issue permits, physical work moves through structured building stages:

    1. Site Preparation and Foundation: Crews excavate the building pad, set foundation forms, run in-slab plumbing lines, place reinforcing steel, and pour the concrete foundation.
    2. Structural Framing and Weatherproofing: Carpenters frame exterior walls, set roof rafters or trusses, install exterior sheathing, apply moisture barriers, and install windows, exterior doors, and roofing shingles.
    3. Mechanical, Electrical, and Plumbing Rough-Ins: Trade specialists run electrical wiring, water lines, drain stacks, and mini-split lines prior to municipal framing and trade inspections.
    4. Thermal Envelope and Drywall: Installers place wall and ceiling insulation, complete municipal energy inspections, and hang, tape, and float drywall.
    5. Interior and Exterior Finishes: Trim carpenters, painters, and tile setters install cabinetry, countertops, interior trim, paint, flooring, exterior siding, and plumbing fixtures.
    6. Final Inspections and Occupancy: City building inspectors conduct final electrical, plumbing, mechanical, and structural checks before issuing the Certificate of Occupancy.

    Coordinating these stages under a single construction contract prevents communication gaps between trades and keeps the build on schedule. Property owners planning their project budgets can review our financing options to arrange project funding before breaking ground. To discuss your site layout with our design and construction team, explore our services overview or connect with us directly through our contact page.


    Frequently Asked Questions

    Is it cheaper to buy a tiny home or build one?

    Buying an uninstalled kit or factory shell often appears cheaper upfront, but total costs frequently equalize once you account for site excavation, concrete foundation work, crane delivery fees, utility trenching, and municipal permitting. Building custom on-site allows you to tailor the foundation, structural framing, and utility connections directly to your property’s topography, avoiding the heavy machinery rental fees associated with modular delivery.

    Can you legally live in a tiny home permanently on your property?

    Permanent, legal occupancy requires the building to rest on an approved permanent foundation and comply with local residential building codes and accessory dwelling unit ordinances. Movable units on wheels are classified as recreational vehicles by most municipal building departments, which prohibits them from serving as full-time, permanent residences in standard residential neighborhoods.

    How do utilities connect to a backyard tiny home?

    Plumbing connects to the property’s existing sanitary sewer line or approved septic system using a continuous, sloped PVC drain line. Electricians run buried feeder cables in protective conduit from the main service panel to a dedicated subpanel inside the secondary dwelling to power lights, climate systems, and appliances.

    Does adding a tiny home increase your property taxes?

    County appraisal districts assess permitted permanent structures based on the added square footage, construction quality, and real property value they bring to the parcel. While this increases the annual assessed property valuation, the equity added to the estate and the potential rental income generated by the secondary unit typically outweigh the adjusted tax obligation.

  • Detached Garage Builder

    Detached Garage Builder

    What if the most valuable improvement for your property is not another bedroom or a traditional Accessory Dwelling Unit, but a permanent, code-built structure that gives you secure parking, organized storage, a serious workshop, and a flexible office in one carefully planned footprint?

    For many homeowners in Keller and Fort Worth, that is the more practical question, and it is one reason more families are looking for detached garage builders who understand Tarrant County zoning, structural demands, and long-term property value.

    A detached garage or workshop can solve several everyday problems without introducing the zoning complexity of a second dwelling. It can protect vehicles from North Texas weather, create space for tools and equipment, support hobbies or home-based work, and preserve the flexibility to adapt the building later. On standard residential lots, particularly in Keller, it may also be the more realistic code-compliant option.

    At PRO Construction, we approach these projects as long-term investments in your property, not as isolated outbuildings. Bruce Laing brings more than 25 years of local North Texas experience to each project, supported by transparent pricing, disciplined project management, and honest, high-quality craftsmanship. PRO Construction is A Boomer Group Inc. Company.

    Key Takeaways

    • Keller’s current detached ADU requirements include a minimum 1.5-acre lot and a Specific Use Permit approved by the City Council.
    • A detached garage or non-habitable workshop is generally simpler to permit than an ADU, although zoning, setbacks, size, and site-specific requirements still apply.
    • Fort Worth properties must be reviewed under the applicable zoning district and the city’s accessory-use standards, including Section 5.301.
    • A well-designed structure can combine parking, storage, workshop space, a home office, and covered outdoor living.
    • Structural planning matters in North Texas, especially where expansive clay soils, drainage, post-tension slabs, and large load-bearing spans are involved.

    Why Detached Garage Builders Matter More Under Keller’s ADU Rules

    Detached ADUs are not automatically available on every Keller residential lot. Under Keller’s current Unified Development Code requirements, a detached ADU must be located behind the main dwelling on a lot of at least 1.5 acres, and all detached ADUs require approval of a Specific Use Permit by the City Council. The unit must also meet applicable setbacks and accessory-building standards.

    You can review Keller’s municipal code and the city’s permit guidance before beginning a project.

    That distinction is important. A detached garage or workshop without sleeping quarters, a kitchen, or independent dwelling use is not automatically an ADU. It is typically reviewed as an accessory building. However, it still must comply with the property’s zoning district, setbacks, lot coverage, height restrictions, easements, drainage requirements, and permit standards. Larger accessory buildings or unusual uses may require additional zoning review or an SUP.

    For many homeowners on standard Keller lots, a detached garage or workshop offers the functional benefits they actually need without asking the property to qualify as a second residence.

    It is a more direct path. It is also easier to design around daily life.

    Fort Worth Requires Address-Specific Planning

    Fort Worth is different from Keller, and “Tarrant County rules” are not a single set of rules for every property. A home inside Fort Worth city limits is governed by the city’s zoning ordinance and development requirements. A property in another municipality, such as Southlake, Grapevine, Colleyville, or an unincorporated area, may follow a different process.

    Fort Worth’s residential permitting guidance states that detached garages require building permits. The proposed structure also needs to comply with the applicable zoning district and the city’s accessory-use provisions. The Fort Worth zoning ordinance is the proper starting point, particularly Section 5.301 and the regulations for your specific district.

    A detached non-habitable garage or workshop is generally easier to classify and permit than a structure containing a bedroom, bathroom, or kitchen. Once living quarters are introduced, the project may be reviewed as a habitable accessory building or ADU, bringing additional building-code, utility, fire-separation, and zoning considerations.

    Our responsibility is to identify that distinction early, before design decisions become expensive revisions.

    One Structure, Several Uses

    A well-planned detached building should not be designed around only one season of your life. Your needs may change, and the structure should be able to change with them.

    Common configurations include:

    Secure vehicle parking

    A custom two- or three-car garage can provide protected parking, room for recreational equipment, and organized access to the yard. High-clearance doors, durable floor coatings, built-in storage, and carefully planned circulation can make the difference between a building that merely holds vehicles and one that genuinely improves your property.

    Workshop and hobby space

    A workshop requires more than open floor area. We consider electrical capacity, task lighting, ventilation, tool storage, workbench placement, wall reinforcement, and noise control. If you use welders, compressors, woodworking tools, or other high-load equipment, those requirements should be addressed during design rather than added after construction.

    Home office

    A detached office creates separation from the main home without requiring a dwelling unit. It can offer quiet space for focused work, client calls, or creative projects while preserving the home’s primary living areas for family use.

    Flexible storage and future adaptability

    Storage is most useful when it is accessible and organized. Attic areas, utility rooms, wall systems, overhead racks, and dedicated equipment zones can keep the garage functional. A future owner may use the same space differently, which is one reason thoughtful design can support long-term property value.

    Custom three-car garage addition with Craftsman-style architecture, covered porch, and concrete driveway

    Structural Integrity Begins Before the Foundation

    North Texas soil and weather conditions deserve respect. Expansive clay can move seasonally, and poor drainage can place unnecessary stress on slabs, walls, and drive approaches.

    The foundation system must be selected according to the site, soil conditions, structure size, and intended use. Depending on the property, that may involve an engineered slab, reinforced footings, grade beams, or drilled piers. If the home or proposed structure involves a post-tension slab, cables must be located before cutting, coring, trenching, or attaching new work.

    The same care applies to the framing. A large workshop door, clear vehicle span, upper storage area, or roofed patio can create significant load-bearing demands. Proper headers, beams, lateral bracing, roof connections, and wind resistance are not decorative details. They are part of protecting the structure and the investment inside it.

    We also evaluate:

    • Site feasibility and building-envelope limitations
    • Property-line setbacks and utility easements
    • Drainage patterns and finished-floor elevations
    • Driveway access and vehicle turning radii
    • Electrical and HVAC requirements
    • Fire separation where the garage connects to conditioned space
    • Material compatibility with the primary residence
    • Inspection sequencing and permit documentation

    Honest, steady work starts with getting these fundamentals right.

    Premium Materials That Belong in the North Texas Climate

    A detached structure should look intentional, not temporary. Matching the primary home’s roof pitch, masonry, siding, trim, windows, and exterior colors helps protect curb appeal and neighborhood harmony.

    For material coordination, we work with established suppliers such as Builders FirstSource, while ProSource can support selections for flooring, cabinetry, countertops, and other finish materials. For exterior and interior coatings, Sherwin-Williams offers systems suited to the demands of Texas heat and everyday use.

    The right material package may include brick or stone that complements the home, durable fiber-cement siding, insulated overhead doors, weather-resistant trim, high-performance windows, and carefully specified concrete work. Premium does not mean excessive. It means choosing materials that are appropriate, maintainable, and built to serve the property for years.

    Local Work That Reflects How We Build

    Our experience is grounded in real North Texas properties and the practical decisions homeowners make every day.

    At 6612 Rhea Ridge Dr, workshop and patio improvements were considered together so the finished space could support both productive work and outdoor use. At 2502 Hillside Ct, a custom kitchen and large sliders focused on connection, natural light, and better daily flow. On Belaire Drive, garage and living-space planning addressed the relationship between storage, access, and usable square footage.

    These projects demonstrate a consistent principle: construction should respond to how you live, not force your life into a generic plan.

    Financing and Clear Cost Communication

    A detached garage or workshop is a significant investment. We believe you should understand the scope, allowances, schedule, and possible site conditions before construction begins.

    PRO Construction provides transparent pricing and clear communication throughout the process. We coordinate design, permitting, materials, inspections, and contractor oversight so you are not left managing disconnected trades.

    For homeowners exploring financing, we can connect you with local partners such as Gus Moreland at First United Bank to discuss flexible financing options. Financing terms, approval, and rates are determined by the lender, but having a knowledgeable local contact can make the budgeting conversation more manageable.

    A Methodical Roadmap for Your Project

    The process should be orderly:

    1. Confirm jurisdiction and zoning. Determine whether the property is inside Keller, Fort Worth, another municipality, or unincorporated Tarrant County.
    2. Review the site. Identify setbacks, easements, drainage, existing utilities, slab conditions, and vehicle access.
    3. Define the structure’s use. Separate a non-habitable garage or workshop from any proposed habitable ADU use.
    4. Develop the design. Plan parking, storage, workshop functions, office space, materials, and future flexibility.
    5. Coordinate engineering and permits. Prepare site plans, structural documents, and required construction details.
    6. Build and inspect. Manage trades, material delivery, inspections, and quality control through completion.

    The same approach applies across nearby communities in Denton and Tarrant counties, including Denton, Flower Mound, Southlake, and Grapevine. The rules differ by jurisdiction, so address-specific verification is essential.

    Modern ADU exterior with landscaped walkway and private patio, illustrating the separate permitting and dwelling-use category

    Frequently Asked Questions

    Is a detached garage easier to permit than an ADU in Keller?

    Often, yes, because a non-habitable garage or workshop does not create a second dwelling unit. It still requires zoning and building-code review, and larger structures or unusual uses may require additional approval. Keller’s detached ADU requirements: including the 1.5-acre minimum and SUP: do not automatically apply to every detached garage.

    Can I include a bathroom in my workshop?

    Possibly, but adding plumbing can affect how the structure is classified and reviewed. The intended use, layout, utilities, and local code requirements should be confirmed before plans are finalized.

    Can a workshop later become an ADU?

    Not automatically. Converting a workshop into habitable space may require new permits, zoning approval, utility upgrades, fire-rated construction, insulation, HVAC, plumbing, and compliance with current ADU regulations. It is wise to discuss future adaptability during the original design phase.

    Does PRO Construction build prefabricated structures or tiny homes on wheels?

    Our focus is on permanent, site-specific, code-built structures designed for the property. We do not position prefabs or tiny homes on wheels as substitutes for a properly planned residential garage or workshop.

    Start With a Conversation

    A detached garage or workshop may be the right way to maximize your Tarrant County property without taking on the restrictions of a traditional ADU. The answer depends on your lot, your jurisdiction, and how you intend to use the space.

    At PRO Construction, Bruce Laing and our team bring more than 25 years of local experience, careful planning, transparent pricing, and high-quality craftsmanship to every project. We carry the permitting and coordination burden so you can make informed decisions with confidence.

    Official PRO Construction gold golf ball logo with serif branding and EST. 2001 designation

    Every PRO Construction visual and project document uses the full official gold golf ball logo, serif branding, EST. 2001, and A Boomer Group Inc. Company identification. For project questions or to begin planning, call 8173720211 or contact PRO Construction. Let’s talk about what your property can support: and build something durable, useful, and worthy of your investment.

  • Custom Detached Garage Builders in DFW: Design, Cost & Financing Your Dream Workshop

    Custom Detached Garage Builders in DFW: Design, Cost & Financing Your Dream Workshop

    Note: This image was created with AI assistance.

    What happens when your attached garage becomes a storage room, your vehicles remain outside, and the workshop you have always wanted has no practical place to go? More importantly, what could go wrong if a detached garage is placed without accounting for expansive clay soil, drainage, setbacks, utilities, or structural loads?

    A custom detached garage can add secure parking, organized storage, a dedicated workshop, and even future living potential to your property. But in Keller, Fort Worth, Southlake, Flower Mound, Grapevine, Denton, and other North Texas communities, the structure must be planned for the site: not simply dropped onto it.

    At PRO Construction, A Boomer Group Inc. Company, we bring more than 25 years of local custom building experience to detached garage projects across the DFW Metroplex. We manage site feasibility, design, permitting, material coordination, construction, inspections, and final details with transparent communication throughout.

    This is honest, steady work designed to protect your property and your investment.

    Key Takeaways

    • A detached garage should be designed around your actual goals: vehicles, storage, workshop use, office space, or future living quarters.
    • North Texas soil, drainage, setbacks, utility routes, and post-tension slab requirements can significantly influence design and cost.
    • A realistic DFW planning range is approximately $35,000 to $90,000 or more, depending on size, finish level, utilities, and site conditions.
    • Smart features are most affordable when planned before construction begins.
    • Financing options may include construction loans, home equity products, or other programs explained by a qualified lender such as Gus Moreland at First United Bank Mortgage Group.

    Start With Site Feasibility and Structural Integrity

    Before discussing cabinets or garage doors, we begin with the property itself.

    A detached garage may need to meet local requirements for setbacks, easements, lot coverage, height, fire separation, access, drainage, and utility connections. Requirements can vary between municipalities in Tarrant and Denton counties, so a design that works in Keller may require changes in Denton or Grapevine.

    North Texas soil adds another layer of responsibility. Expansive clay can shift as moisture levels change. Depending on the site and engineering requirements, the foundation may involve a reinforced or post-tension slab designed for local conditions. The goal is not merely to pour concrete. It is to establish a stable foundation that protects the garage’s structural integrity over time.

    We also evaluate:

    • Existing drainage patterns and low areas
    • Underground utilities and service routes
    • Driveway access and vehicle turning radius
    • The relationship between the garage and the primary home
    • Roofline, brick, siding, trim, and exterior color compatibility
    • Electrical capacity for tools, HVAC, EV charging, and future expansion

    A well-planned garage should look as though it belongs on the property. It should also function safely for the way you intend to use it.

    Workshop Design: Build Around the Work

    A workshop requires more than four walls and an overhead door. The layout should support movement, equipment, ventilation, storage, and safe electrical access.

    For a woodworking shop, that may mean dedicated circuits, dust collection, durable flooring, bright task lighting, and clear space around saws or benches. An automotive workshop may need wider bays, compressed-air lines, higher ceilings, stronger lighting, and a floor system that is easy to clean.

    Common workshop features include:

    • 240-volt circuits for specialized equipment
    • Dedicated subpanels and additional conduit
    • Higher outlet density at workbench height
    • Task lighting and overhead LED fixtures
    • Insulation and climate control
    • Ventilation for fumes, dust, or heat
    • Durable flooring or sealed concrete
    • Built-in workbenches and cabinets
    • Oversized doors for trucks, trailers, or recreational equipment
    • Sound separation from the main house

    Detached construction is especially useful when your work involves noise, vibration, dust, or tools that should remain separate from the primary living space.

    Custom multi-bay garage exterior with a covered entry and coordinated residential design

    Smart Garage Features Worth Planning Early

    A “smart garage” is not simply a garage door controlled from your phone. It is a structure designed to accommodate your future needs without expensive demolition later.

    At the planning stage, homeowners may consider:

    EV-Ready Electrical Service

    Even if you do not own an electric vehicle today, installing properly sized electrical service and conduit during construction can make future charging far easier. The same planning can support welders, compressors, lifts, freezers, or other high-demand equipment.

    Reliable Connectivity

    A detached garage used as a workshop, office, gym, or studio may need hard-wired Ethernet, a dedicated Wi-Fi access point, or a planned data route from the main home. Reliable connectivity is much easier to install before the walls are closed.

    Security and Access Control

    Smart locks, cameras, motion lighting, and monitored overhead doors can improve security for vehicles, tools, and equipment. These systems should be coordinated with door locations, lighting, and electrical plans.

    Climate Control

    In the North Texas heat, insulation and HVAC can protect both people and property. A mini-split system may be appropriate for a conditioned workshop, office, or storage area. Proper roof ventilation and insulation also help control attic temperatures and reduce strain on the building envelope.

    Storage Solutions That Keep the Floor Usable

    Many homeowners build a larger garage only to fill it with unplanned storage. The answer is not always more square footage. It is better organization.

    We recommend defining storage zones before construction begins:

    • Tall storage for ladders, kayaks, and yard tools
    • Overhead racks for seasonal decorations
    • Lockable cabinets for chemicals and valuable equipment
    • Slatwall or pegboard systems for hand tools
    • A dedicated sports-equipment wall
    • Deep shelving for bins and household overflow
    • A clear service path around vehicles and equipment
    • A separate mechanical or utility area

    If you want a clean workshop, reserve space for storage in the architectural plan. Built-in solutions can then be coordinated with electrical outlets, windows, lighting, and work surfaces instead of being added as an afterthought.

    Our partners help support this level of coordination. Builders FirstSource DFW provides access to lumber, trusses, wall panels, windows, doors, millwork, and other building components. ProSource can help with flooring, cabinets, and finish selections. Sherwin-Williams offers durable paint and coating options along with color visualization tools for interior and exterior decisions.

    Multi-Purpose Garages: More Than Vehicle Storage

    A detached garage can serve several purposes over its useful life.

    You might begin with two vehicle bays and a workshop, then later use part of the building as:

    • A home office
    • A fitness room
    • A hobby or craft studio
    • A private guest area
    • A pool house
    • A photography or music studio
    • A flex room for aging parents or adult children
    • A future ADU or guesthouse, where local regulations allow

    However, a future living conversion must be planned carefully. A garage is not automatically an ADU. Living quarters may require additional design, plumbing, insulation, egress, fire separation, utility, and permitting requirements. If future flexibility matters to you, we can discuss the structural and site implications before construction begins.

    Detached residential structure illustrating a finished multi-purpose garage or future living-space concept

    Note: This image was created with AI assistance.

    What Does a Custom Detached Garage Cost in DFW?

    For planning purposes, detached garage projects in the DFW area commonly fall in the range of $35,000 to $90,000 or more. A basic, unfinished structure may sit toward the lower end, while a climate-controlled workshop with upgraded electrical service, premium finishes, storage, or future living potential can exceed that range.

    Major cost factors include:

    Cost factor Why it matters
    Size and number of bays More area increases foundation, framing, roofing, and finish costs
    Foundation requirements Soil conditions, engineering, reinforcement, and grading affect the base
    Site access Tight lots, demolition, tree removal, or difficult access may add labor
    Electrical service Workshops and EV charging require more capacity and planning
    Plumbing and HVAC Sinks, bathrooms, or conditioned space increase trade work
    Exterior materials Matching brick, stone, siding, windows, and roofing may require premium materials
    Interior finish level Cabinets, flooring, drywall, paint, and insulation change the total investment
    Future-use planning ADU-ready or second-story structural preparation requires early coordination

    A responsible proposal should separate the core structure from optional features and clearly identify allowances, permit costs, utility work, and finish selections. A low initial number is not helpful if important scope is missing.

    Financing Your Garage Build

    Financing should be discussed early, before design decisions become commitments.

    PRO Construction works with Gus Moreland at First United Bank Mortgage Group, a local lending partner who can explain construction financing options, qualification requirements, project documentation, and payment structures. You can learn more through our construction financing page or explore First United Bank’s builder finance resources.

    Depending on your circumstances, you may also discuss:

    • Construction or renovation financing
    • Home equity loans
    • Home equity lines of credit
    • Cash reserves
    • Other lender-specific programs

    Loan approval, rates, terms, and eligibility are determined by the lender. Our role is to provide clear project documentation and coordinate responsibly with the financing process.

    A Managed Process Protects Your Time and Budget

    A detached garage involves more coordination than many homeowners expect. Our process generally includes:

    1. Consultation and site review : We discuss how you want to use the space and assess the property.
    2. Concept and feasibility : We review placement, setbacks, access, utilities, foundation considerations, and exterior integration.
    3. Design and selections : We develop the layout, materials, doors, finishes, storage, and smart features.
    4. Permitting and approvals : We coordinate required submissions and inspections with the appropriate municipality.
    5. Material coordination : We work with suppliers and partners to organize structural and finish materials.
    6. Construction : Our team manages the foundation, framing, roof, exterior, utilities, interior, and finishing work.
    7. Final inspection and walkthrough : We address details and confirm the space is ready for use.

    Our experience also extends beyond garages. Projects such as the workshop and patio work at 6612 Rhea Ridge Dr, the custom kitchen and slider improvements at 2502 Hillside Ct, and the garage and living-space work on Belaire Drive reflect the same integrated approach: understand the property, plan carefully, and manage the details.

    Frequently Asked Questions

    How long does a detached garage build take?

    Many projects take approximately 8 to 16 weeks from design and permitting through completion. Active construction may be shorter, but the total schedule depends on municipal review, engineering, material availability, weather, site conditions, and finish complexity.

    Do I need a permit for a detached garage in North Texas?

    Most permanent detached garages require a building permit, and electrical, plumbing, or mechanical work may require additional approvals. The exact requirements depend on your city and project scope. We help coordinate the permitting and inspection process.

    Can I build a workshop above or beside the garage?

    Potentially, but a second story or living area affects foundation design, framing, stairs, utilities, egress, fire separation, and zoning. It should be addressed during the initial feasibility review rather than added later.

    Is a detached garage a good investment?

    A well-designed garage can improve storage, parking, daily function, and buyer appeal. Its value depends on construction quality, neighborhood expectations, permitted use, and how naturally it integrates with the home.

    Let’s Talk About Your Garage Plan

    Your detached garage should solve a real problem today while protecting your options tomorrow. Whether you are planning a workshop in Keller, additional parking in Southlake, a multi-purpose structure in Flower Mound, or a garage and flex space near Fort Worth, Denton, or Grapevine, the right first step is a clear conversation about your site and goals.

    At PRO Construction, we provide transparent pricing, seasoned craftsmanship, and reliable project management from the first site review through the final walkthrough.

    Start a conversation with PRO Construction or call 8173720211.

    PRO Construction is A Boomer Group Inc. Company: Driving Quality Home since 2001.

  • Home Additions in Tarrant County: What It Really Costs, How Long It Takes & How to Plan It Right

    Home Additions in Tarrant County: What It Really Costs, How Long It Takes & How to Plan It Right

    What happens when the home you love no longer supports the way your family lives? And what could a poorly planned addition cost you in structural repairs, permitting delays, or lost property value?

    For homeowners in Fort Worth, Southlake, Colleyville, Keller, and North Richland Hills, expanding your home can be a practical alternative to moving. But a successful addition involves far more than adding walls and flooring. It requires site feasibility planning, structural engineering, careful budgeting, and disciplined project management.

    At PRO Construction, Bruce Laing brings more than 25 years of local custom building experience to projects across North Texas. As A Boomer Group Inc. Company, we manage the full process, from design and permitting to material coordination, inspections, and final completion, so you can make an informed decision with fewer surprises.

    Key Takeaways

    • A typical Tarrant County home addition may cost approximately $100–$300 or more per square foot, depending on the design and finishes.
    • Many North Texas additions fall in the broad range of $80,000 to $180,000 or more.
    • Most projects take approximately four to nine months from initial planning through completion.
    • City permits, not county permits, generally govern additions in Fort Worth and nearby municipalities.
    • Foundation design, load-bearing transitions, HVAC capacity, and wet-room plumbing are among the most important cost drivers.
    • Transparent pricing and consistent communication are essential protections for your investment.

    What Does a Home Addition Cost in Tarrant County?

    There is no single price for a home addition because each property has different soil conditions, access limitations, structural requirements, and finish selections. However, a reasonable 2026 planning range for many Tarrant County projects is approximately $100–$300-plus per square foot.

    A smaller, straightforward bump-out may fall near the lower end of that range. A high-end primary suite, second-story addition, or addition with a new kitchen and bathroom can move substantially higher.

    As a broad planning guide:

    • 150–250 square feet: approximately $30,000–$80,000
    • 300–600 square feet: approximately $60,000–$180,000 or more
    • 800–1,000-plus square feet: approximately $150,000–$300,000 or more

    These figures are not a proposal or fixed quote. They are starting points for evaluating whether your goals and budget are aligned. You should also reserve a 10–20% contingency for concealed conditions, design revisions, inspection requirements, or material changes.

    Our Texas home addition planning guide explains why square footage alone is an unreliable way to estimate your final investment.

    The Main Factors That Affect Your Budget

    Foundation and Soil Conditions

    North Texas soil is a serious consideration. Expansive clay can move as moisture levels change, placing stress on foundations and structural tie-ins.

    Depending on the property and engineering requirements, your addition may require a post-tension slab, reinforced foundation system, or other engineered solution. The new foundation must also connect appropriately to the existing structure. This is not the place to cut corners.

    Wet Rooms Cost More Than Dry Rooms

    A family room or home office is generally simpler than a kitchen, bathroom, or laundry room. Wet rooms require additional plumbing, drainage, ventilation, waterproofing, electrical circuits, and inspections.

    The project at 2502 Hillside Ct, which included a custom kitchen and large sliders, illustrates how thoughtful planning can connect interior living space with the outdoors while coordinating cabinetry, structural openings, glazing, and finishes as one complete system.

    Structural Openings and Load-Bearing Walls

    Opening an existing exterior or load-bearing wall can dramatically change the scope of work. The structure may require engineered beams, temporary supports, new headers, or modifications to the existing roof and foundation.

    A qualified builder should identify these conditions early. A low initial estimate that excludes structural work is not necessarily a bargain; it may simply be incomplete.

    Exterior Matching

    The addition should look as though it belongs to the original home. Matching brick, stone, siding, windows, roof pitch, trim, and drainage details takes planning and material coordination.

    This is especially important in established neighborhoods throughout Southlake, Colleyville, Keller, and Fort Worth, where architectural consistency contributes to long-term property value.

    Custom North Texas home with vaulted living space, stone fireplace, and warm wood detailing

    How Long Does a Home Addition Take?

    Most Tarrant County additions take approximately four to nine months from the first planning meeting through completion. A straightforward one-story addition may move more quickly, while a second-story expansion or complex structural renovation may take longer.

    A realistic schedule often includes:

    1. Initial consultation and site feasibility: one to three weeks
    2. Design and engineering: two to eight weeks
    3. Permit review: approximately two to eight weeks, depending on the city and completeness of the plans
    4. Construction: approximately three to six months for many one-story additions
    5. Final inspections and completion: one to three weeks

    Weather, inspection schedules, long-lead materials, HOA review, and revisions can affect the timeline. The most reliable way to avoid unnecessary delays is to resolve as many decisions as possible before construction begins.

    At PRO Construction, we use structured project management and clear communication to keep responsibilities visible. You should know what has been approved, what is being ordered, what is scheduled next, and whether any decision requires your attention.

    Permits: Tarrant County or Your City?

    This distinction matters.

    For homeowners within Fort Worth, Southlake, Colleyville, Keller, and North Richland Hills, the primary building authority is generally the city’s development or building department, not Tarrant County itself. Additions typically require a building permit, along with separate electrical, plumbing, and mechanical permits where applicable.

    You may also need approvals related to:

    • Site plans and property setbacks
    • Drainage or grading
    • Utility connections
    • Easements and lot coverage
    • HOA architectural review
    • Structural or foundation engineering
    • Fire-code requirements for certain project scopes

    You can review Fort Worth’s permit information through the City of Fort Worth Development Services Department. Tarrant County also provides information about permits and development requirements through its Engineering Services department.

    Permitting is a burden we carry for you. Our role is to prepare and coordinate the documentation, respond to questions, and help move the project through the required inspections without leaving you to manage every administrative detail alone.

    Build Out or Build Up?

    The right direction depends on your property, goals, and budget.

    Building Out

    A ground-level addition is often the most comfortable solution for families, seniors, and homeowners planning for aging in place. It can provide easier access and simpler daily circulation.

    The tradeoff is that building out consumes yard space and requires new foundation work. Drainage and setbacks must be reviewed carefully.

    Building Up

    A second-story addition preserves the backyard and may be the best option for smaller lots in North Richland Hills, Keller, or established Fort Worth neighborhoods.

    However, adding a story places new loads on the existing structure. The first floor may require reinforcement, and the construction process can be more disruptive while your family remains in the home.

    A site evaluation should determine whether building out or building up is feasible before you invest in detailed plans.

    How We Coordinate Materials and Financing

    A well-managed addition depends on more than the construction crew. It also depends on reliable material sources and early budget coordination.

    Our local network includes:

    • Gus Moreland at First United Bank, who provides residential and construction lending guidance for North Texas homeowners. You can review First United’s construction loan programs or visit our financing information page.
    • Builders FirstSource, which supports framing, structural materials, and building supply coordination.
    • ProSource, which helps homeowners review flooring, cabinetry, countertops, tile, and other finish selections.
    • Sherwin-Williams, which provides dependable coatings and color solutions for interior and exterior applications.

    These relationships do not replace proper estimating. They support it. Selecting materials early helps reduce substitutions, clarify allowances, and keep the finished design aligned with your budget.

    Custom three-car garage addition with Craftsman-style architecture and covered porch

    Local Experience That Protects the Details

    Every property has its own constraints. A tight lot in Grapevine or North Richland Hills may require careful equipment access and protection of existing landscaping. A larger property in Colleyville or Southlake may present more complex drainage, masonry matching, or HOA review requirements.

    Our experience also includes projects such as:

    • 6612 Rhea Ridge Dr, where we worked on a workshop and patio to add useful workspace and outdoor living function.
    • 2502 Hillside Ct, where a custom kitchen and large sliders helped create a stronger connection between the interior and exterior.
    • Belaire Drive, where a garage and living-space project combined storage, vehicle accommodation, and expanded household function.

    These projects share a common lesson: the visible finishes matter, but the work behind them matters more. Structural integrity, proper sequencing, accurate inspections, and honest communication protect the result.

    Questions to Ask Before Hiring a Builder

    Before signing a contract, ask:

    • Who will manage the design, permits, inspections, and subcontractors?
    • Has the builder completed additions in my city?
    • How will the foundation address local soil conditions?
    • Will the estimate identify allowances and exclusions clearly?
    • How will changes be documented and priced?
    • What is the communication schedule during construction?
    • Can the builder provide examples of comparable work?

    A transparent builder will welcome these questions. You are not simply buying square footage. You are protecting your home, your finances, and the way your family will live in the space for years to come.

    FAQ: Home Additions in Tarrant County

    What is the average cost of a home addition in Tarrant County?

    Many projects fall between $100 and $300 or more per square foot, with common total investments ranging from approximately $80,000 to $180,000 or more. Kitchens, bathrooms, second stories, foundation work, and premium finishes can increase the final cost.

    How long does a typical addition take?

    Plan for approximately four to nine months from design through completion. Construction itself may take three to six months, while design, engineering, permits, and inspections add additional time.

    Can I stay in my home during construction?

    Often, yes. Dust barriers, temporary separations, and careful scheduling can reduce disruption. However, projects involving the primary kitchen, multiple bathrooms, or major load-bearing wall removal may require temporary relocation.

    Do I need a permit for a room addition?

    Yes. A structural addition generally requires a city building permit and may also require electrical, plumbing, mechanical, grading, or HOA approvals.

    How do I start planning?

    Begin with a consultation and site feasibility review. Bring your goals, approximate budget, preferred timeline, and any survey or HOA documents you already have. We can then discuss the best path forward.

    Let’s Talk About Your Addition

    A home addition should create more comfort without creating uncertainty. With Bruce Laing’s 25 years of local custom building experience, PRO Construction provides the disciplined planning, transparent pricing, and reliable project oversight North Texas homeowners deserve.

    If you are considering an addition in Fort Worth, Southlake, Colleyville, Keller, or North Richland Hills, start a conversation with PRO Construction or call 8173720211. We’ll help you understand what is feasible, what it may cost, and how to plan it correctly from the beginning.

    Honest, steady work protects your investment.