
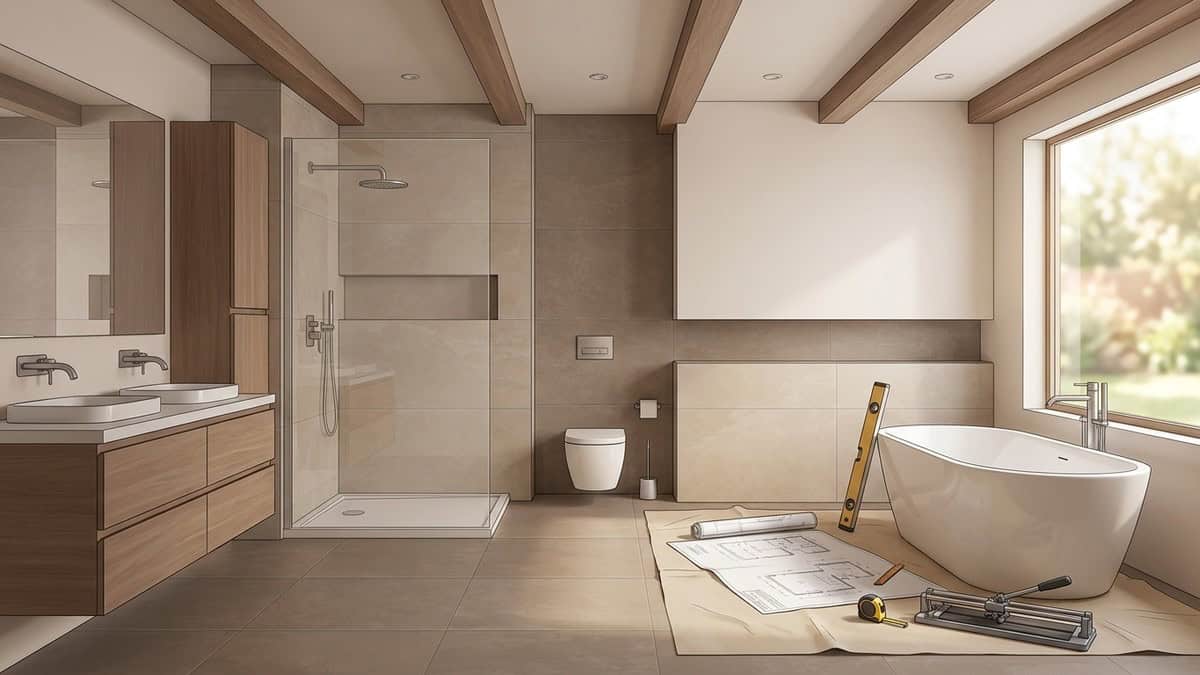
Planning bathroom renovations near me requires balancing municipal building codes, foundation structural limits, and wet-area waterproofing long before selecting tile or plumbing fixtures. A successful remodel demands a clear scope that accounts for underground drain lines on concrete slab foundations or joist deflection on framed subfloors. Evaluating these technical parameters early ensures the space remains structurally sound, code-compliant, and watertight through decades of daily use.

How to Plan Bathroom Renovations Near Me
Every bathroom renovation begins with understanding what lies behind the drywall and underneath the flooring. In North Texas and surrounding areas, homes are frequently built on slab-on-grade concrete foundations or pier-and-beam crawlspaces. Each structural type dictates how easily a contractor can alter plumbing supply lines, waste stacks, and vent pipes.
When you research local bathroom renovations, the first design fork is deciding whether to work within the existing footprint or reconfigure the floor plan. Keeping existing fixture locations reduces labor time, avoids concrete slab trenching, and simplifies trade permitting. Conversely, relocating a toilet or expanding a primary shower requires cutting through concrete or sistering floor joists, expanding both project complexity and construction timelines.
To balance aesthetics against structural demands, build your remodel plan around these essential phases:
- Structural assessment: Verify whether any partition walls targeted for demolition carry roof or upper-floor loads.
- Plumbing and drain mapping: Locate main soil stacks, secondary vent branches, and incoming water supply lines.
- Moisture barrier evaluation: Determine how existing wet walls were constructed and whether past moisture penetrated subflooring.
- Mechanical ventilation pathing: Plan a dedicated exterior exhaust run rather than terminating ductwork inside an attic space.
- Electrical load calculation: Confirm the home electrical panel can accommodate dedicated circuits for high-draw fixtures.
Careful sequencing prevents costly backtracking. For homeowners evaluating structural adjustments, our guide on planning a bathroom remodel explains how to align architectural design with real-world trade scheduling.
Assessing Existing Plumbing and Slab Conditions
On a monolithic concrete slab, moving a drain line even a few inches requires saw-cutting the slab, jackhammering concrete, excavating base soil, and reconnecting into the main sanitary line. If the slab is post-tensioned, cutting into the foundation carries extreme structural risk. Post-tension cables must be mapped with ground-penetrating radar before any concrete demolition begins.
For homes with pier-and-beam framing, access underneath the subfloor offers more flexibility for moving waste lines. However, joist spacing and structural integrity must be checked. Older properties frequently conceal decades of minor leaks around wax rings and tub overflow gaskets, which softens wood framing and requires replacing rotted rim joists or subfloor decking before setting new tile.
Defining Scope: Cosmetic Refresh vs. Structural Reconfiguration
Clarifying project scope protects your timeline from ballooning out of control. A cosmetic refresh focuses on surface elements: replacing an outdated vanity, swapping plumbing trims, updating vanity mirrors, and painting drywall. These projects rarely require opening walls or altering underlying infrastructure.
A structural reconfiguration involves tearing down walls to merge a cramped water closet into the main room, building an expanded walk-in shower, or shifting plumbing rough-ins. This tier requires pulling trade permits, bringing electrical configurations up to current code standards, and rebuilding wall framing. Choosing the right scope means recognizing whether your primary frustration is aesthetic wear or a fundamentally dysfunctional floor plan.
| Project Factor | Cosmetic Refresh | Full Structural Reconfiguration |
|---|---|---|
| Plumbing Changes | Fixture trim and direct faucet swaps | Relocated drain lines, new waste arms, modified vent stacks |
| Electrical Upgrades | Direct light fixture and outlet swaps | Dedicated branch circuits, rewired wet-location lighting |
| Wall Framing | Unaltered drywall and existing partitions | Framing demolition, load-bearing headers, pocket doors |
| Permit Requirements | Rarely required for basic surface swaps | Mandated by municipal building departments |
| Primary Substrate | Existing drywall and subfloors retained | Cementitious backer boards, uncoupling mats, new subfloors |
What Permits and Local Building Codes Apply to Bathroom Remodels?
Local municipal building departments exist to ensure residential construction meets safety, fire, and structural standards. When planning bathroom renovations near me in Keller, Fort Worth, or neighboring North Texas municipalities, trade permits are mandatory whenever supply plumbing, drainage lines, structural framing, or electrical branch circuits are altered.
Municipalities enforce local variations of the International Residential Code (IRC) and National Electrical Code (NEC). Skipping permits might seem like a time-saver, but unpermitted work can complicate future property sales, invalidate homeowner insurance claims in the event of water damage, and lead to stop-work orders from city inspectors.
Waterproofing and Pan Liner Inspection Milestones
City building inspectors typically inspect a bathroom project at two primary phases: the rough-in stage and the final stage. The rough-in inspection occurs while wall cavities are exposed, before insulation, backer board, or drywall are installed.
During the rough plumbing inspection, inspectors check:
- Shower pan water-tightness: The shower receptor must be plugged at the drain and filled with standing water up to the threshold for a set inspection window to prove the pan liner does not leak.
- Slope to drain: The shower sub-pan must provide continuous pitch toward the weep holes of the clamping-ring drain without low spots that pool water.
- Pipe sizing and venting: Waste arms must maintain appropriate grade, and vents must tie into the main soil vent stack without back-pitching.
Closing up a wall before an inspector signs off on the shower pan liner or plumbing rough-in can force a contractor to demolish newly hung tile to expose the connections, causing severe delays and unnecessary costs.
Electrical Code Requirements for Wet Locations
Bathrooms introduce moisture into close proximity with electrical circuits, making strict adherence to the NEC non-negotiable. Modern building codes require that all bathroom receptacle outlets be protected by Ground-Fault Circuit-Interrupters (GFCI).
Standard practice requires a dedicated branch circuit serving only bathroom receptacles, preventing circuit overloads when high-draw heating appliances like blow dryers or curling irons operate simultaneously. Light fixtures installed directly above bathtubs or within shower zones must be specifically listed and labeled for wet locations. If a fixture is subject to shower spray, surface-mounted hanging pendants or non-rated recessed trims will fail inspection immediately.
Managing Structural Framing and Wet-Area Waterproofing
Tile and grout are not waterproof. Grout absorbs moisture, and hairline cracks in cementitious grout lines are normal as buildings expand and contract. The longevity of any bathroom renovation relies entirely on the hidden waterproofing assembly installed behind the finish surfaces.
When walls are stripped down to the studs during demolition, contractors frequently uncover hidden water damage, rusted drywall screws, or mildewed framing from failing tub surrounds. Any rotted studs must be sistered or replaced with fresh framing lumber before beginning wall construction.
[Finish Tile Layer]
         │
[Modified Thin-Set Mortar]
         │
[Bonded Waterproofing Membrane / Sheet System]
         │
[Cement Backer Unit or High-Density Foam Board]
         │
[Kiln-Dried Wall Studs & Structural Blocking]
Subfloor Preparation for Large-Format Tile
Large-format porcelain tiles demand rigid subfloor assemblies. As tile dimensions increase, the floor system’s tolerance for deflection decreases. If a floor joist system flexes under foot traffic, rigid stone or porcelain tile will pop loose, crack, or fracture along grout lines.
Proper subfloor prep requires calculating joist span and spacing. Standard plywood subfloors must be evaluated for thickness, secured with structural screws to eliminate floor squeaks, and paired with an appropriate substrate:
- Cementitious Backer Boards: Nailed or screwed into a wet bed of thin-set mortar to eliminate voids between the backer board and subfloor plywood.
- Uncoupling Membranes: Polyethylene mats featuring geometric cutouts that neutralize shear stresses between the subfloor and the tile layer, preventing substrate movement from transferring into the stone surface.
- Self-Leveling Underlayments: Poured over primed subfloors to correct dips, humps, or sloping floors before snapping layout chalk lines.
Cutting corners on floor leveling leads to severe lippage, where one edge of a tile sits higher than its neighbor. Once mortar cures, lippage cannot be ground down on glazed tile and requires complete tear-out.
Curbless Shower Transitions and Linear Drains
Curbless walk-in showers deliver clean aesthetics and aging-in-place accessibility, but their execution requires precise structural carpentry. To create a shower entrance that sits flush with the dry bathroom floor, the shower receptor must slope downward toward the drain without stepping over a raised threshold.
Achieving a flush transition requires one of two structural approaches:
- Recessing the Concrete Slab: In slab foundations, the shower area must be saw-cut and trenched down to permit a sloped pre-pan below the main floor elevation.
- Dropping Joist Elevations: In crawlspace framing, floor joists under the shower footprint are sistered, cut down, or rebuilt lower than the adjacent subfloor to accommodate the sloped mortar bed.
Pairing a curbless transition with a linear drain allows for single-plane floor grading. Unlike traditional center drains that require a bowl-shaped four-way slope (restricting tile choices to small mosaics), a linear drain allows large-format floor tiles to run continuously across the sloped shower floor.
How to Vet Local General Contractors for Bathroom Projects
Hiring the right partner is the most critical decision in any remodeling project. Vetting general contractors requires moving beyond polished portfolio photos to evaluate trade licensing, insurance limits, permitting workflows, and verified project records.
A reputable builder coordinates specialized trades—licensed master plumbers, master electricians, framing carpenters, and master tile setters—while managing city inspections and vendor supply chains. For broad advice on screening home professionals, consult our complete resource on hiring a builder contractor near me.
PRO Construction provides Accessory Dwelling Units (ADU), Garage Conversions, Garage Builds for Homeowners in Keller, TX and surrounding communities seeking additional living space, rental income, or guest accommodations.
Verifying Builder Qualifications and Track Records
Before signing a construction agreement, verify that your builder maintains active general liability insurance and local contractor registrations across your specific city jurisdiction. Building departments maintain lists of registered contractors permitted to pull permits within municipal boundaries.
Review third-party platforms such as BuildZoom to evaluate a contractor’s real permit history, verified license status, and historical project values. A consistent track record of pulled and completed municipal permits demonstrates that a builder operates transparently with code enforcement officials.
Key screening questions to ask during an initial site consultation:
- Site containment: How do you isolate construction dust from the rest of the living space? (Look for mentions of plastic zipper walls, negative-air HEPA scrubbers, and floor protection runners.)
- Project oversight: Will an assigned site supervisor be on-site daily to manage trade subcontractors?
- Trade licensing: Are plumbing and electrical rough-ins performed by licensed trade subcontractors holding master-level oversight?
- Change management: What is the specific written protocol when concealed framing rot or broken cast-iron pipes are discovered behind walls?
Contract Clarifications: Allowances vs. Fixed-Scope Bids
Contract structures vary widely among builders. Understanding how material allowances work is critical to keeping project finances predictable.
- Fixed-Scope Bids: The contractor specifies exact materials, fixture models, finishes, and labor costs upfront. The price does not change unless you alter the scope via a formal, written change order.
- Allowance-Based Estimates: The contractor includes placeholder sums for variable items like plumbing trims, custom vanities, wall tile, and light fixtures. If your actual material selections exceed the stated allowance, you pay the difference out-of-pocket, along with any contracted builder markup.
Review every allowance line item before executing a contract. If an allowance is set unrealistically low for basic porcelain tile or standard brass rough-in valves, the bid price is artificially deflated, creating budget surprises once design selections begin. For larger remodels involving room reconfigurations, our guide on how to choose and design functional floor plans provides valuable context for spatial allocation.
Common Pitfalls During Local Bathroom Renovations
Bathroom remodels involve more trades per square foot than almost any other home project. This concentration makes the workspace susceptible to scheduling conflicts, mechanical oversights, and finish failures if details are overlooked.
Homeowners and inexperienced crews frequently stumble into predictable pitfalls:
- Ordering Specialty Plumbing Trims Too Late: Concealed rough-in valves must match the decorative exterior trim kit. If you purchase an imported or custom thermostatic valve with extended supply chain lead times, your plumbing rough-in stalls, preventing drywall installation and halting the entire project.
- Undersizing the Exhaust Ventilation Fan: A standard builder-grade exhaust fan often fails to move enough air to clear moisture generated by large walk-in showers. Exhaust fans must be sized based on room cubic volume, ducted through smooth rigid metal piping, and vented directly outdoors through a roof or soffit cap—never loose into an unconditioned attic space.
- Skipping the Shower Pan Flood Test: Rushing straight from pan liner installation to tile mortar without performing an extended water isolation test invites disaster. A minor puncture in a waterproof membrane or a compromised clamping drain seal will seep moisture into the subfloor, rotting structural wood long before water appears on a ceiling below.
- Neglecting Electrical Placement for Modern Fixtures: Modern vanities frequently incorporate illuminated anti-fog mirrors, internal drawer outlets, or bidet seats. Adding these features requires roughing in electrical junction boxes inside wall cavities before tile or cabinetry is installed.
- Ignoring Tile Substrate Deflection Standards: Setting natural stone or large porcelain panels over bouncing subfloors without uncoupling mats or structural blocking inevitably leads to cracked grout and sheared tiles.
Frequently Asked Questions
What is the 30% rule for renovations?
The thirty percent rule is a planning guideline suggesting homeowners avoid spending more than roughly one-third of their home’s total property value on comprehensive renovations. In the context of single-room projects like bathrooms, it is commonly adapted to reserve approximately twenty to thirty percent of the targeted project budget as a dedicated structural and plumbing contingency fund. This cushion covers unavoidable concealed repairs—such as subfloor dry rot, corroded cast-iron pipes, or framing settling—discovered once demolition exposes the wall cavities.
Do I need a building permit to remodel a bathroom?
A building permit is typically required whenever a bathroom remodel involves structural framing changes, moving drainage pipes or water supply lines, or extending new electrical branch circuits. Direct cosmetic updates—such as replacing an existing vanity in the same position, changing a mirror, repainting, or swapping a light fixture onto an existing junction box—usually do not trigger municipal permit mandates. Always check with your local city building department, as trade requirements vary by jurisdiction.
How long does a full bathroom tear-out and renovation typically take?
A full bathroom tear-out and renovation generally requires several weeks of active construction, depending on project scale and material complexity. The process involves multiple sequential steps: selective demolition, mechanical rough-ins, municipal framing and plumbing inspections, mortar cure times, waterproofing flood tests, tile installation, cabinetry, and final plumbing and electrical trim-out. Specialty items like custom-tempered glass shower enclosures cannot be accurately measured until finish tile is fully set, often adding an extra fabrication window near the end of the project.
Can existing plumbing remain in place during a complete bathroom remodel?
Yes, keeping your existing drain, waste, and vent stack locations in place is one of the most effective ways to manage labor costs and reduce project duration. You can completely replace bathtubs, showers, vanities, and toilets with modern, high-performance fixtures while connecting directly into existing rough-in locations. This eliminates the need to cut into structural concrete slabs or alter framing joists, allowing you to invest more of your budget into premium finishes, waterproofing systems, and custom cabinetry.