Author: PRO Construction

  • Custom Home Building on Your Lot in North Texas: From Land to Key in Hand

    Custom Home Building on Your Lot in North Texas: From Land to Key in Hand

    What happens after you purchase the perfect piece of land but before you can turn the key in the front door? Who verifies that the lot is buildable, coordinates the plans, manages inspections, controls the budget, and protects the home’s structural integrity?

    Building a custom home on your own lot is not simply a matter of choosing a floor plan and hiring subcontractors. In North Texas, the property itself becomes part of the construction equation. Soil conditions, drainage, utility access, setbacks, HOA requirements, foundation design, and permitting can all affect the final cost and schedule.

    At PRO Construction, an A Boomer Group Inc. Company, we help homeowners approach the process methodically. With Bruce Laing’s 25 years of local experience, our role is to carry the construction burden while keeping you informed about the decisions that affect your investment.

    What “Build on Your Lot” Really Means

    A build-on-your-lot project is a custom home constructed on land you already own or intend to purchase. Unlike a subdivision build, there is no standardized lot package waiting for a home plan. Your property must be evaluated before design and pricing can be considered reliable.

    The process may involve:

    • Reviewing the site’s access, slope, drainage, and elevation
    • Confirming utility availability or planning for septic and private services
    • Coordinating surveys, soil reports, and foundation engineering
    • Designing around setbacks, easements, HOA rules, and local requirements
    • Establishing a realistic budget before construction begins
    • Managing permits, inspections, subcontractors, materials, and lender draws

    Whether your land is near Keller, Fort Worth, Southlake, Grapevine, Denton, or Flower Mound, site-specific planning protects you from discovering major cost issues after construction has already started.

    The Owner’s Role and the General Contractor’s Role

    A successful custom home project depends on clear responsibilities. You do not need to manage every trade or interpret every inspection report. You do, however, need to make informed decisions at the right time.

    Your role as the owner Our role as the general contractor
    Define how you want the home to function Review site feasibility and construction requirements
    Establish priorities, budget parameters, and must-have features Coordinate design, estimating, permitting, and construction
    Make timely selections for finishes and fixtures Schedule trades and coordinate material deliveries
    Review proposed changes and approve documented decisions Manage change orders, inspections, quality control, and jobsite progress
    Work with your lender on personal financing requirements Provide project documentation for construction draws and lender coordination

    Our job is not to remove you from the process. It is to make sure you are involved in the decisions that matter without being forced to become a full-time construction manager.

    Step One: Site Feasibility Before Final Design

    The first question is not, “What style of home do you want?” It is, “What can this lot reasonably support?”

    A site feasibility review should consider:

    Access and logistics

    Can construction vehicles reach the property? Is there enough room for deliveries, equipment, and material storage? A narrow street, steep driveway, or limited access can affect both cost and scheduling.

    Soil, drainage, and foundation conditions

    North Texas properties can vary significantly in soil composition and drainage behavior. Soil reports and engineering recommendations may influence the foundation system, grading plan, and site preparation budget. On some lots, the design may require more detailed engineering for a slab foundation, including evaluation of post-tension slab requirements.

    Utilities

    Water, sewer, electricity, gas, and communications may already be available, or they may require extensions. Rural or semi-rural properties in Denton County and surrounding communities may also require private water or septic planning.

    Setbacks, easements, and restrictions

    The home must fit within required building lines and any recorded easements. HOA architectural guidelines may control exterior materials, roof forms, garages, outbuildings, or accessory structures even when the city or county would otherwise allow them.

    This review is where a seasoned general contractor in Denton TX can help identify risks before they become expensive surprises.

    Step Two: Design the Home Around the Property

    A custom home should respond to the land rather than forcing the land to accommodate an unsuitable plan.

    Design decisions may include:

    • Positioning living spaces for natural light and views
    • Locating the garage for safe and practical driveway access
    • Planning covered patios and outdoor living areas
    • Protecting mature trees where feasible
    • Accounting for drainage routes and finished-floor elevations
    • Allowing space for a future workshop, custom garage, or metal building
    • Creating efficient circulation between the kitchen, living spaces, bedrooms, and utility areas

    A floor plan is only one part of the design. The exterior materials, roofline, window placement, foundation height, and site grading must work together.

    Three-bedroom open-concept residential floor plan with kitchen island, living area, bedrooms, bathrooms, and integrated storage

    If you are considering a detached workshop, custom garage, or metal building at the same time as the home, bring that requirement into the early planning conversation. Placement, electrical service, driveway access, drainage, and setbacks are easier to coordinate before the main home is designed and permitted.

    If the property plan includes an ADU, that scope should go through DFW ADU. An ADU is not automatically interchangeable with a detached garage, workshop, or guest space, and its permitting and design requirements need to be handled as their own project.

    Step Three: Establish a Transparent Budget and GMP Structure

    A custom home budget should be more than a single square-foot figure. It should explain what is included, what is excluded, and which costs remain subject to verification.

    A responsible preliminary budget should identify:

    • Home construction
    • Site clearing and grading
    • Foundation and engineering
    • Utility connections or extensions
    • Driveway and flatwork
    • Permits and testing
    • Appliances, fixtures, and finish selections
    • Landscaping and exterior improvements
    • Allowances for items not yet selected
    • Contingency for verified unknown site conditions

    A Guaranteed Maximum Price, or GMP, is intended to establish an upper limit for defined work, subject to the contract terms. In practice, the protection comes from the details: a clearly documented scope, defined allowances, written exclusions, and a process for approved changes.

    Before signing, ask:

    1. Is the proposed price fixed, GMP-based, or cost-plus?
    2. What site conditions are excluded?
    3. How are allowances established and reconciled?
    4. What happens if the selected materials exceed an allowance?
    5. How are change orders documented and approved?
    6. Are permit fees, engineering, utility work, and inspections included?

    A transparent price is not necessarily the lowest initial number. It is the number you can understand and manage.

    Step Four: Coordinate Construction Financing

    Many owners use a construction-to-permanent loan or another construction financing structure. These loans commonly release funds through draws as defined milestones are completed.

    Your lender may require:

    • Approved plans and specifications
    • A detailed construction budget
    • A signed construction agreement
    • Builder information and insurance documentation
    • Appraisal based on the completed home
    • Inspection reports before draw releases
    • A projected construction schedule

    This is where early communication matters. PRO Construction can coordinate project documentation with your lender, while your lending professional handles underwriting and loan terms.

    We also value relationships with local partners, including Gus Moreland at First United Bank, who can help homeowners understand the financing side of a construction project. Builders FirstSource, ProSource, and Sherwin-Williams are also important partners in material coordination and finish selection.

    Step Five: Manage Materials, Trades, and Inspections

    Once construction begins, the general contractor becomes the central point of accountability.

    That includes coordinating:

    • Excavation and foundation work
    • Framing and structural components
    • Roofing, windows, and exterior envelope
    • Plumbing, electrical, and HVAC systems
    • Insulation and drywall
    • Cabinets, countertops, flooring, and paint
    • Final fixtures, trim, and punch-list work

    Material coordination is especially important on a custom home because selections affect both cost and schedule. A delayed cabinet package can affect countertops. A late window delivery can affect weatherproofing. A finish change can affect several trades at once.

    Inspections are not merely administrative checkpoints. They help verify that work is progressing according to approved plans and applicable code requirements. We coordinate the process so you are not left trying to schedule every inspection or determine what must happen next.

    Custom North Texas barn-style home with stone and metal exterior finishes, expansive driveway, covered porch, and open-concept interior

    How Long Does a Custom Home Take?

    A custom home timeline generally includes three broad phases:

    1. Pre-construction: site review, design, engineering, estimating, financing, and permitting
    2. Construction: site work, foundation, framing, mechanical systems, finishes, and inspections
    3. Closeout: punch list, final approvals, warranty documentation, and move-in preparation

    Many North Texas custom homes require approximately 12 to 22 months from serious planning through occupancy, although the actual schedule depends on the size of the home, site complexity, permitting jurisdiction, material selections, weather, and changes made during construction.

    A realistic schedule is more valuable than an aggressive promise. Honest, steady work protects quality.

    Why Local Experience Matters in North Texas

    A home in Southlake may face different HOA and site-planning considerations than a property outside Denton. A lot in Grapevine or Keller may have different access and utility conditions than acreage near Flower Mound or Fort Worth.

    Local experience helps with:

    • Understanding regional subcontractor availability
    • Anticipating North Texas soil and drainage concerns
    • Coordinating with local permitting departments
    • Planning for weather and seasonal construction conditions
    • Selecting durable materials for the Texas climate
    • Managing the expectations of lenders, inspectors, and homeowners

    Bruce Laing’s 25 years of local experience provide a practical foundation for that work. We know that your home is more than a construction project. It is a long-term investment, a place for your family, and part of your financial legacy.

    Key Takeaways

    • Building on your lot begins with site feasibility, not with a floor plan.
    • Soil, drainage, utilities, access, easements, and setbacks can materially affect the budget.
    • The owner makes important design and selection decisions; the general contractor coordinates the work required to execute them.
    • A GMP or fixed-price structure is only meaningful when the scope, allowances, exclusions, and change-order process are clearly written.
    • Construction financing should be discussed before finalizing the project budget.
    • Material coordination and inspections are essential to protecting the schedule and structural integrity.
    • Future garages, workshops, and metal buildings should be considered early.
    • ADU projects should be coordinated through DFW ADU.
    • A realistic timeline and transparent communication are more valuable than a rushed promise.

    Frequently Asked Questions

    Can PRO Construction build a custom home on land I already own?

    We can discuss the feasibility of your lot, the construction scope, and the appropriate next steps for a custom home project in the North Texas area. A site review is necessary before a reliable budget or schedule can be established.

    Do I need an architect or designer?

    That depends on the project, jurisdiction, and level of customization. Some projects require architectural, structural, or engineering services. We help coordinate the professional team needed to move the plans from concept to permitted construction.

    Can I include a workshop or custom garage with the home?

    Yes, a workshop, custom garage, or metal building can be considered during early site planning. Its location, foundation, utilities, access, and permitting requirements should be coordinated with the primary residence.

    What should I bring to the first conversation?

    Bring your property address, survey if available, deed restrictions or HOA information, utility details, preferred home size, inspiration images, and an approximate budget range. The more clearly we understand your goals, the more useful the early planning process becomes.

    How do I start?

    Start a conversation with PRO Construction by calling 817-372-0211. We will listen to your goals, review what is known about the property, and help identify the next responsible step.

    Explore our custom residential work, review our home addition planning resources, or visit the PRO Construction home page to learn more about our services.

    PRO Construction is an A Boomer Group Inc. Company. We build with clear communication, durable methods, and respect for the investment you are making.

  • Build Your Custom Home Online: A Realistic Guide

    Build Your Custom Home Online: A Realistic Guide

    To build your custom home online, you use web-based layout software and 3D modeling platforms to establish your floor plan concept, room flow, and visual preferences before hiring a general contractor. While these digital programs help you clarify spatial requirements and compile finish ideas, software alone cannot generate the structural engineering, geotechnical calculations, or stamped architectural schematics required for municipal permitting. Turning a virtual model into a physical residence requires translating your online concept into stamped working drawings that comply with local building codes, structural load paths, and site topography.

    Build Your Custom Home Online: A Realistic Guide

    What Does It Actually Mean to Build Your Custom Home Online?

    Homeowners looking to build your custom home online typically interact with browser-based drafting tools, parametric 3D configurators, or digital plan libraries. These platforms allow you to drag and drop interior partition walls, test window placements, adjust ceiling heights, and configure room adjacencies. You can evaluate how an open-concept living area connects to an outdoor patio or how a split-bedroom layout isolates the primary suite from guest rooms.

    Digital configurators operate in a simplified virtual environment where soil bearing capacity is uniform, plumbing stacks do not require vertical chases, and roof structures carry theoretical loads without dedicated bearing points. Because of these simplifications, an online model functions primarily as a visual brief rather than a buildable blueprint.

    Web-based design platforms excel at three primary functions:

    • Spatial visualization: Walking through a 3D model helps you evaluate interior sightlines, traffic flow, and room proportions before committing to construction drawings.
    • Option testing: Comparing single-story footprints against two-story layouts with detached garages or covered porches allows you to weigh different spatial configurations.
    • Specification gathering: Storing your visual preferences for siding materials, roof profiles, cabinetry styles, and trim details creates an organized reference document for your design team.

    Exporting your digital layout provides the aesthetic and functional baseline for your project. The physical construction process begins when structural engineers, civil designers, and licensed trade contractors adapt that concept to fit municipal building regulations and physical site conditions.

    Conceptual floor plans versus structural working drawings

    A conceptual floor plan shows room labels, approximate interior dimensions, door swings, and window locations. It illustrates where you intend to place specific living activities within the home.

    Structural working drawings—often referred to as construction blueprints—provide trade contractors, structural engineers, and building inspectors with the technical specifications required to assemble the building safely. For an in-depth breakdown of these technical drawing packages, review our house blueprints builder guide.

    Feature Conceptual Online Floor Plan Structural Working Drawing Set
    Primary Purpose Visualizing spatial relationships and interior layout ideas Directing trade execution, structural engineering, and municipal permitting
    Dimensional Detail Approximate room sizes that often omit finished wall thicknesses Exact framing dimensions accounting for studs, exterior sheathing, and drywall
    Foundation Detail None (assumes a completely flat, uniform lot) Engineered foundation layout based on site-specific soil testing
    Structural Engineering No calculation of load paths, header sizes, or shear walls Stamped point loads, truss designs, shear walls, and hold-down brackets
    Mechanical Systems Generic fixture placements without piping pathways Dedicated routing paths for ductwork, plumbing stacks, and electrical panels
    Permit Usability Cannot be submitted to city plan reviewers for permits Fully compliant with local residential building codes and ready for submission

    Key Steps to Plan and Design Your Home Using Digital Tools

    Using digital layout software before consulting a builder helps organize your ideas, establish spatial priorities, and speed up initial project consultations. Structuring your digital design process systematically prevents common layout mistakes and produces clearer documentation for your design-build team.

    1. Outlining functional spaces and lifestyle requirements

    Begin by defining how each room will support your daily routines rather than focusing immediately on exterior styling. Group your requirements into distinct functional zones:

    1. Private living zones: Primary suites, guest rooms, and multi-generational living quarters. Consider whether secondary bedrooms need acoustic buffering from common areas like media rooms or great rooms.
    2. Work and utility zones: Dedicated home offices, walk-in pantries, laundry facilities, and mudrooms. Placing high-traffic utility spaces directly adjacent to garage entries keeps daily clutter isolated from main living areas.
    3. Social zones: Great rooms, kitchens, and formal dining areas. Determine whether you prefer continuous open living spaces or semi-defined rooms with framed archways.
    4. Accessory structures: If your lot dimensions permit, consider how the primary residence connects to outdoor living zones, guest suites, or detached structures. PRO Construction provides Accessory Dwelling Units (ADU), Garage Conversions, Garage Builds for Homeowners in Keller, TX and surrounding communities seeking additional living space, rental income, or guest accommodations..

    2. Testing spatial flow and furniture scale digitally

    Scale distortion is a frequent challenge when working in consumer-grade drafting software. Virtual rooms often appear spacious on a computer screen until real-world furniture dimensions and clear walkway zones are introduced.

    Apply these dimensional standards when refining your digital layout:

    • Set main hallway widths to at least 36 inches, though 42 to 48 inches provides significantly better mobility and furniture movement.
    • Maintain at least 36 inches of clearance between kitchen island countertops and perimeter cabinetry so appliance doors, pull-out trash bins, and drawers open without obstruction.
    • Insert accurate furniture blocks for king beds, dining tables with pulled-out chairs, and sectional sofas to confirm you retain at least 30 inches of walkable perimeter space.
    • Position window openings to maximize natural daylighting while avoiding direct sightlines into private areas from neighboring homes or street traffic.

    3. Compiling specifications and material preferences

    Use your software’s documentation tools to compile material and architectural selections once the basic layout functions smoothly. Note desired ceiling plate heights, exterior cladding materials, roofing materials, and window styles.

    Generate dimensioned two-dimensional floor plans alongside your three-dimensional perspective renderings when exporting your digital files. For additional insight on organizing practical room adjacencies, our guide on how to choose and design functional floor plans outlines room connectivity principles in detail.

    Where Online House Planning Software Hits a Wall

    Virtual drafting platforms model building sites as clean, level planes with stable ground conditions. Physical residential construction, however, is governed by geotechnical conditions, municipal zoning constraints, and structural mechanics.

    North Texas expansive clay soils

    Expansive clay soils contain minerals that swell substantially when absorbing moisture and shrink during hot, dry periods. Web-based software does not account for the structural movement caused by fluctuating soil conditions. Building safely on expansive soil requires geotechnical soil core testing followed by a custom-engineered foundation—typically an engineered post-tension slab with deepened perimeter beams or drilled concrete piers anchored into stable strata.

    Lot orientation and municipal setbacks

    Digital tools do not automatically enforce property lines, utility easements, or municipal drainage corridors. Local building departments establish front, rear, and side setback requirements that define the buildable envelope of your lot. If your online design produces a footprint wider than the allowed building envelope between side setbacks, the entire floor plan requires dimensional revision.

    Local civil drainage regulations also restrict the total percentage of impervious surface cover permitted on a residential parcel. Exceeding impervious surface caps through combined roof area, concrete driveways, and hardscaped patios leads to permit rejections until drainage mitigation plans are approved.

    Mechanical, structural, and framing pathways

    Many web applications allow users to place upper-level bathrooms directly above wide, clear-span living rooms without identifying where vertical plumbing drain stacks and venting pipes will drop. On the job site, a vertical drain pipe cannot pass through a solid engineered structural beam without compromising load capacity.

    High-efficiency heating and cooling equipment also requires dedicated vertical duct chases between levels. When you build from an unverified digital sketch rather than a coordinated structural plan, mechanical trades are forced to build drop-down soffits and chase walls on site, altering your intended ceiling heights and clean architectural lines.

    How to Bridge the Gap Between Virtual Plans and Job Site Reality

    Translating an online concept into a physical structure requires a structured pre-construction workflow that validates your design against real-world engineering standards.

    1. Site feasibility and zoning analysis

    Your builder performs a comprehensive feasibility assessment on your specific lot before proceeding to structural engineering. This initial review evaluates:

    • Boundary and topographic land surveys
    • Local zoning district rules and maximum height limits
    • Flood plain designations and natural surface water drainage paths
    • Municipal tree preservation and canopy protection ordinances

    2. Professional engineering translation

    Your conceptual export moves to a structural designer and licensed engineer to generate constructible drawings. Engineering coordination includes:

    • Calculating vertical and lateral load distributions from the roof down through the wall framing to the foundation
    • Sizing engineered wood or steel headers across wide window openings and multi-panel patio doors
    • Designing coordinated Mechanical, Electrical, and Plumbing (MEP) layouts that conceal utility runs within wall cavities and designated attic spaces

    Review our detailed custom home building workflow to see how design-build teams coordinate engineering documentation directly with municipal code authorities.

    3. Financial predictability through clear contracting

    Converting digital plans into physical structures requires balancing your aesthetic vision with material and labor requirements. Establishing a clear construction agreement, such as a fixed-price contract or a Guaranteed Maximum Price agreement, ensures that all structural components, energy code compliance details, and material selections are specified before site excavation starts. If you plan to finance your build, exploring your financing options early in the design stage helps define an accurate overall investment range.

    4. Dedicated on-site construction management

    A project manager provides continuous oversight throughout the physical build, translating engineering documents into daily trade execution. Site managers verify framing tolerances, moisture barrier installations, subcontractor sequencing, and municipal inspection milestones across each phase of construction.

    Five Critical Mistakes to Avoid When Planning a Custom Home Online

    Digital planning tools give you tremendous creative freedom, but failing to anticipate real-world construction constraints can lead to costly revisions and permitting delays.

    1. Designing without boundary surveys or topography data

    Sketching a floor plan without boundary and topographic survey data frequently leads to unbuildable designs. A parcel that appears level can easily feature a grade elevation change of several feet across the proposed building footprint. Sloped sites require stepped foundations, dropped grade beams, or retaining walls that directly impact exterior door thresholds, driveway slopes, and garage slab elevations.

    2. Overlooking utility infrastructure and drainage pathways

    Standard design software does not show the physical locations of municipal water meters, sewer taps, electrical transformers, or private septic drain fields. Placing high-demand plumbing zones on the side of the home furthest from the utility tie-in increases trenching labor and installation costs.

    3. Buying generic stock blueprints without local code adjustments

    Stock floor plan downloads purchased online often create issues during municipal plan review. Generic blueprints designed for broad national use rarely account for:

    • Regional wind-speed and lateral wind-load bracing criteria
    • Local energy code compliance standards
    • Regional foundation engineering tailored to specific soil classes

    Our technical overview of house construction design explains how regional building codes dictate structural framing and envelope assemblies.

    4. Prioritizing cosmetic finishes over building envelope performance

    Focusing heavily on virtual tile patterns, cabinet colors, and plumbing fixtures often leads homeowners to overlook exterior envelope details. Wall framing thickness, continuous exterior insulation, high-performance window assemblies, and thorough air sealing details determine your home’s long-term energy consumption and indoor comfort far more than decorative finishes.

    5. Relying on automated cost calculators

    Third-party online cost calculators rely on broad regional averages that fail to reflect current local material costs, trade availability, or site-specific development requirements. Developing an accurate construction budget requires itemizing actual site costs, including utility trenching, tree removal, driveways, and municipal permit fees.

    If you are ready to evaluate your layout ideas against a physical job site, review our full range of services or reach out across our North Texas service areas through our contact page to discuss your project with our local team.

    Frequently Asked Questions

    Can I design my own house online for free?

    Free web-based drafting tools allow you to explore room arrangements, test furniture layouts, and generate three-dimensional visual walkthroughs. However, free software produces conceptual drawings rather than constructible blueprints. Municipal building departments require structural framing plans, engineered foundation designs, and code-compliant mechanical schematics stamped by a state-licensed professional engineer before issuing a building permit.

    Is it actually cheaper to build your own house?

    Managing your own custom home build as an owner-builder rarely saves money unless you have professional construction management background. Owner-builders lack commercial subcontractor relationships, pay retail pricing for materials, and often face substantial scheduling delays and expensive trade rework when uncoordinated installations fail municipal inspections. Partnering with a licensed general contractor provides volume trade pricing, strict schedule coordination, and formal warranty protection.

    Can digital house plans be submitted directly for building permits?

    Stock digital house plans cannot be submitted directly for building permits without professional review. City building officials require structural drawings tailored to local building codes, regional wind-load standards, and site-specific soil engineering. A local design-build contractor or licensed engineer must review and stamp the plans to confirm compliance with all regional residential construction codes.

    What should I bring to an initial custom home consultation after designing online?

    Bring your dimensioned two-dimensional floor plans, exterior 3D renderings, an updated boundary and topographic survey of your property, and a prioritized list of essential features. Providing these organized materials allows your builder to quickly assess site feasibility, identify necessary structural adjustments, and establish a clear construction plan.

  • Tiny Houses for Sale Near Me: What Texas Buyers Must Know

    Tiny Houses for Sale Near Me: What Texas Buyers Must Know

    Searching for tiny houses for sale near me presents Texas buyers with a fundamental choice: purchase a movable unit built on a trailer chassis or construct a permanent accessory dwelling unit on a poured foundation. While factory-made shells and mobile micro-cabins appear convenient, local municipal zoning ordinances, setback mandates, and building safety codes determine whether you can legally occupy the structure. Navigating property readiness, utility tie-ins, and local permitting requirements upfront ensures your secondary residence remains fully compliant, durable, and structurally sound.


    Tiny Houses for Sale Near Me: What Texas Buyers Must Know

    What Counts as a Legal Tiny House in North Texas?

    Municipal building departments across North Texas evaluate small residential structures based on foundation engineering, structural framing, and compliance with adopted building codes rather than visual styling. Most incorporated cities enforce the International Residential Code (IRC), which governs minimum ceiling heights, emergency egress points, room sizes, and sanitation fixtures.

    Feature Tiny House on Wheels (THOW) Permanent Accessory Dwelling (ADU)
    Legal Classification Personal Property / Travel Trailer Real Property / Residential Addition
    Foundation Type Wheeled Steel Trailer Chassis Engineered Concrete Slab or Drilled Piers
    Suburban Backyard Use Prohibited in most city limits Allowed per municipal ADU ordinances
    Utility Infrastructure Temporary RV cords and hoses Direct-buried, hardwired connections
    Financing Options RV loans or personal loans Construction loans or home equity
    Property Valuation Depreciates like a motor vehicle Appraises alongside the primary home

    Building codes require habitable rooms to provide adequate clearance, dedicated sanitation facilities, and approved emergency escape windows. Purchasing an out-of-state mobile unit without verifying these standards can trigger municipal stop-work orders or utility shutoffs. Homeowners can examine these baseline standards in our detailed guide to tiny homes in North Texas.


    Tiny Houses on Wheels vs. Permanent Accessory Dwellings

    Mobility represents the primary dividing line for buyers exploring tiny houses for sale. Wheeled micro-units are built over heavy-duty trailer frames and classified by the state as recreational vehicles.

    Because recreational vehicles are designed for temporary travel rather than continuous habitation, most suburban municipalities prohibit living in them on residential lots. Parking an occupied travel trailer in a suburban driveway or backyard generally violates local zoning regulations. Consequently, mobile units remain restricted to licensed RV parks, specialized rural developments, or unincorporated acreage lacking land-use restrictions.

    Permanent backyard cottages and accessory dwelling units (ADUs) sit securely on engineered concrete foundations or reinforced pier-and-beam assemblies. These structures connect straight to municipal water mains, sanitary sewer lines, and primary electrical panels. Because they meet standard residential construction criteria, permanent guest suites are legally recognized as habitable improvements that contribute measurable square footage to the parcel.


    Buying Prefab Models vs. Building on a Permanent Foundation

    Homeowners evaluating tiny houses often compare prefabricated cabin kits, converted utility sheds, and ground-up site builds. A pre-assembled shed on skids might seem cost-effective initially, but standard storage outbuildings lack the framing density and thermal protection required for human occupancy.

    Component Standard Utility Shed Shell Code-Compliant Site Build
    Wall Framing 2×4 studs spaced on 24-inch centers 2×4 or 2×6 studs on 16-inch centers
    Exterior Sheathing Direct-attached thin siding panels Structural OSB sheathing with weather wrap
    Window Specifications Single-pane utility glass Double-pane Low-E insulated glazing
    Roof Construction Lightweight unvented trusses Engineered rafters with continuous ridge vents
    Floor System Uninsulated plywood over raw skids Reinforced vapor-barrier slab or insulated subfloor

    Commercial storage sheds feature framing intended strictly for lawn equipment. Upgrading a basic utility shed to residential standards requires reinforcing wall studs to standard 16-inch centers, reframing window openings with load-bearing headers, and applying proper exterior weather barriers.

    Summer heat across Texas creates severe thermal demands on compact living spaces. Lightweight prefab shells lack continuous thermal breaks, causing interior temperatures to spike under direct sun exposure.

    Proper site-built tiny homes incorporate closed-cell spray foam or dense-pack insulation to seal framing cavities against outdoor air infiltration. Mechanical planning requires properly calculated ductless mini-split heat pumps. Sizing cooling equipment accurately prevents short-cycling, allowing the system to run long enough to pull humidity from the indoor air. To understand how custom building differs from factory modules, read our overview of fabricated homes and our approach to custom home building.


    Site Feasibility for Tiny Houses and Detached Guest Suites

    Evaluating the physical layout of your land is necessary before purchasing plans or ordering building materials. Positioning an additional residential structure on an existing lot requires careful attention to soil mechanics, utility runs, and zoning setbacks.

    Expansive clay soils across North Texas shift dramatically between wet winters and hot, dry summers. This continuous movement places significant stress on unreinforced structures, making unanchored wood skids unsuitable for long-term foundations. Permanent construction utilizes monolithic concrete slabs with deep perimeter grade beams or concrete piers drilled down to stable sub-strata.

    Utility connections require comprehensive planning:

    1. Electrical Service: Compact dwellings rely on dedicated circuits for mini-splits, water heaters, and electric appliances. An electrician evaluates the main house breaker panel to verify if the existing service capacity can support an added sub-panel without a service panel upgrade.
    2. Potable Water Lines: Potable water runs through buried PEX piping routed below local freeze depths, protected by an approved backflow prevention assembly to keep the municipal supply clean.
    3. Sanitary Sewer Lateral: Drain pipes must maintain a consistent downward pitch of one-quarter inch per linear foot to carry waste to the city sewer. Sites sloping downward away from the street require a dedicated sewage pump station to lift wastewater up to the public lateral.

    Homeowners associations (HOAs) frequently enforce restrictive covenants that exceed basic city zoning requirements. These private rules often dictate matching brick or stone facades, roof pitch parameters, and strict outbuilding dimensions. Integrating your living quarters with detached garages can often satisfy both HOA design rules and city setback requirements.


    Zoning Restrictions and Permitting Roadblocks in Texas

    Zoning frameworks for secondary dwellings vary significantly across Texas municipalities. Certain jurisdictions permit detached accessory structures by right, while neighboring communities enforce strict lot-size thresholds, parking ratios, or total prohibition of secondary kitchens.

    Zoning Challenge Structural or Operational Impact
    Minimum Lot Dimensions Prevents secondary dwellings on smaller suburban parcels
    Impervious Coverage Caps Restricts total surface area covered by roofs, driveways, and patios
    Utility Metering Rules Prohibits secondary meters, requiring sub-panel configurations
    Off-Street Parking Mandates Requires an extra paved parking space on the property
    Owner-Occupancy Covenants Mandates that the property owner reside in the primary home

    Delivered shells bought off retail sales lots rarely include stamped engineering packages, which can stall the permitting process at the city building desk. Municipal planning departments require signed structural drawings, foundation details, and electrical schematics prior to permit issuance. Reviewing our guide on custom ADU planning near Grapevine illustrates how municipal ordinances govern small-footprint developments.


    Step-by-Step Process for Building a Backyard Tiny Home

    Constructing a permitted backyard tiny house or detached suite involves an orderly progression through feasibility analysis, architectural drafting, trade rough-ins, and final finishes.

    1. Site Assessment and Feasibility Mapping

    A surveyor maps your parcel boundaries, locating existing underground easements, drainage pathways, and required setback buffers. This step confirms your property can legally accommodate the footprint without violating local land-use limits.

    2. Architectural Design and Plan Engineering

    Draftspersons produce blueprints indicating wall framing spans, window dimensions, electrical panel loads, and plumbing routes. These documents are submitted to the municipal development department to obtain required building, electrical, mechanical, and plumbing permits.

    3. Foundation Pour and Trenching

    Crews dig trenches for water lines, sewer connections, and electrical conduit before pouring concrete. Foundation teams set moisture barriers, tie reinforcing steel rebar, and pour an engineered slab or drill structural concrete piers.

    4. Framing and Rough-In Trades

    Framers build exterior walls using dimensional lumber on 16-inch centers, set engineered roof trusses, and secure exterior OSB sheathing. Licensed trades then run internal wiring, PEX water lines, plumbing vents, and mini-split lines before city building inspectors perform mandatory rough-in checks.

    5. Insulation, Drywall, and Interior Finish-Out

    Installers seal exterior wall cavities with high-performance spray foam or batt insulation. Drywall is hung and finished, followed by cabinetry, durable hard-surface flooring, fixtures, and interior trim.

    PRO Construction provides Accessory Dwelling Units (ADU), Garage Conversions, Garage Builds for Homeowners in Keller, TX and surrounding communities seeking additional living space, rental income, or guest accommodations.

    Partnering with a general contractor who manages the entire build protects your budget and ensures the structure passes all inspections required for a final Certificate of Occupancy. Whether you plan to build a detached guest cottage, add space through attached additions, or review project financing, working with an experienced local contractor safeguards your investment. Homeowners across our regional service areas and Justin, TX can contact our team directly to discuss site feasibility.


    Frequently Asked Questions

    Is it cheaper to buy a tiny home or build a tiny home?

    Purchasing a basic factory shell often carries a lower initial purchase price, but the total investment required to make it livable closes that gap quickly. Delivered shells exclude foundation pours, utility trenching, plumbing connections, electrical sub-panels, and local permit fees. When you factor in the cost of hiring separate trades to finish out an uninsulated shell to residential standards, building a site-constructed dwelling on a permanent foundation delivers greater long-term durability and measurable property equity.

    Can I legally put a tiny house on wheels in my backyard?

    Most incorporated municipalities across Texas prohibit tiny houses on wheels from serving as permanent backyard residences. Local land-use codes classify wheeled units as recreational vehicles, restricting them to licensed RV parks, mobile home communities, or unregulated rural land. To create a legal, permanent backyard home within city limits, the dwelling must be anchored to an engineered foundation and permitted under the standard residential building code.

    Can I rent out a backyard tiny home or guest suite?

    Rental allowances depend on municipal zoning rules and private HOA restrictions. Several North Texas cities permit long-term leasing for fully permitted accessory dwellings, provided the property owner maintains primary residence on the parcel and provides adequate off-street parking. Short-term rentals, however, face strict operational limitations or outright bans in many suburban neighborhoods, making early zoning verification critical.

  • Home Addition Contractor in Roanoke, TX: Planning Guide

    Home Addition Contractor in Roanoke, TX: Planning Guide

    Hiring an experienced home addition contractor in Roanoke TX ensures your expansion meets local zoning rules, handles active North Texas clay soils, and integrates cleanly with your existing layout. A successful residential addition requires engineering the foundation tie-in, verifying utility capacities, and coordinating structural framing to match your original architecture. Planning every detail before pulling permits keeps timelines predictable and prevents structural settling down the road.

    Expanding a home is fundamentally different from building on an empty lot. Every decision must account for the existing framing, rooflines, plumbing lines, and electrical distribution. Whether you need a primary suite extension, a multi-generational living wing, or a dedicated home office, working with a builder who understands local municipal codes and regional structural engineering standards protects your property value and your investment.


    Home Addition Contractor in Roanoke, TX: Planning Guide

    Bump-Out, Second Story, or Full Wing: Choosing the Right Addition Type

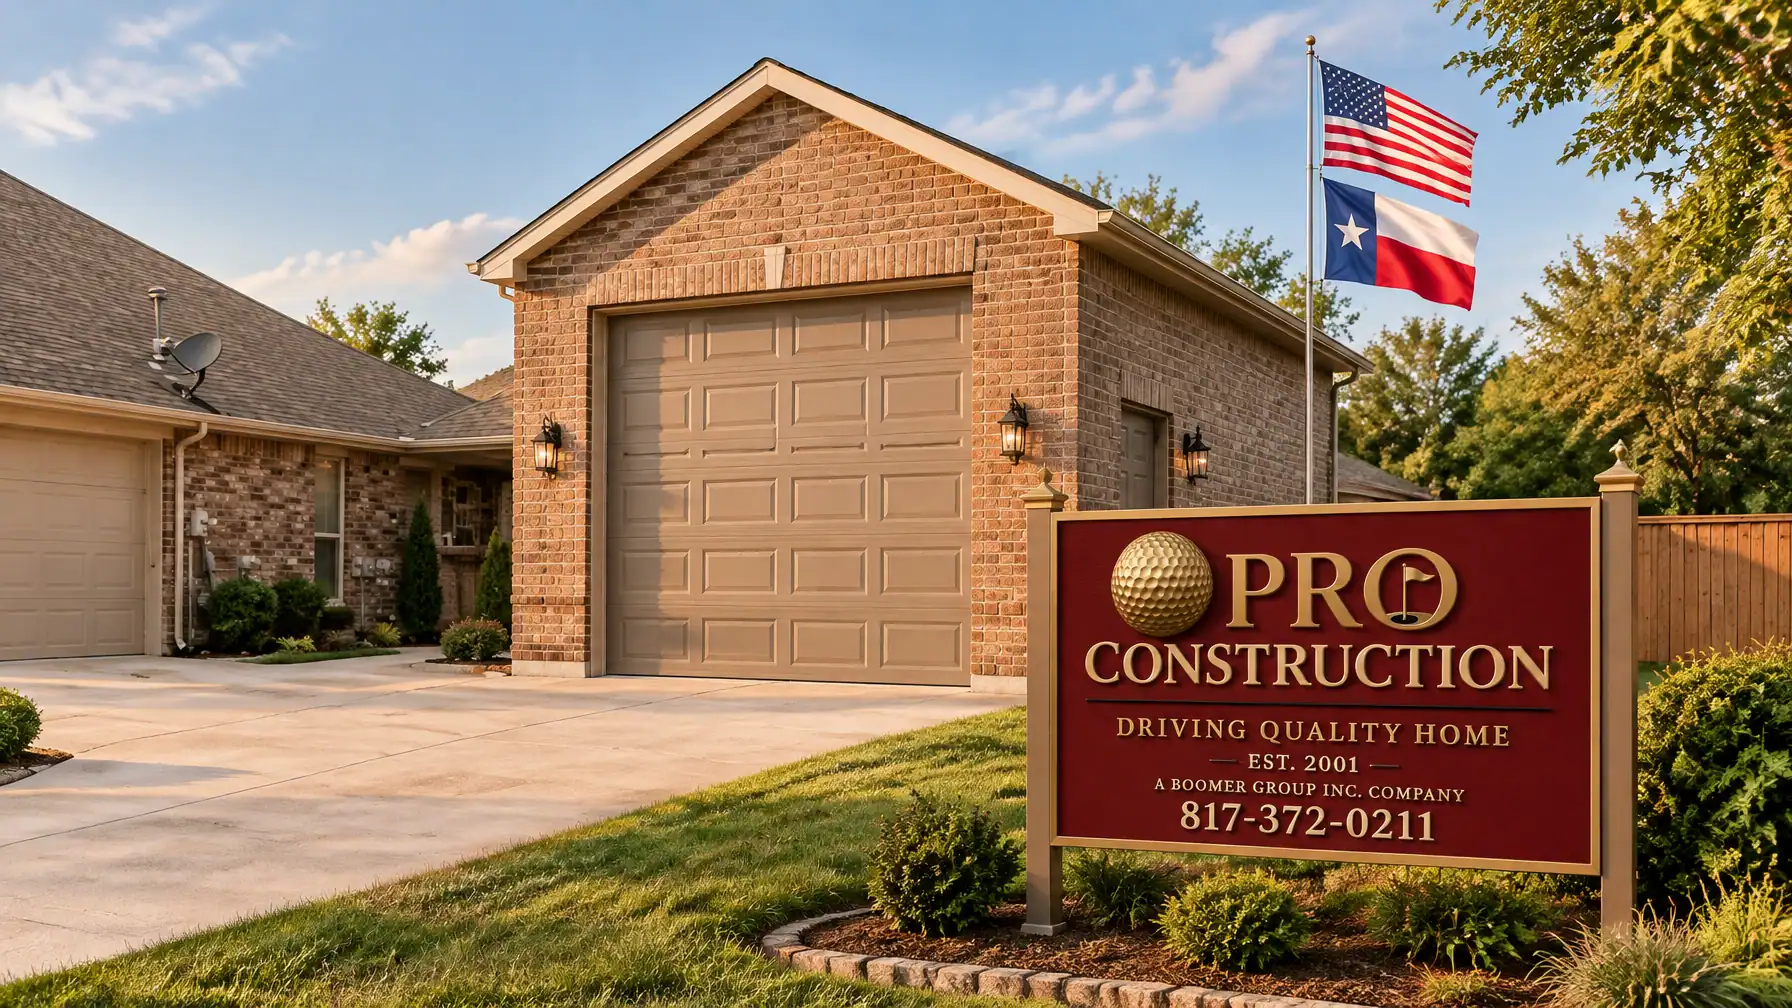
    Detached brick garage addition next to a residential home

    Determining how your home expands depends on your lot dimensions, existing structural layout, and budget parameters. Each expansion style comes with distinct structural requirements, especially when building in the Dallas-Fort Worth area.

           ADDITION CONFIGURATIONS
     ┌──────────────────────────────────────┐
     │  BUMP-OUT (Micro-Expansion)          │
     │  • Extends footprint 2–8 feet        │
     │  • Often cantilevers or small slab   │
     ├──────────────────────────────────────┤
     │  FULL HORIZONTAL WING                │
     │  • Complete ground-level suite       │
     │  • Requires dedicated foundation     │
     ├──────────────────────────────────────┤
     │  VERTICAL SECOND STORY               │
     │  • Preserves yard footprint          │
     │  • Requires foundation/wall framing  │
     │    reinforcement audits              │
     └──────────────────────────────────────┘

    Main-Level Ground Expansions vs. Vertical Additions

    Ground-level additions expand your footprint outward onto your lot. These projects require excavation, concrete work, and roofline tie-ins, but they allow you to keep living in your home during the majority of the build. Ground extensions are particularly common for expanding kitchens, adding primary bedrooms, or building complete attached wings.

    Vertical additions build upward by adding a second story over an existing single-story structure or over an attached garage. This approach preserves your backyard and outdoor living space, which is critical on smaller suburban lots. However, vertical additions require a structural engineer to evaluate the existing slab footings and load-bearing wall studs. North Texas foundation slabs designed solely for single-story loads often need localized underpinning or grade-beam thickening before they can support a second floor.

    Addition Type Footprint Impact Foundation Scope Living Disruption Primary Structural Focus
    Micro Bump-Out Minimal lot loss Cantilevered joists or shallow grade beam Low Floor joist sizing and exterior flashing
    Ground-Level Wing Consumes yard space New engineered slab with pier tie-ins Moderate Foundation pinning and roof tie-in
    Second-Story Addition Zero lot loss Slab/footing reinforcement check High (temporary roof removal) Load path transfer to main foundation

    Structural Headers and Foundation Tie-In Feasibility

    When opening an exterior wall to connect an addition, that wall is almost always load-bearing. Removing exterior wall studs requires installing an engineered structural header—such as a laminated veneer lumber (LVL) beam or a steel I-beam—to carry the roof and ceiling loads above.

    Foundation tie-ins present the largest technical challenge in ground expansions. Roanoke soils feature high concentrations of expansive clay that swell during wet seasons and shrink during dry summers. If a new concrete slab is poured directly against an existing foundation without structural anchoring, the two foundations will move independently. This differential movement causes drywall cracking, sticking doors, and roof flashing failures. A proper tie-in uses drilled rebar dowels set in high-strength epoxy along the existing foundation beam, supplemented by drilled concrete piers beneath the new perimeter beams to match the depth and stability of the original home.

    Matching Rooflines, Pitch Profiles, and Masonry

    An addition should never look like an afterthought tacked onto the side of the house. Achieving architectural continuity requires precise matching of existing pitch profiles and exterior materials:

    • Roof Geometry: New rafters or trusses must tie into the existing ridge boards and valley lines without creating flat dead zones that trap rainwater or debris.
    • Masonry and Brick Sourcing: Bricks weather over time, and older brick profiles may be discontinued. We source matching clay compositions and custom-tint mortar joints to blend the new exterior with the original structure.
    • Siding and Trim Lines: Fascia, soffits, and frieze boards must align across the transition seam to maintain unbroken visual sightlines from the street.

    When an Attached Suite Beats a Detached Living Unit

    Homeowners needing space for aging parents or extended guests often weigh attached additions against detached accessory structures.

    ATTACHED SUITE vs. DETACHED ADU
    
    ATTACHED SUITE:
    • Direct, conditioned interior access
    • Ties directly to primary home HVAC/plumbing
    • Shared central electrical service panel
    • Lower overall utility infrastructure cost
    
    DETACHED ADU:
    • Maximum acoustic and living privacy
    • Requires independent utility trenching
    • Needs separate subpanel, HVAC, and sewer lines
    • Subject to distinct secondary-dwelling zoning limits

    An attached ground-level suite offers direct, conditioned access without stepping outside. This setup is ideal for multi-generational living, mobility-impaired family members, or expanding common living zones. Connecting to the existing home allows the addition to share primary mechanical systems, reducing the need for separate utility infrastructure.

    Detached units offer complete privacy and work well for rental units or remote home offices, but they require independent utility trenching, separate sewer taps, and distinct setback allowances. For most Roanoke homeowners seeking everyday living space, an attached addition provides greater functional connection at a more economical price per square foot.


    Roanoke Building Codes, HOA Rules, and Site Permitting

    Every home addition in Roanoke must comply with local municipal codes and community guidelines before any excavation begins. Managing these approvals early prevents costly stop-work orders and redesign fees.

           ROANOKE SITE PLANNING SEQUENCE
     ┌─────────────────────────────────────────┐
     │ 1. Property Survey & Easement Review    │
     │    Verify side/rear setbacks & buffers  │
     ├─────────────────────────────────────────┤
     │ 2. Lot Coverage Calculation             │
     │    Ensure roofed space stays under cap  │
     ├─────────────────────────────────────────┤
     │ 3. HOA Architectural Review (ARC)       │
     │    Submit elevations, colors, materials │
     ├─────────────────────────────────────────┤
     │ 4. Municipal Permit Submission          │
     │    Engineered drawings to City building │
     │    department for structural review     │
     └─────────────────────────────────────────┘

    City of Roanoke Setbacks, Easements, and Lot Coverage

    The City of Roanoke enforces specific zoning ordinances that define how close a structure can sit to property lines. Residential properties are subject to:

    1. Front, Rear, and Side Setbacks: Additions cannot extend past established setback lines, which vary based on your specific zoning classification.
    2. Utility and Drainage Easements: You cannot build permanent concrete foundations over platted municipal easements, power easements, or stormwater paths.
    3. Maximum Impervious Lot Coverage: Municipal rules cap the percentage of a lot that can be covered by roofed structures, driveways, and concrete patios to prevent excessive stormwater runoff.

    A modern property boundary survey showing all easements, property pins, and current structures is mandatory before drafting structural plans. Reviewing these requirements alongside our house blueprints builders guide helps clarify how structural drawings reflect local building standards.

    Working with Roanoke HOA Architectural Review Committees (ARC)

    Many neighborhoods in Roanoke, such as Briarwyck or Fairway Ranch, have strict Homeowners Association covenants. Even if the City approves your building permit, your HOA Architectural Review Committee must grant formal written approval before construction begins.

    ARC submittals typically require:

    • Full color elevations displaying all four sides of the planned addition.
    • Physical material and paint samples matching the existing exterior.
    • Scaled plot plans illustrating that roof ridges do not exceed neighborhood height limits.
    • Landscape restoration plans for areas disturbed by heavy machinery.

    Utility Capacity Audits Prior to Groundbreaking

    Before framing begins, we conduct a utility capacity audit to confirm that existing services can support the expanded conditioned space.

          MECHANICAL CAPACITY AUDIT CHECKLIST
     ┌────────────────────────────────────────────────────────┐
     │ [ ] Electrical Panel: Calculate total amp load         │
     │     (Verify if 200A service supports new subpanel)     │
     │                                                        │
     │ [ ] Sewer Lateral Depth: Measure drain line slope      │
     │     (Ensure 1/4" per foot drop to municipal connection)│
     │                                                        │
     │ [ ] Water Supply: Check static pressure (PSI)          │
     │     (Confirm volume for added fixtures/bathrooms)      │
     │                                                        │
     │ [ ] Gas Line Volume: Audit total connected BTU load    │
     │     (Resize line if adding high-draw tankless units)   │
     └────────────────────────────────────────────────────────┘
    • Electrical Service: Older homes often have 100-amp or 150-amp main service panels that are already near capacity. Adding a new bathroom, bedroom suite, or dedicated HVAC unit frequently requires upgrading to a 200-amp main panel or installing an auxiliary subpanel.
    • Sewer Invert Elevation: New plumbing drains require a minimum slope of 1/4 inch per foot to flow via gravity to the municipal sewer tap. If an addition sits far from the main sewer lateral, we verify pipe depth before trenching to ensure waste lines drain naturally without needing mechanical macerating pumps.

    The Addition Build Sequence: From Foundation Piers to Dry-In

    Executing a residential addition requires a methodical sequence of structural trades. Each phase must be inspected and verified before the next step begins.

        PHASED CONSTRUCTION TIMELINE
     Foundation     Framing & Tie-In      Rough-Ins         Insulation/Drywall      Interior Finishes
    ┌───────────┐  ┌─────────────────┐  ┌───────────────┐  ┌──────────────────┐  ┌─────────────────────┐
    │ Piers,    │─>│ Wall framing,   │─>│ Plumbing,     │─>│ Spray foam/batts,│─>│ Trim, paint, tile,  │
    │ plumbing  │  │ trusses, roof   │  │ electrical,   │  │ drywall hang,    │  │ flooring, fixture   │
    │ rough,    │  │ flashing, &     │  │ HVAC ducting, │  │ tape, bed, &     │  │ install, final      │
    │ slab pour │  │ house wrap      │  │ city rough    │  │ texture          │  │ municipal punch     │
    │           │  │ (Dry-In)        │  │ inspections   │  │                  │  │                     │
    └───────────┘  └─────────────────┘  └───────────────┘  └──────────────────┘  └─────────────────────┘

    1. Foundation Piers and Rebar Doweling

    Foundation construction starts with deep structural support. In North Texas soils, we drill straight-shaft or bell-bottom concrete piers down to stable strata or rock. Once piers are poured, the perimeter grade beams are formed.

    We drill holes into the existing foundation’s grade beam, clean the dust, inject structural epoxy, and drive in ribbed steel rebar dowels. This mechanical bond locks the new foundation to the original slab, preventing independent settling and structural separation.

    2. Framing Integration, Sheathing, and Weather Flashing

    Once the concrete cures, structural framing begins. The existing roof overhang is opened up, cutting back eaves and fascia boards to tie new rafters directly into the existing load-bearing ridge and wall plates.

    Weatherproofing the transition zone is the most critical step of the rough framing stage. We install:

    • Self-Adhering Ice and Water Underlayment: Applied over the roof valley junction where old decking meets new decking.
    • Step Flashing and Kick-Out Flashing: Integrated along vertical brick or siding walls to channel water away from wall cavities.
    • Vapor-Permeable Housewrap: Taped continuously across framing joints to prevent air leaks while allowing wall cavities to breathe.

    3. HVAC Load Planning: Central Ducting vs. Mini-Splits

    Conditioning the new space requires calculating heating and cooling loads under local climate extremes.

    HVAC EXPANSION OPTIONS
    
    1. CENTRAL SYSTEM EXTENSION
       • Pros: Single thermostat, hidden ducting
       • Cons: May overtax existing compressor; requires duct access
       • Best For: Small additions close to the existing air handler
    
    2. DUCTLESS MINI-SPLIT SYSTEM
       • Pros: Independent zone control, zero duct loss, high efficiency
       • Cons: Visible wall-mounted interior head unit
       • Best For: Large master wings, second-story builds, remote rooms

    Extending central ductwork is practical only if your existing air handler has sufficient remaining airflow capacity and accessible duct runs. If the current unit is already running at peak output, adding more registers will create hot and cold spots across the entire house.

    In many ground-floor suites or second story additions, installing an independent multi-zone ductless mini-split system provides dedicated climate control without placing extra strain on the primary HVAC unit.


    Sound Isolation and Electrical Layout for High-Function Rooms

    When expanding for a home office, media room, or primary bedroom, acoustic isolation should be built directly into the wall assemblies during the rough-in stage:

    1. Acoustic Insulation: Dense mineral wool batts placed in all interior partition walls absorb airborne sound frequencies far better than standard fiberglass.
    2. Decoupled Framing: Staggered-stud wall framing or resilient sound isolation channels isolate drywall sheets from the wall studs, stopping physical vibration transfer.
    3. Solid-Core Doors: Replacing standard hollow-core interior doors with heavy solid-core doors eliminates the primary air gap where sound escapes.
    4. Dedicated Home Run Circuits: Running dedicated 20-amp electrical circuits directly from the breaker panel prevents flickering lights or electrical interference when running computers, electronics, or personal appliances.

    Evaluating a Home Addition Contractor in Roanoke, TX

    Selecting the right builder requires looking closely at contract terms, staffing structure, and verified local experience. Building an addition is significantly more complex than standard remodeling because it alters the structural envelope of your home.

           CONTRACTOR VETTING MATRIX
     ┌──────────────────────────────────────────────┐
     │ [ ] Guaranteed Maximum Price (GMP) Contract  │
     │     Protects against open-ended labor spikes │
     ├──────────────────────────────────────────────┤
     │ [ ] Dedicated On-Site Project Manager        │
     │     Direct trade coordination & daily QA     │
     ├──────────────────────────────────────────────┤
     │ [ ] Verified Municipal Registration (Roanoke)│
     │     Active insurance & city bond on file     │
     ├──────────────────────────────────────────────┤
     │ [ ] Documented Foundation Warranty           │
     │     Covers soil-engineered tie-in work       │
     └──────────────────────────────────────────────┘

    GMP Contracts vs. Cost-Plus Estimates

    Contract structure plays a major role in your overall project security:

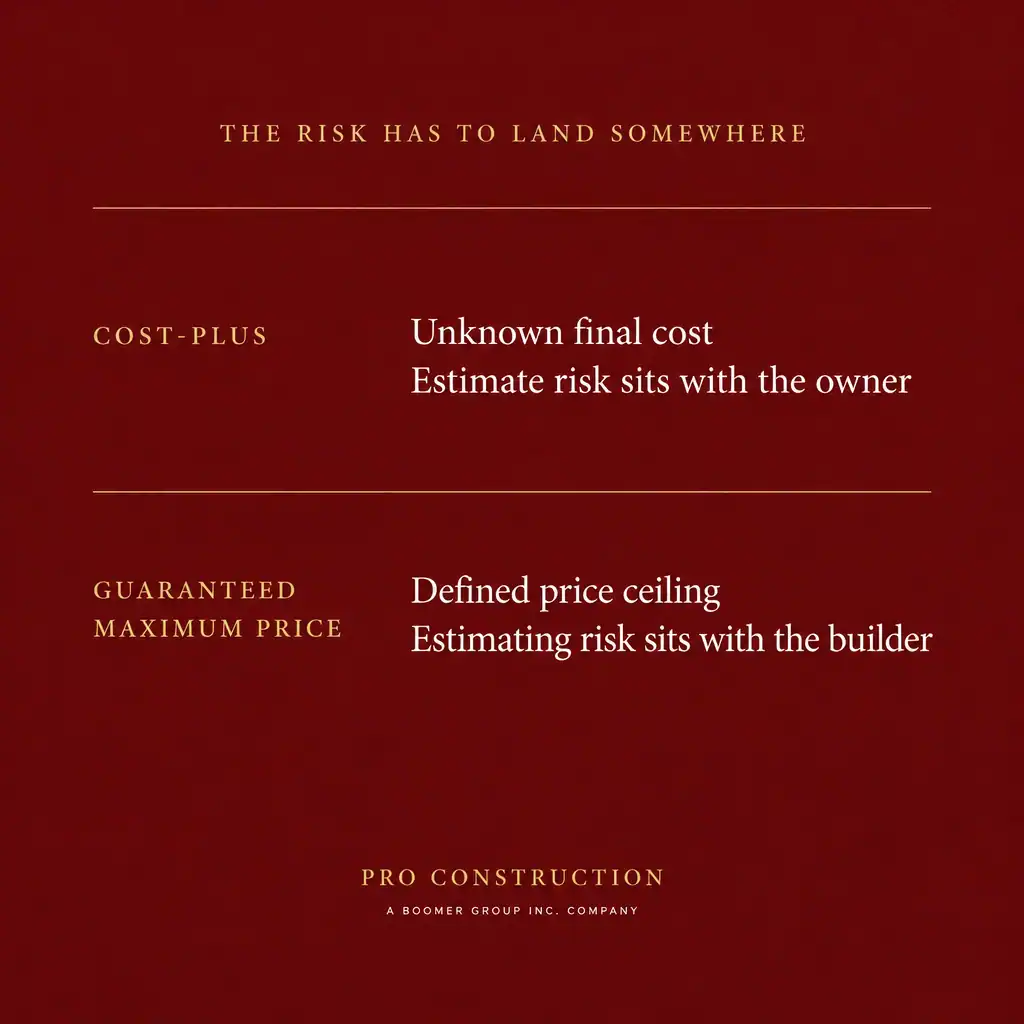
    • Cost-Plus Contracts: The contractor bills for actual labor and material costs plus a fixed percentage fee. While transparent, the homeowner absorbs all cost overruns caused by material price swings, trade delays, or estimation mistakes.
    • Guaranteed Maximum Price (GMP) Contracts: The contractor provides a detailed scope of work with a fixed price ceiling. The builder absorbs unexpected cost overruns within the defined scope, protecting your budget from unanticipated spikes.

    For broader contractor evaluation standards across local communities, review our guide on hiring a home addition contractor in Trophy Club, TX.

    Dedicated Project Management and Design Support

    Complex additions involve dozens of specialized trades, including earthmovers, concrete crews, framers, plumbers, electricians, and finish carpenters. A builder with dedicated on-site project management ensures:

    • Trades work in correct sequence without trade overlap conflicts.
    • Material deliveries arrive just before installation, keeping your driveway clear.
    • Municipal building inspectors are scheduled precisely at each stage to prevent job delays.

    PRO Construction provides Accessory Dwelling Units (ADU), Garage Conversions, Garage Builds for Homeowners in Keller, TX and surrounding communities seeking additional living space, rental income, or guest accommodations.. Pairing construction oversight with clear design guidance keeps finish selections aligned with the framing schedule, avoiding last-minute change orders.

    Credentials, Insurance, and Municipal Registration

    Before signing an agreement, verify that your contractor holds:

    • Active City of Roanoke Contractor Registration: Contractors pulling permits must maintain active registration with the City building department.
    • General Liability and Workers’ Comp Insurance: Standard coverage should include comprehensive commercial general liability and full workers’ compensation policies to protect you from on-site liability.
    • Third-Party Performance Scoring: Review independent data platforms such as BuildZoom to confirm permit history, license status, and project volume across North Texas.

    For an in-depth breakdown of credentials and safety checks, refer to our guide on vetting construction general contractors near you.


    Critical Mistakes That Cause Cost Overruns in North Texas Additions

    Budget overruns on additions rarely stem from aesthetic finish selections. They occur when builders fail to anticipate structural and mechanical realities early in the planning process.

    TOP 3 COST OVERRUN DRIVERS IN NORTH TEXAS
    
    1. MECHANICAL CAPACITY OVERSIGHT
       Adding square footage without verifying water heater recovery,
       HVAC tonnage, or main electrical service capacity.
    
    2. UNTESTED SOIL CONDITIONS
       Pouring grade beams over uncompacted or moisture-deficient clay
       without geotechnical pier engineering.
    
    3. INADEQUATE DUST & SITE ISOLATION
       Allowing fine sheetrock and demolition dust to enter the existing
       home's ductwork and living spaces.

    1. Neglecting Mechanical and Service Upgrades

    Adding a luxury bathroom or an entire living wing increases demand on your home’s central infrastructure. If a contractor frames an addition without auditing your existing water heater recovery rate or main breaker capacity, you may face expensive change orders mid-project.

    Planning for necessary electrical service upgrades, dedicated subpanels, or secondary water heating units during the initial design phase keeps costs transparent from day one.

    2. Skipping Soil and Structural Engineering

    North Texas soils are notorious for high shrink-swell potential. Pouring an un-engineered slab extension directly on unprepared topsoil invites foundation failure.

    A quality builder works directly with licensed structural engineers to:

    • Test soil conditions and assess localized moisture levels.
    • Specify exact pier depths, bell diameters, and steel rebar grid layouts.
    • Design grade beams capable of resisting seasonal soil movement.

    Skipping these engineering steps to save upfront costs frequently leads to thousands of dollars in structural repairs later on.

    3. Inadequate Site Containment and Dust Control

    Connecting a new addition requires cutting into the existing building envelope, creating concrete dust, drywall residue, and wood particles. Without proper site isolation, that dust will circulate through your home’s central HVAC system.

    Professional containment practices include:

    • Building temporary heavy-mil plastic zip-wall barriers at all interior access points.
    • Sealing existing HVAC return vents in the work zone to prevent whole-house dust contamination.
    • Using dedicated exterior access doors for trade crews, keeping daily construction traffic out of your main living areas.

    Ready to Plan Your Roanoke Home Expansion?

    A well-executed home addition provides functional space tailored to your lifestyle while enhancing your property’s long-term market value. Exploring our custom home building services and browsing our construction insights can help you visualize what is possible for your property.

    When you are ready to evaluate your layout, review setback requirements, and build your expansion with predictable timelines, contact our team to schedule an initial site assessment. You can also review our general faqs to learn more about our process.


    Frequently Asked Questions

    Can our family stay in the home while the addition is being built?

    Yes, families can typically remain in the home during the majority of a ground-level addition build. The work area is sealed off using temporary partition walls and plastic dust containment barriers, and trade crews enter directly through exterior access points. You will only experience short-term disruptions when opening the connection wall and tying into primary plumbing or electrical lines.

    How long does the planning and permitting process take before construction starts in Roanoke?

    The pre-construction phase typically takes several weeks to a few months, depending on project complexity. This window includes conducting property boundary surveys, drafting architectural floor plans, completing structural engineering reviews, securing HOA architectural approvals, and waiting for the City of Roanoke to review and issue the residential building permits.

    How will a permitted home addition affect Denton or Tarrant County property assessments?

    Once a permitted addition passes final city inspection, the municipal building department notifies the local county appraisal district (Denton Central Appraisal District or Tarrant Appraisal District, depending on your parcel boundary). The county will update your property record to reflect the newly added conditioned square footage, which will adjust the assessed value of your home on future annual tax appraisals.

  • Metal Buildings in North Texas: A Smart Choice for Garages, Workshops & RV Storage

    Metal Buildings in North Texas: A Smart Choice for Garages, Workshops & RV Storage

    Could the right garage or workshop give you more usable property value without forcing you to compromise on durability, storage capacity, or neighborhood appearance?

    For many property owners in Keller, Fort Worth, Southlake, Grapevine, Denton, and Flower Mound, the answer may be a well-planned metal building. Steel construction can provide clear-span interior space, flexible door placement, durable exterior protection, and efficient construction for garages, workshops, RV storage, and combination shop-and-storage buildings.

    But a metal building is not simply a kit dropped onto a vacant piece of land. In North Texas, the project must be planned around soil conditions, foundation requirements, severe weather, insulation, condensation control, setbacks, permits, and: often: HOA design standards.

    At PRO Construction, A Boomer Group Inc. Company, we help homeowners evaluate these details before construction begins. Under the leadership of Bruce Laing, our team brings 25 years of local experience to residential construction, custom garages, additions, workshops, and structural improvements. Our approach is simple: honest, steady work with clear communication from the first site review through final inspection.

    Key Takeaways

    • Metal buildings can be a practical choice for garages, workshops, RV storage, and combination-use structures.
    • Clear-span steel framing can create more flexible interior space than conventional wood framing.
    • A successful project still requires proper site feasibility, an engineered slab or foundation, anchoring, drainage, and local approvals.
    • Insulation, ventilation, and vapor control are essential in the North Texas heat and humidity.
    • Residential finish options can help a metal building fit naturally into neighborhoods in Tarrant and Denton counties.
    • City and HOA approval should be confirmed before ordering materials or pouring concrete.

    Metal Buildings vs. Conventional Stick-Framed Garages

    Both steel and wood-framed buildings can be durable when properly designed and constructed. The better choice depends on your intended use, site, budget, appearance requirements, and long-term plans.

    Consideration Metal Building Conventional Stick-Framed Garage
    Interior layout Often supports wide, open clear spans Interior walls and roof framing may create more obstructions
    Large doors Well-suited for RV, boat, equipment, and oversized garage doors Possible, but may require additional structural framing
    Construction process Steel components may shorten the framing phase Familiar process with broad finish flexibility
    Weather resistance Durable when engineered and anchored correctly Durable when properly framed, sheathed, and detailed
    Insulation Requires deliberate condensation and thermal planning Insulation is typically integrated into wall and roof assemblies
    Exterior appearance Can be customized with siding, masonry, trim, and roof options Naturally resembles residential construction
    Best fit Workshops, RV storage, large garages, hybrid shop buildings Garages intended to closely match a conventional home

    The important point is that the structure type is only one part of the decision. A low-cost steel shell can become an expensive mistake if the foundation, drainage, insulation, or permit requirements are overlooked.

    Why Clear-Span Space Matters for Garages and Workshops

    One of the strongest advantages of a properly designed metal building is usable interior volume.

    A clear-span layout can allow you to park an RV, boat, classic vehicle, trailer, or multiple cars without interior columns interfering with movement. It can also create a more efficient workshop for woodworking, fabrication, equipment maintenance, or other hobbies.

    For a combination building, we may divide the space into practical zones:

    • An enclosed RV or vehicle bay
    • A workshop with dedicated electrical circuits
    • A tool and material storage area
    • A finished office or hobby room, where permitted
    • A covered loading or work area
    • A mechanical and utility zone

    The planning should begin with the items you intend to store: not just the building’s outside dimensions. Measure vehicle height, mirror width, turning radius, lift requirements, trailer clearance, and door-opening space. An RV garage that technically fits an RV but leaves no room to maneuver is not a successful design.

    Foundation and Slab Requirements in North Texas

    The slab is not an afterthought. It is the part of the project that transfers the building’s weight, equipment loads, and wind forces into the ground.

    For most enclosed metal garages and workshops, the foundation should be designed around:

    • Building dimensions and column locations
    • Soil conditions and site drainage
    • Vehicle and equipment loads
    • Anchor-bolt layout
    • Wind uplift and lateral forces
    • Door openings and concentrated loads
    • Finished floor elevations
    • Utility penetrations and plumbing requirements

    North Texas properties can contain expansive clay soils that move as moisture conditions change. That does not mean every site requires the same foundation system, but it does mean a generic slab detail may not be appropriate for every property.

    The concrete plan should be coordinated with the steel building drawings before the pour. Thickness, reinforcement, thickened edges, anchor locations, control joints, base preparation, and drainage all matter. If the structure will contain a heavy RV, vehicle lift, or shop equipment, those loads should be identified during design.

    A qualified builder should also review the relationship between the new building and existing driveways, drainage paths, easements, utilities, septic systems, and nearby structures.

    Detached brick garage with a high ceiling and oversized garage door

    Insulation and Condensation Management for Texas Weather

    Bare metal panels can become extremely hot in direct summer sun and can develop condensation when warm, humid air meets a cooler metal surface. That moisture can damage stored materials, tools, vehicles, insulation, and interior finishes.

    A usable North Texas metal building should be planned as a complete envelope, not just a roof and walls.

    Depending on the building’s use, options may include:

    • Vinyl-faced fiberglass insulation
    • Closed-cell spray foam
    • Rigid insulation assemblies
    • Roof insulation designed to reduce heat transfer
    • Ridge and eave ventilation
    • Mechanical exhaust fans
    • Sealed wall and roof penetrations
    • A properly detailed slab vapor barrier
    • HVAC and dehumidification for conditioned areas

    A workshop may need ventilation to remove fumes, dust, and humidity. An RV storage building may need enough air movement to reduce moisture accumulation while protecting the vehicle from temperature extremes. If you intend to heat or cool the building, the insulation strategy should be decided before the steel package is ordered.

    This is where site-specific planning protects your investment. The least expensive insulation option is not always the most economical choice over the life of the building.

    Exterior Finishes That Work in Residential Neighborhoods

    A metal building does not have to look like an industrial warehouse. Exterior design can be adapted to the property and the surrounding homes.

    Common residential-oriented finish options include:

    • Brick or stone wainscoting
    • Board-and-batten or lap siding
    • Metal panels in muted residential colors
    • Matching roof colors
    • Gable-end accents
    • Residential-style windows
    • Overhead doors selected to coordinate with the home
    • Covered porches or awnings
    • Decorative trim and lighting
    • Landscape screening

    For homes in Keller, Southlake, Grapevine, or Flower Mound, visual compatibility may be just as important as interior capacity. A building that matches the primary residence’s roof pitch, trim color, masonry, and general proportions is more likely to feel intentional.

    Our project gallery includes examples of garages, custom residential structures, and metal-accented construction that demonstrate how durable materials can be paired with a residential design approach.

    City Permits and HOA Approval

    Before selecting a building package, confirm the rules that apply to your property. Requirements vary by municipality, zoning district, lot size, and neighborhood restrictions.

    For example:

    For Southlake and Grapevine properties, homeowners should confirm current requirements directly with the city’s development or building-services department. Requirements can change, and a building that is acceptable in one municipality may not be acceptable in another.

    HOA approval is a separate issue from city approval. An HOA may regulate:

    • Building height
    • Placement and setbacks
    • Exterior colors
    • Roof pitch and material
    • Masonry coverage
    • Visibility from the street
    • RV storage
    • Door style
    • Screening and landscaping

    Obtain written HOA approval before ordering the structure or beginning foundation work. That sequence helps protect you from paying for a building that later requires expensive redesign.

    A Practical Planning Process

    A responsible metal-building project usually follows this order:

    1. Define the use. Decide whether the structure is for vehicles, an RV, a workshop, equipment, storage, or a combination.
    2. Measure the contents. Account for height, width, turning space, lifts, shelving, and work areas.
    3. Review the site. Evaluate setbacks, easements, drainage, utilities, trees, access, and soil conditions.
    4. Confirm approvals. Check city, county, zoning, deed restrictions, and HOA requirements.
    5. Develop the structure. Establish dimensions, roof design, doors, windows, insulation, ventilation, and finish materials.
    6. Coordinate engineering. Match the foundation and anchor layout to the building design and local requirements.
    7. Plan utilities. Identify electrical service, lighting, HVAC, plumbing, internet, security, and drainage needs.
    8. Build and inspect. Complete site work, foundation, framing, enclosure, finish work, and required inspections.

    A design-build partner can carry much of this coordination for you. At PRO Construction, we manage the details that can otherwise become fragmented between a steel supplier, concrete contractor, designer, permitting office, and finish trades.

    Why Local Experience Matters

    A metal-building project in Denton County is not identical to one in Tarrant County. A property in rural Denton may have different access, drainage, or utility concerns than a lot in central Fort Worth. Keller and Southlake neighborhoods may place greater emphasis on architectural compatibility and HOA review, while a larger property near Grapevine or Flower Mound may require careful planning around existing improvements and setbacks.

    Bruce Laing’s 25 years of local experience help our team evaluate the full construction picture: not just the building shell. We coordinate with trusted local partners, including Gus Moreland at First United Bank, Builders FirstSource, ProSource, and Sherwin-Williams, to support material selection, project planning, financing conversations, and finish coordination.

    If your project is part of a larger home expansion, you may also wish to review our North Texas home-addition planning guide or learn more about custom home construction.

    Frequently Asked Questions

    Are metal buildings a good choice for RV storage in North Texas?

    They can be. Metal buildings offer wide interior spans and can accommodate taller overhead doors, making them practical for RVs, boats, trailers, and other large equipment. The design must account for vehicle height, turning space, ventilation, drainage, insulation, and local approval requirements.

    Is a concrete slab required for a metal garage?

    Most enclosed metal garages and workshops require a concrete slab or another engineered foundation system. The correct design depends on soil, building loads, wind requirements, vehicle loads, and local code. The slab should be coordinated with the building’s column and anchor layout.

    Can a metal building look residential?

    Yes. Brick, stone, siding, residential windows, coordinated roofing, covered porches, trim, and landscaping can make a steel structure fit naturally into a residential setting. HOA rules may determine which finish combinations are allowed.

    Does a metal workshop need insulation?

    If you want year-round comfort, condensation control, or protection for tools and vehicles, insulation is usually an important part of the plan. The appropriate system depends on whether the building will be conditioned, ventilated, or used primarily for storage.

    Can PRO Construction help with permits and inspections?

    We can help coordinate the design, permitting, material planning, contractor oversight, and inspection process. Requirements vary by city and property, so we begin by reviewing your site and confirming the applicable rules.

    Start a Conversation About Your North Texas Metal Building

    A well-designed metal building can provide durable storage, a capable workshop, a secure RV garage, or a flexible shop-plus-storage space for years to come. The key is to treat the project as a complete construction system: from site feasibility and foundation engineering to insulation, appearance, and final inspection.

    PRO Construction, A Boomer Group Inc. Company, brings 25 years of local experience to custom garages, workshops, additions, structural improvements, and residential construction across North Texas. If you are considering a metal building in Keller, Fort Worth, Southlake, Grapevine, Denton, Flower Mound, or the surrounding DFW communities, let’s talk through the practical requirements before you commit to a design.

    Call 817-372-0211 to start a conversation with our team.

  • Texas Custom Home Cost Per Square Foot: 2026 Guide

    Texas Custom Home Cost Per Square Foot: 2026 Guide

    Calculating your Texas custom home construction cost per square foot in 2026 depends on whether you measure conditioned interior living space or total area under roof, combined with your property’s specific site engineering needs. Rather than relying on a single statewide baseline, builders calculate true project expenses by evaluating structural slab requirements, mechanical system density, and architectural complexity. Anyone evaluating the texas custom home construction cost per square foot 2026 standard must account for how soil mechanics, utility access, and floor plan efficiency influence the bottom line before breaking ground.

    Texas Custom Home Cost Per Square Foot: 2026 Guide

    How Is Custom Home Cost Per Square Foot Calculated in Texas?

    In residential construction, the cost per square foot is determined by dividing total hard and soft construction expenses by the home’s total usable square footage. Confusion frequently arises between conditioned living space and the gross under-roof footprint. Conditioned space includes heated and cooled interior rooms, while unconditioned space spans covered porches, attached garages, breezeways, and unfinished storage areas.

    General contractors calculate base structural framing, foundation slabs, and rough mechanicals across the entire building footprint, but high-end interior finishes apply only to conditioned areas. When evaluating estimates for custom home building, asking your builder which square footage number serves as the divisor is critical. Quoting a single number without reviewing an engineered site plan or detailed house blueprints creates false expectations, as site-specific variables often sit entirely outside standard interior square-foot metrics.

    Construction Scope Area Included Structural Components Cost Impact on Overall Square-Foot Calculation
    Conditioned Living Area Drywall, trim carpentry, flooring, cabinetry, MEP finishes, dedicated HVAC High: Concentrates the highest skilled labor and finish material investments per foot
    Covered Outdoor Living Slab extension, framing, tongue-and-groove ceilings, exterior lighting, patio covers Moderate: Lower mechanical density, but requires weather-rated structural lumber and masonry
    Garages & Workbenches Monolithic slab, structural framing, fire-rated drywall, overhead doors, dedicated circuits Moderate to Low: Open spans reduce interior finishing costs per square foot
    Unfinished Attic & Storage Subflooring, structural access stairs, heavy-duty truss modifications Low: Minimal finish trades, functioning primarily as structural load adjustments

    Conditioned Space vs. Under-Roof Footprint

    Conditioned space demands complete thermal envelope insulation, multi-zone HVAC ductwork, drywall, millwork, and floor coverings. Unconditioned spaces, such as attached garages or covered cedar patios, require structural foundations, framing, and roofing, but skip costly interior finish trades.

    When a builder provides an estimate based on conditioned square footage alone, the expense of constructing large covered outdoor living rooms and multi-car garages is distributed across the smaller interior square footage, making the per-foot figure appear higher. Conversely, calculating costs against total under-roof area spreads those framing and foundation expenses across a larger footprint, lowering the headline figure while the total project dollar amount remains unchanged.

    Why Online Calculators Fail for Custom Builds

    Online construction calculators rely on broad regional averages that assume flat, cleared suburban subdivision lots with municipal utilities already stubbed to the property line. These automated tools cannot evaluate:

    • Municipal building department plan review fees, drainage studies, and local tap charges.
    • The depth and diameter of drilled concrete piers required by local soil plasticity.
    • Extended utility service trenches running from county road easements to the build pad.
    • Complex architectural roofline geometry, vaulted ceilings, and multi-level structural steel spans.

    Relying on generic formulas without soil borings or civil engineering documents usually leads to unexpected budget adjustments during the site preparation phase.


    What Drives Custom Home Construction Costs in Texas for 2026?

    Regional site conditions, engineering standards, and the architectural specifications chosen for the home determine the ultimate investment required to complete a custom build.

    Primary Cost Driver Engineering & Architectural Elements Impact on Project Budget
    Soil Mechanics & Foundations Geotechnical testing, post-tension cables, grade beams, drilled concrete piers Dictates structural concrete volume, excavation labor, and foundation steel
    Mechanical Systems (MEP) Zoned heat pumps, spray foam encapsulation, fresh-air ventilation, recirculating plumbing Establishes long-term thermal efficiency, air quality, and daily operating performance
    Acreage Infrastructure Aerobic septic systems, water wells, private electrical drops, culvert driveway bases Generates substantial site development expenses independent of the house framing
    Architectural Complexity Roof pitch variations, structural steel beams, custom masonry, high-performance window walls Increases specialty framing labor hours and structural material quantities

    Soil Mechanics and Engineered Foundations

    North and Central Texas are known for highly active, expansive clay soils with high plasticity indices. These soils swell significantly when wet and contract during dry summer months, exerting immense hydrostatic and lateral pressure on foundation slabs.

    Structural engineers design heavy-duty post-tension foundations or engineered slab-on-beam systems reinforced with drilled concrete piers to prevent structural movement. In areas with shallow limestone bedrock, builders must bring in specialized rock-trenching equipment to excavate plumbing runs and grade beams. A custom foundation engineered for highly active clay requires significantly more steel rebar, structural concrete volume, and specialized earthwork than a standard builder slab poured in stable soil.

    Mechanical, Electrical, and Plumbing Complexity

    Modern energy efficiency standards and architectural designs place high performance demands on mechanical, electrical, and plumbing systems.

    • HVAC Systems: High-efficiency heat pump systems with variable-speed compressors and multi-zone electronic dampers ensure consistent temperatures across high-ceiling layouts. Homes built with unvented attics encapsulated in open- or closed-cell spray foam require dedicated fresh-air ventilation and whole-home dehumidification systems.
    • Electrical Design: High-capacity electrical panels, smart home automation wiring, dedicated vehicle charging circuits, and whole-home backup generator integration add labor hours and technical rough-in requirements.
    • Plumbing Infrastructure: High-demand custom builds often incorporate dual tankless water heaters arranged in recirculating loops, secondary laundry stations, wet bars, and multi-head luxury shower systems that demand larger supply lines and balanced drainage stacks.

    High-capacity electrical distribution panels, low-voltage communication backbones, and dedicated vehicle charging circuits require extensive conduit routing during framing rough-ins. Installing heavy-duty transfer switches for standby generators also requires careful coordination with local power providers before service lines are energized.

    Luxury bathrooms and gourmet kitchen islands demand complex underslab plumbing configurations. Running dedicated recirculating hot water loops ensures immediate hot water delivery to distant fixtures, while oversized drain lines prevent backpressure across multi-fixture master bathrooms.


    Acreage and On-Your-Lot Factors That Shift Square-Foot Pricing

    Building on private acreage or an undeveloped residential parcel introduces site development costs that do not exist within master-planned communities. These infrastructure requirements must be engineered and installed before foundation work begins.

    1. Geotechnical Testing and Boundary Surveys: Drilling core soil samples to evaluate soil plasticity and bearing capacity across the proposed building footprint.
    2. Civil Clearing and Mass Grading: Clearing native brush, removing deep tree stumps, and balancing dirt to establish positive drainage slopes away from the slab.
    3. Engineered Driveway and Culvert Installation: Setting heavy-gauge corrugated steel or reinforced concrete culverts beneath access points and laying crushed limestone road bases.
    4. Onsite Utilities Installation: Drilling private water wells, installing storage tanks, trenching electrical conduit, and burying aerobic septic treatment units.
    5. Foundation Pad Preparation: Hauling select fill dirt, compacting structural pad layers, and establishing finished slab elevations above base flood levels.

    Rural Utility Infrastructure Planning

    Unincorporated building sites across our service areas require property owners to budget for self-contained utility networks:

    • Onsite Sewage Facilities (OSSF): Expansive clay soils frequently fail standard percolation tests, making conventional gravity septic systems unviable. Most acreage parcels require engineered aerobic treatment units with multi-zone surface or subsurface drip irrigation fields.
    • Private Water Wells: Drilling depth varies widely across aquifers. Projects require water storage tanks, booster pumps, filtration systems, and water softeners to handle mineral-heavy groundwater.
    • Electrical Line Drops: Running primary electrical service from the nearest utility easement requires setting intermediate poles, installing step-down transformers, and trenching secondary conduit to the home’s main service disconnect.

    Driveways, Grading, and Drainage Management

    Establishing a stable building pad requires extensive civil earthwork. Heavy machinery must clear native brush, remove deep tree root systems, and balance cut-and-fill dirt to create positive drainage away from the planned foundation perimeter.

    County engineering departments also regulate access points along public roads. Builders must install properly sized corrugated steel or reinforced concrete culverts beneath access drives to maintain roadside drainage ditches. Constructing long, heavy-duty road bases capable of supporting concrete trucks and material haulers during construction represents a major site infrastructure expense that is distinct from the house itself.


    Footprint Efficiency: Why Smaller Custom Homes Cost More Per Square Foot

    A common misconception in home building is that reducing square footage automatically cuts the cost per square foot. Smaller custom homes and detached secondary structures frequently have a higher cost per square foot than sprawling estate properties.

    Compact floor plans concentrate high-cost functional zones into a small footprint. Every standalone home requires a kitchen, primary bathrooms, hot water heaters, an electrical distribution panel, and heating and cooling equipment. In a compact floor plan, these mechanically dense rooms represent a substantial portion of the overall square footage.

    Large estate layouts balance those exact same mechanical zones across open living rooms, guest bedrooms, wide hallways, and dining spaces. Because open living areas consist primarily of basic framing lumber, drywall, and standard flooring, they dilute the concentrated mechanical expenses across a much wider surface area.

    Structural Layout Size Proportion of High-Cost Zones (Kitchen/MEP/Baths) Framing & Drywall Finish Spread Impact on Cost Per Square Foot
    Compact Custom / ADU High concentration across a limited footprint Minimal open, low-cost square footage to absorb mechanical expenses Higher cost per square foot
    Mid-Size Custom Residence Balanced mix of living areas and primary utilities Moderate distribution across bedrooms, flex rooms, and living spaces Moderate baseline cost per square foot
    Sprawling Estate Home Low concentration relative to total under-roof area Extensive open living spaces, secondary suites, and bonus areas spread fixed costs Lower per-foot mechanical density

    PRO Construction provides Accessory Dwelling Units (ADU), Garage Conversions, Garage Builds for Homeowners in Keller, TX and surrounding communities seeking additional living space, rental income, or guest accommodations. For homeowners researching standalone adu construction or detached guest suites, planning for this higher per-foot mechanical concentration prevents unexpected budget shortfalls.


    Controlling Construction Costs: Guaranteed Maximum Price vs. Cost-Plus

    Selecting the right contract structure is just as important as finalizing your architectural floor plans. The two primary contracting methods in custom home construction carry very different financial risk profiles for the property owner.

    Contract Feature Cost-Plus Contract Guaranteed Maximum Price (GMP)
    Cost Transparency Open-book billing for all trade invoices and supply receipts Hard budget ceiling established from finalized engineering and specifications
    Material Volatility Risk Borne entirely by the property owner as prices fluctuate Borne by the general contractor within the agreed scope of work
    Design Flexibility High; changes can be made continuously during construction Controlled; requires structured change orders for modifications
    Lender Financing Ease Complex; requires contingency reserves during underwriting Streamlined; provides underwriters with a defined total construction figure

    How a Guaranteed Maximum Price Protects Homeowners

    Cost-plus contracts require the client to pay the direct costs of materials, labor, and trade invoices, plus a set percentage fee for builder management. While flexible during preliminary design, it leaves the owner vulnerable to trade labor rate hikes, weather delays, and material supply changes throughout construction.

    Under a Guaranteed Maximum Price (GMP) agreement, the builder commits to a clearly defined budget ceiling based on completed architectural plans, structural engineering, and specific interior selections. If labor rates or lumber prices shift during construction, the general contractor absorbs those price differences within the contracted scope. This approach provides budget certainty, which is essential for securing construction-to-permanent financing through your lender’s underwriting department.

    Eliminating Allowance Traps in Custom Specs

    Vague construction allowances are one of the most common causes of cost overruns. An allowance is a placeholder figure set within a contract for items not yet selected, such as lighting fixtures, tile, countertops, or hardware.

    Specifying exact plumbing trim, engineered hardwood species, window series, and exterior masonry before signing your contract ensures that your final agreement reflects genuine construction costs rather than arbitrary estimates. When allowances are set unrealistically low to make an initial bid look artificially competitive, the homeowner faces substantial out-of-pocket change orders once actual selections are made. When you are ready to review engineered plans for your property, you can contact our team to discuss building parameters and timeline planning.


    Frequently Asked Questions

    How much does it cost to build a 2,000 square foot house in Texas?

    Total investment for a 2,000 square foot home depends on site-specific civil engineering, foundation design, and interior finish grades. Because fixed mechanical zones—such as kitchens, bathrooms, and HVAC systems—are concentrated across a smaller overall footprint, the cost per square foot for a mid-sized home is typically higher than that of a larger home with the same level of finish. Site conditions like soil plasticity, tree clearing, and utility runs also create significant cost variations between urban lots and rural acreage.

    Does building an ADU cost more per square foot than a main custom home?

    Detached accessory dwelling units and guest suites generally have a higher cost per square foot than constructing a full-sized custom residence. Detached ADUs require dedicated utility hookups, separate foundation pours, independent HVAC systems, and complete kitchens and bathrooms within a compact layout. Because there are fewer low-cost square feet (such as large living rooms or extra bedrooms) to dilute the high cost of plumbing and mechanical systems, the per-foot figure is naturally higher.

    What site expenses often catch North Texas land buyers off guard?

    Acreage buyers frequently overlook the infrastructure required before vertical framing can begin. Key pre-construction expenses include geotechnical soil borings, civil grading permits, culvert installations sized to county flood standards, and engineered aerobic septic systems for active clay soils. Additionally, bringing electrical service from road easements to distant building pads often requires setting private poles, pad-mounted transformers, and long underground conduit runs.

    How do foundation requirements impact the texas custom home construction cost per square foot 2026 budget?

    Foundation engineering represents one of the largest structural variables in Texas custom building. Expansive clay soils require soil borings, deep-drilled concrete piers, and heavy post-tension cable reinforcement to prevent foundation deflection. Homes built over rocky terrain require specialized mechanical rock sawing for plumbing trenches and grade beams, which increases site labor expenses compared to standard residential slab pours.

  • Custom ADU Builders Near Grapevine, TX: Planning Guide

    Custom ADU Builders Near Grapevine, TX: Planning Guide

    Planning a secondary dwelling requires understanding local building codes, site prep, and zoning constraints before breaking ground. Homeowners working with custom ADU builders near Grapevine TX typically build detached cottages, in-law suites, or garage apartments to house multi-generational family members or generate long-term rental income. Navigating local municipal guidelines, soil conditions, and utility connections early ensures a smooth build that adds lasting residential value.

    Custom ADU Builders Near Grapevine, TX: Planning Guide

    What Qualifies as a Legal ADU in North Texas?

    Accessory dwelling units are self-contained living spaces built on the same parcel as an existing single-family residence. Unlike a spare bedroom or a basic detached workshop, an ADU provides complete facilities for independent living, including dedicated sleeping, cooking, sanitation, and living areas.

    Regional building departments across Tarrant and Denton Counties evaluate specific physical features before issuing a certificate of occupancy for a secondary residence:

    • Full Bathroom: A dedicated space containing a sink, toilet, and shower or bathtub connected to an approved sanitary sewer.
    • Permanent Kitchen: Food preparation counters, a sink with running water, dedicated circuits, and permanent cooking appliances.
    • Habitable Living Space: Dedicated rooms meeting residential ceiling heights and emergency egress standards.
    • Separate Access: An independent exterior entrance that allows occupants to come and go without entering the primary house.
    Feature / System Detached Workshop Pool Cabana Permitted Accessory Dwelling Unit
    Habitable Sleeping Area No No Yes (Egress compliant)
    Complete Kitchen No Wet bar only Yes (Permanent cooktop/range)
    Full Bathroom Rare Optional Yes (Mandatory)
    Conditioned Space Optional Optional Yes (Dedicated HVAC required)
    Permitted Occupancy Non-habitable Recreational Permanent independent living

    Many property owners consider outbuildings or explore tiny homes built on permanent foundations as alternatives. Even so, standard sheds and modular shell buildings lack the continuous vapor barriers, structural framing depth, fire separation, and dedicated mechanical systems required for residential permitting.

    Detached Guest Houses vs. Garage Conversions

    Property layouts dictate whether a detached ground-up build or an attached conversion makes the most sense.

    Detached backyard guest houses provide maximum acoustic separation and layout flexibility. Building a standalone cottage allows you to orient private patios, main entry doors, and primary windows away from the main home. However, standalone builds require dedicated site excavation, a new foundation pad, and separate utility trenching across the yard.

    Converting an existing garage or reviewing plans for a garage with an apartment above repurposes established wall framing or vertical space. This approach preserves open yard area and can lower initial framing material needs. Converting an existing garage slab requires moisture barrier treatments, and shared walls or ceilings must be upgraded with fire-rated drywall assemblies to satisfy local fire safety codes.


    Zoning, Setbacks, and Permitting Around Grapevine

    Municipal zoning ordinances determine where an accessory unit can sit on a residential lot, its allowable dimensions, and total lot coverage allowances.

    Critical zoning limits include:

    1. Rear and Side Setbacks: Secondary structures must sit a mandated distance inside rear and side property lines to prevent storm runoff issues and allow emergency clearance.
    2. Main Structure Separation: Fire codes require clear spacing between exterior walls of the main home and detached accessory units to minimize fire spread hazards.
    3. Impervious Surface Caps: Cities cap the combined footprint of rooftops, driveways, flatwork, and covered patios across the entire parcel.

    Navigating HOA Reviews and City Plan Approvals

    Permit submissions must satisfy both municipal building divisions and neighborhood Homeowners Association (HOA) architectural review committees.

    Municipal examiners review structural framing, plumbing isometric diagrams, and electrical load calculations. City plan reviewers also confirm the structure does not encroach on recorded utility or drainage easements, where permanent concrete foundations are prohibited.

    HOA committees evaluate aesthetic continuity rather than mechanical systems. Most neighborhood guidelines require matching exterior masonry proportions, siding profiles, paint palettes, and roof pitches to maintain neighborhood character. Submitting detailed house blueprints and builder plans with full elevation profiles accelerates both approval processes.


    Foundation Engineering and Site Preparation for Local Soils

    North Texas expansive clay soils present substantial engineering challenges for residential foundations. Clay expands during rainy seasons and contracts during hot, dry stretches, creating localized upward and downward movement that can damage rigid drywall and underground pipes.

    Engineered foundation designs for permanent living spaces incorporate several protective measures:

    • Soil Borings and Analysis: Geotechnical assessments measure plasticity to determine expected soil movement.
    • Engineered Post-Tension Slabs: Slabs embedded with high-strength steel cables tensioned under hydraulic pressure create a rigid, monolithic foundation that resists soil shifting.
    • Drilled Concrete Piers: Concrete shafts placed beneath perimeter grade beams transfer building weight down to stable strata.
    • Compacted Select Fill: Removing native expansive surface clay and replacing it with compacted crushed stone establishes a stable base.

    Connecting Utilities: Water, Sewer, and Electrical Infrastructure

    An ADU requires dedicated utility capacity to support daily cooking, bathing, laundry, and climate control.

    Sanitary Sewer and Potable Water

    Plumbing lines must maintain proper downward slope to allow gravity drainage into the municipal main or private septic system. When the ADU sits at a lower grade than the main sewer cleanout, an engineered sewage ejector pump station lifts wastewater to the primary exit line. Potable water lines are branched from the main supply line using durable cross-linked polyethylene (PEX) piping with dedicated exterior shut-off valves.

    Electrical Capacity and Climate Control

    Adding major appliances, water heaters, and HVAC equipment requires a formal electrical load calculation on the existing main service panel:

    1. Subpanel Installation: If the main panel has sufficient spare amperage, electricians run heavy-gauge conductors through underground conduit to a secondary distribution panel inside the ADU.
    2. Service Panel Upgrades: If the current home electrical service is near capacity, the main meter base and electrical distribution panel must be upgraded with the utility provider.
    3. Mini-Split HVAC: Ductless multi-zone heat pump systems provide efficient heating and cooling without requiring extensive attic ductwork.

    Working With Custom ADU Builders Near Grapevine, TX

    Constructing an accessory home requires coordinating civil earthwork, foundation pouring, framing, mechanical rough-ins, and interior finishing under strict municipal inspection schedules. PRO Construction provides Accessory Dwelling Units (ADU), Garage Conversions, Garage Builds for Homeowners in Keller, TX and surrounding communities seeking additional living space, rental income, or guest accommodations.

    Experienced builders manage the project through structured phases:

    1. Site Feasibility Audit: Verifying property corners, setback lines, easement boundaries, and primary utility connection depths.
    2. Architectural Drafting: Developing floor plans, rooflines, and exterior elevations that match your primary home.
    3. Permitting and Engineering: Preparing structural foundation plans, drainage calculations, and managing city submissions.
    4. Excavation and Foundation: Clearing the site, digging utility trenches, setting form boards, placing steel reinforcement, and pouring concrete.
    5. Framing and Weatherproofing: Assembling exterior walls, setting roof trusses, installing sheathing, house wrap, and roof underlayment.
    6. Mechanical Rough-Ins: Running plumbing supply and waste lines, electrical home runs, and HVAC lines.
    7. City Inspections and Insulation: Passing framing and trade inspections before installing wall and ceiling insulation.
    8. Interior Finish Work: Hanging drywall, tiling showers, installing cabinetry, trim carpentry, and setting fixtures.
    9. Final Walkthrough: Completing final building inspections and securing the official Certificate of Occupancy.

    Homeowners evaluating options like attached additions or specialized services can work directly with custom ADU builders near Grapevine TX to create functional, code-compliant living spaces that serve their families for decades.


    Frequently Asked Questions

    Do ADUs increase property value?

    Legally permitted ADUs add finished, livable square footage to your property. Appraisers recognize permitted secondary units as gross living area or potential income-generating space, which positively impacts long-term property valuation.

    What is one drawback of an ADU?

    High initial site preparation and utility infrastructure costs represent a primary drawback. Trenching long plumbing, sewer, and electrical lines across an established yard can add significant complexity to the initial budget.

    Can I design my own ADU?

    Initial floor plans and conceptual sketches can be drafted by homeowners to define layout preferences and room sizing. However, city building departments require formal structural plans stamped by licensed engineers alongside code-compliant electrical and plumbing diagrams to issue building permits.

    How much does an ADU cost to build in Texas?

    Total project costs vary based on whether you build a detached guest house or convert an existing garage. Primary cost drivers include site grading, foundation engineering requirements for expansive clay soil, utility trenching distances, and chosen interior finish materials.

  • Whole Home Renovations in North Texas: Modernizing Your Home Room by Room

    Whole Home Renovations in North Texas: Modernizing Your Home Room by Room

    What happens when a home’s electrical system, plumbing, HVAC, layout, and finishes all show their age at the same time? Is it safer and more economical to renovate everything at once, or should you phase the work room by room?

    For homeowners in Keller, Fort Worth, Southlake, Grapevine, Denton, and Flower Mound, Whole Home Renovations require more than a collection of attractive finishes. They require a disciplined plan for structural integrity, mechanical systems, permitting, inspections, materials, and budget control.

    At PRO Construction, A Boomer Group Inc. Company, we help North Texas homeowners evaluate those decisions carefully. Bruce Laing brings 25 years of local experience to the process, supported by trusted partners including Gus Moreland at First United Bank, Builders FirstSource, ProSource, and Sherwin-Williams.

    Our goal is straightforward: modernize your home without compromising the structure, character, or long-term value that made you want to stay.

    Whole-Home Renovation or Room-by-Room Phasing?

    The first major decision is whether to complete the renovation in one coordinated project or divide it into phases.

    Renovating the entire home at once

    A comprehensive renovation can be the more efficient choice when multiple rooms share the same systems or when the floor plan needs significant reworking. For example, opening a kitchen into a living room may affect:

    • Load-bearing walls and beam design
    • Electrical circuits and lighting
    • Plumbing supply and drain lines
    • HVAC distribution
    • Flooring transitions
    • Permit drawings and inspections

    Completing interconnected work together can reduce duplicated demolition, protect finished areas from later construction, and allow trades to move through the home in a logical sequence.

    The tradeoff is that your family may need to relocate temporarily, particularly if the project involves the kitchen, primary bathroom, or most of the home’s utilities.

    Phasing the renovation room by room

    Phasing can be appropriate when you want to remain in the home, manage cash flow over time, or prioritize the spaces that most affect daily life. A common sequence may begin with the kitchen, continue to the living areas, and then address bedrooms, bathrooms, and exterior improvements.

    However, phasing requires more than choosing a room and starting demolition. The complete renovation should still be planned at the beginning. Electrical capacity, plumbing routes, flooring heights, paint colors, trim profiles, and HVAC requirements should be considered across the whole house so that the first phase does not make later phases more expensive.

    A phased project should be treated as one long-range plan with separate construction milestones.

    How a General Contractor Sequences the Work

    A general contractor provides value by coordinating the dependencies between design, trades, materials, and inspections. A typical whole-home renovation sequence includes the following stages.

    1. Existing-condition review and design

    We begin by documenting the existing home, identifying priorities, and reviewing site feasibility. This includes examining the floor plan, foundation type, rooflines, utility locations, attic access, drainage, and areas where previous work may have been completed.

    Plans should show both the desired result and the technical path to reach it.

    2. Engineering, permits, and procurement

    If walls are being removed, openings enlarged, or new loads introduced, structural plans may be required. The permit requirements depend on the municipality and the scope of work.

    For example, the City of Fort Worth’s residential information identifies structural and major electrical, mechanical, and plumbing changes as work that generally requires permitting, while some strictly cosmetic improvements may not. Keller, Southlake, Grapevine, Denton, and Flower Mound have their own procedures, so the applicable city must confirm the requirements for each property.

    We manage the documentation and coordinate with the appropriate building department rather than asking the homeowner to carry that administrative burden alone.

    3. Selective demolition

    Demolition should reveal conditions, not create avoidable damage. We protect portions of the home that remain, identify hidden utilities, and verify assumptions made during design.

    This is often when the project team discovers outdated wiring, undersized framing, moisture damage, or previous alterations that were not visible during the initial consultation.

    4. Structural work

    Structural modifications come before finishes. If a load-bearing wall is removed, temporary shoring may be needed while an engineered beam, header, or post system is installed.

    The load path must be understood from the roof and upper floors through the walls, beams, columns, and foundation. A visually open room is not a successful renovation if the structure beneath it has been improperly altered.

    5. Mechanical rough-ins

    Electrical, plumbing, and HVAC work should generally be updated before insulation, drywall, cabinetry, flooring, and paint.

    This is the stage for:

    • New or relocated electrical circuits
    • Panel capacity and code-required protection
    • Plumbing supply and drain reroutes
    • Water shutoff access
    • HVAC equipment, ductwork, and return-air planning
    • Ventilation for bathrooms, kitchens, and laundry areas
    • Low-voltage, lighting, and smart-home wiring

    Finishes cannot compensate for a system that is difficult to service, overloaded, poorly ventilated, or hidden behind newly installed cabinets.

    6. Inspections and close-in work

    Rough framing and trade inspections typically occur before walls are closed. Depending on the project and jurisdiction, inspections may include structural framing, electrical, plumbing, mechanical, insulation, and final life-safety review.

    The general contractor schedules the inspections, prepares the work for review, and coordinates corrections if an inspector requests changes. This sequencing prevents the costly mistake of covering work before it has been approved.

    7. Finishes and final commissioning

    Only after the structure and systems are in place should the project move into drywall, trim, cabinets, countertops, tile, flooring, paint, fixtures, and hardware.

    At the end, we review operation: not just appearance. Doors should latch properly. Fixtures should function. HVAC zones should respond correctly. GFCI and other protective devices should be tested. The final walkthrough is about performance as well as presentation.

    Open-concept home renovation in progress with structural and utility coordination

    Structural Considerations in North Texas Homes

    Load-bearing walls

    Many open-concept renovations involve removing or modifying a wall that carries roof, floor, or ceiling loads. Before demolition, the team must determine whether the wall is load-bearing and identify how its loads transfer to the foundation.

    The solution may involve an engineered steel or wood beam, concealed support, new posts, or foundation reinforcement. The right answer depends on the span, loads above, available bearing points, and the existing construction.

    Post-tension slabs

    Some North Texas homes are built on post-tensioned slabs. These foundations contain tensioned cables embedded in the concrete. Cutting, drilling, or coring without confirming the tendon locations can create a serious structural and safety risk.

    Before new plumbing lines, floor outlets, posts, or other penetrations are introduced, the team should review available drawings, locate tendons using appropriate non-destructive methods such as ground-penetrating radar, and involve a qualified structural engineer when required. The Post-Tensioning Institute provides technical resources for repairs and modifications involving post-tensioned structures.

    This is not a place for guesswork.

    Budget Protection Through Transparency and GMP Planning

    A whole-home renovation budget is only useful when the scope behind it is clear. A vague allowance for “electrical,” “flooring,” or “cabinetry” can create surprises later because homeowners may not know what quantity, quality, labor, or installation requirements are included.

    We recommend developing:

    • A detailed scope of work
    • Drawings and finish specifications
    • Allowances for selections not yet finalized
    • A schedule of owner decisions
    • A contingency for concealed conditions
    • Written change-order procedures
    • A clear payment schedule

    Where the design and scope are sufficiently developed, a Guaranteed Maximum Price, or GMP, can provide an additional layer of budget protection. The GMP establishes a maximum price for the defined scope, subject to the contract’s allowances, exclusions, concealed conditions, and approved owner changes.

    A GMP is not a substitute for planning. It works best when the plans, selections, and responsibilities are detailed before construction begins. Homeowners should understand what is included, how savings are handled, and which changes can adjust the maximum price.

    Transparent budgeting protects more than your bank account. It protects the working relationship between homeowner and contractor.

    Preserving Character While Modernizing an Older Home

    Consider an older brick or traditional home in Grapevine, Keller, or Fort Worth with narrow rooms, original trim, dated lighting, and a closed-off kitchen. The objective does not have to be making the home look brand new.

    A thoughtful renovation might preserve the original brick, wood doors, fireplace, or distinctive millwork while introducing:

    • A better-connected kitchen and living area
    • New electrical service and dedicated appliance circuits
    • Updated plumbing shutoffs and supply lines
    • More efficient HVAC distribution
    • Improved insulation and energy performance
    • Carefully matched flooring and trim
    • New windows or doors that respect the original proportions

    The result is a home that works for modern life while retaining evidence of where it came from. That balance is especially important in established North Texas neighborhoods, where character can be part of a property’s identity and value.

    Our work across projects: from the workshop and patio improvements at 6612 Rhea Ridge Dr to the custom kitchen and sliders at 2502 Hillside Ct and garage and living-space work on Belaire Drive: reinforces the importance of treating each home as an individual structure, not a blank canvas.

    Custom interior with warm wood, stone, and open living spaces

    Key Takeaways for Whole Home Renovations

    • Decide early whether the project should be completed at once or phased under a whole-home master plan.
    • Address load-bearing walls, foundation conditions, and post-tension slab risks before finishes.
    • Upgrade electrical, plumbing, and HVAC systems before closing walls.
    • Confirm permit and inspection requirements with the city having jurisdiction over the property.
    • Use detailed scopes, allowances, and written change-order procedures to protect the budget.
    • Consider a GMP approach only after the plans and responsibilities are sufficiently defined.
    • Preserve architectural character where it contributes to the home’s identity and long-term value.

    Frequently Asked Questions

    Can we stay in our home during a whole-house remodel?

    Sometimes. It depends on whether the kitchen, bathrooms, HVAC, utilities, and main circulation paths remain functional. Dust control and temporary protections can help, but a project involving extensive structural work or multiple system shutdowns may be more comfortable and safer with temporary relocation.

    Is it less expensive to renovate room by room?

    Not always. Phasing may help distribute payments, but it can increase labor, mobilization, protection, storage, and material costs. A complete plan is essential so that early work does not need to be removed or duplicated later.

    How long do Whole Home Renovations take?

    The schedule depends on the size of the home, structural scope, permit review, selections, material lead times, and whether the family remains in the house. A realistic schedule should be developed after the existing conditions and scope are documented.

    What should we ask a general contractor?

    Ask who will manage permits, inspections, engineering, trade sequencing, material procurement, allowances, and change orders. Also ask how the contractor handles post-tension slabs, concealed conditions, and budget reporting.

    Start With a Careful Conversation

    Whole Home Renovations are a significant investment in your comfort, safety, and property’s future. The strongest projects begin with an honest assessment of what should be preserved, what must be replaced, and what the home needs to serve your family for the next chapter.

    PRO Construction, A Boomer Group Inc. Company, brings more than 25 years of local experience to homes throughout Tarrant and Denton Counties. We provide coordinated construction management, transparent communication, and craftsmanship grounded in honest, steady work.

    If you are considering a whole-house remodel in Keller, Fort Worth, Southlake, Grapevine, Denton, or Flower Mound, start a conversation with PRO Construction or call 817-372-0211.

  • Reconstruction Services in Keller: A Homeowner Guide

    Reconstruction Services in Keller: A Homeowner Guide

    Residential reconstruction restores the structural stability, framing integrity, and safety of a home that has suffered deep deterioration, impact damage, or foundation movement. When standard remodeling cannot resolve shifting load-bearing components or extensive water rot, investing in structural reconstruction services in Keller ensures your property is rebuilt to current building codes. This intensive building process strips a property down to sound framing members, corrects structural deficiencies, and rebuilds the interior envelope from the subfloor to the roof rafters.

    Reconstruction Services in Keller: A Homeowner Guide

    What Are Structural Reconstruction Services in Keller?

    Residential reconstruction is the complete structural rebuilding, stabilization, and restoration of a residential building. Unlike cosmetic updates that simply cover up surface wear, reconstruction targets the load-bearing framework and physical assemblies that keep a house level, structurally sound, and weather-tight. When foundation settlement cracks grade beams, roof trusses sag under load, or plumbing leaks rot primary floor joists, basic drywall repairs only hide active structural failures.

    North Texas homes face distinct environmental stressors that frequently trigger major structural repairs:

    • Severe Weather and Wind Loading: Straight-line storms, wind-thrown tree limbs, and torn roof decking that fracture rafters, compromise truss connections, and break ceiling diaphragms.
    • Widespread Moisture Infiltration: Chronic subfloor pipe leaks, broken supply lines, or flash floods that rot sill plates, wall studs, subfloor sheathing, and exterior band joists.
    • Compromised Load Paths: Faulty previous renovations where structural walls were opened without installing appropriately sized laminated veneer lumber (LVL) or steel support beams.
    • Complete Layout Re-engineering: Whole-home structural transformations that remove core load-bearing assemblies to reconfigure floor plans while upgrading outdated building systems.

    Executing complex structural work requires experienced general contractors working directly with structural engineers. An engineer evaluates dead and live loads, calculates point-load transfers, and specifies hurricane ties and framing anchors down to the slab. The contractor translates these structural calculations into physical framing, pulls required city trade permits, and coordinates structural inspections to verify code compliance. PRO Construction provides Accessory Dwelling Units (ADU), Garage Conversions, Garage Builds for Homeowners in Keller, TX and surrounding communities seeking additional living space, rental income, or guest accommodations.

    Remodeling vs. Reconstruction: Scope and Engineering

    Homeowners frequently interchange the terms "remodel" and "reconstruct," but their technical execution, structural engineering demands, and municipal review processes differ substantially.

    Project Element Cosmetic or Standard Remodel Structural Residential Reconstruction
    Primary Scope Surface aesthetics, cabinet replacement, finish materials Structural framing, load path correction, core sub-assemblies
    Framing Changes None or minor non-bearing partition wall moves Sistering joists, replacing studs, setting structural beams
    Engineering Oversight Rarely required for finish replacements Mandatory engineered framing and foundation plans
    Permit Classifications Simple trade permits for plumbing or electrical fixtures Master building permits, structural framing, and full trade rough-ins
    City Inspections Final mechanical, electrical, and plumbing checks Phased rough-in, framing, insulation, and building reviews
    Home Livability Frequently occupied during room-by-room work Typically vacated due to utility disconnections and open framing

    Cosmetic remodeling focuses entirely on visible finishes such as cabinetry, tile surfaces, and paint. Structural reconstruction targets the underlying framework that carries the building’s weight. When vertical studs or horizontal floor joists suffer from dry rot or insect tunneling, covering them with fresh sheetrock creates a safety hazard. Reconstruction removes all degraded lumber, integrates engineered structural posts, and ensures every vertical load transfers directly into the concrete foundation.


    When Total Reconstruction Makes More Sense Than Remodeling

    Deciding between standard renovations and full reconstruction services in Keller depends on the condition of your home’s foundation and framing assemblies. Cosmetic investments are quickly wasted when applied over an unstable structure. If a house exhibits sloping floors, severe ceiling deflection, exterior brick cracks, or binding exterior doors, cosmetic finishes will fail as the underlying structure continues to move.

    Clay soils throughout North Texas present significant challenges for residential slabs and pier-and-beam foundations. These heavy soils expand during rainy periods and contract during prolonged dry stretches. Over time, differential soil movement causes foundation grade beams to heave or settle unevenly. When the foundation plane shifts, the structural framing above it twists, causing wall studs to bow, window headers to pinch, and rafters to pull apart at the ridge board.

    Beyond foundation concerns, older residential structures often contain compounding structural and utility issues. Deteriorating cast-iron waste stacks beneath the slab, undersized ceiling framing, ungrounded wiring, and unvented roof systems frequently make surface-level work impractical. Stripping the structure down to its bare framing allows trades to replace compromised systems efficiently without working around brittle wall surfaces.

    Homeowners evaluating extensive property overhauls often consult our guides on custom home building and attached additions to balance the financial practicality of structural rebuilding against new construction.

    Evaluating Load-Bearing Framing and Foundation Levels

    Prior to beginning structural reconstruction, an on-site evaluation by an experienced structural engineer is necessary. This evaluation focuses on three primary structural components:

    1. The Foundation Elevation Profile: Mapping elevation differentials across the concrete slab or floor framing using a precision digital manometer. Excessive variance indicates that foundation underpinning piers must be installed to stabilize the home before any wall or roof framing work proceeds.
    2. The Vertical Load Distribution: Inspecting load-bearing stud walls, point-load posts beneath heavy roof valleys, and cripple walls. Any lumber rot, structural bowing, or improper mechanical notches must be corrected through stud replacement or header re-engineering.
    3. The Horizontal Diaphragms: Assessing roof rafters, ceiling joists, and subfloor assemblies for structural deflection, broken truss gusset plates, or moisture-damaged subfloor sheathing.

    Addressing framing and foundation faults before ordering interior finish materials prevents the costly mistake of having to tear out new tile or custom cabinetry to fix an underlying structural defect.


    The Phased Process of Structural Reconstruction

    Systematic project phasing is essential during major reconstruction. Because each structural milestone serves as the physical base for subsequent trades, skipping steps or accelerating schedules leads to failed municipal inspections and compromised structural performance.

    1. Structural Engineering and Architectural Design: The structural engineer drafts framing layouts, specifying lumber grades, metal connector schedules, shear wall locations, and point-load posts. Reviewing house blueprints helps homeowners track these structural details.
    2. Keller Permitting and Site Staging: Master building permit applications are submitted to the municipal building department. The job site is secured with temporary fencing, waste dumpsters, and temporary power poles.
    3. Controlled Structural Demolition: Compromised wallboard, failing framing members, and deteriorated subfloors are removed down to solid structural elements, exposing the bare framing skeleton.
    4. Structural Stabilization and Framing: Foundation repairs are completed, rotted bottom plates are replaced, load-bearing headers are installed, and damaged floor joists or rafters are sistered with structural lumber.
    5. Trade Rough-Ins (Mechanical, Electrical, Plumbing): Licensed mechanical, electrical, and plumbing trades run new copper or PEX water lines, PVC drainage stacks, dedicated electrical circuits, and HVAC ducting through open wall cavities.
    6. Insulation and Building Envelope Sealing: Open-cell or closed-cell spray foam or batt insulation is installed across exterior wall cavities, paired with flashing tape around window and door rough openings to seal the thermal envelope.
    7. Drywall, Millwork, and Interior Finishes: Drywall is hung, taped, and textured, followed by the installation of interior doors, baseboards, custom cabinetry, tile, and hardwood flooring.
    8. Final Code Inspections and Occupancy Certification: Municipal inspectors perform final trade, structural, and life-safety reviews, issuing the final certificate of occupancy.

    Navigating Keller Permitting and Building Codes

    The City of Keller Community Development and Building Services Department enforces residential construction standards derived from adopted International Residential Code (IRC) provisions. Performing major structural reconstruction without obtaining required master building permits can lead to stop-work orders, administrative penalties, and issues with property insurance coverage.

    Submitting plans for municipal review in Keller requires:

    • Dimensioned architectural floor plans and exterior elevation sheets.
    • Stamped structural engineering drawings detailing framing alterations, beam sizes, and foundation piers.
    • Residential energy code compliance documentation.
    • Detailed scopes of work covering plumbing, electrical, and mechanical trade replacements.

    During construction, municipal inspectors review the property at defined progress stages. Framing inspections cannot take place until all plumbing, electrical, and HVAC rough-ins have been inspected and approved. Insulation cannot be placed until framing approval is formally recorded. Working with an organized general contractor ensures inspections are requested in the correct order, avoiding trade delays. Property owners vetting prospective contractors can consult our guide on how to vet construction general contractors for verification standards.


    Budgeting for Reconstruction: Managing Contracts and Scopes

    Financial clarity is critical during large-scale structural projects. Opening existing walls often reveals hidden plumbing leaks, unauthorized framing cuts, or termite damage. Because of these variables, open-ended time-and-materials agreements can expose property owners to sudden cost increases from unplanned labor hours and uncontrolled material adjustments.

    Contract terms like a Guaranteed Maximum Price (GMP) protect property owners by establishing a defined financial ceiling for the specified scope of work. Under a GMP structure, the general contractor carries the responsibility for labor overruns and general estimating discrepancies within the agreed plans. If the work is completed below the ceiling price, the cost savings remain with the homeowner.

    Establishing a reliable GMP requires detailed pre-construction coordination. The contractor, structural engineer, and homeowner define structural hardware, window schedules, insulation packages, and finish allowances before demolition begins. Property owners looking for structured payment pathways can review our financing options to align construction scopes with their project capital.

    Single-Source Project Management vs. Multi-Contractor Models

    Traditional construction arrangements require homeowners to hire an architect or engineer independently before sending the completed plans out for competitive bidding among trade contractors. When unexpected framing problems arise on site, disagreements can occur between the engineer’s theoretical plan and the contractor’s field execution, leaving the property owner responsible for revision fees and delay costs.

    Single-source management combines design, engineering coordination, and on-site construction under one primary agreement. This unified structure offers clear advantages:

    • Early Constructability Reviews: The builder reviews the engineer’s framing concepts during drafting to ensure beam installations and point loads can be efficiently constructed on site.
    • Realistic Cost Forecasting: Trade specialists provide material and labor pricing while drawings are being developed, eliminating budget gaps before permits are filed.
    • Single-Point Accountability: A single project manager oversees structural trades, city inspection scheduling, and quality standards from initial demolition through final trim work.

    Complex structural overhauls and second-story additions require precise scheduling across multiple framing and mechanical trades. Review our wide range of residential services to see how unified project management simplifies structural construction.


    Common Pitfalls to Avoid in Major Rebuilds

    Rebuilding the structural core of a home requires strict adherence to engineering standards. Small procedural mistakes during demolition or framing can lead to compounding structural issues that compromise both budget and safety.

    1. Initiating Demolition Before Engineering Approval: Tearing out partition walls before an engineer calculates load paths can cause ceiling joists to sag, roof ridges to drop, and exterior brick veneer to crack. Temporary structural shoring walls must be erected before removing any load-bearing studs.
    2. Employing Unregistered or Uninsured Labor: Keller requires general contractors and trade subcontractors to maintain active registration with the city and carry general liability insurance. Hiring uninsured labor exposes homeowners to direct financial liability for job-site accidents and unpermitted framing errors. Homeowners can read our practical guide on hiring a general contractor for guidance on validating builder credentials.
    3. Neglecting the Exterior Building Envelope: Replacing rotted interior framing without fixing damaged roof step flashing, missing house wrap, or unsealed window perimeters allows moisture to penetrate and damage new framing lumber.

    Identifying and Repairing Concealed Moisture Damage

    Concealed framing damage remains a primary cause of construction scope adjustments. When moisture penetrates exterior brick veneer, roof valleys, or tile shower pans over extended periods, wood-destroying fungi break down framing fibers without showing obvious surface signs.

    High-risk areas that require careful inspection during demolition include:

    • Exterior Wall Bottom Plates: Sections with insufficient ground clearance or blocked brick weep holes.
    • Subfloor Plywood and Band Joists: Framing bays directly beneath upstairs bathrooms, kitchens, and water heaters.
    • Roof Rafter Tails and Fascia Backing: Eaves exposed to overflowing gutters or missing drip edge flashing.
    • Door and Window Jack Studs: Framing surrounding openings that lack proper pan flashing or caulking seals.

    Addressing structural rot requires a methodical three-step response:

    1. Define the Rot Boundaries: Inspect adjacent lumber to identify the full perimeter of softened or fungus-damaged wood.
    2. Eliminate the Moisture Ingress: Repair the root cause—such as damaged roof flashing, plumbing fitting leaks, or poor perimeter grading—before setting new framing.
    3. Replace or Sister Damaged Members: Remove severely rotted wood and install new structural lumber, or sister damaged joists with engineered lumber using code-compliant nailing patterns and structural screws.

    When planning comprehensive reconstruction services Keller homeowners must ensure that all plans meet local building standards. Thorough structural framing practices guarantee that your rebuilt home remains stable, level, and durable for decades. To discuss your property’s structural framing or rebuilding requirements, please contact our team directly.


    Frequently Asked Questions

    What is the 30% rule for home renovations and reconstruction?

    The 30% rule is a practical budgeting guideline suggesting that if the estimated cost of repairs, structural remediation, and renovations exceeds 30% of the property’s total market value, homeowners should evaluate full reconstruction or rebuilding options. Investing heavily into an aging structure with failing underground plumbing, chronic foundation settlement, and damaged framing may yield lower long-term value than rebuilding a modern, code-compliant structure from the foundation up.

    Is it better to gut a house or rebuild?

    Deciding whether to gut a house or rebuild completely depends on the condition of the foundation, roof geometry, and exterior masonry. Gutting a home down to the studs is advantageous when the concrete slab is stable and the exterior brick or stone is intact, as it saves significant demolition and masonry costs while allowing complete replacement of wiring, plumbing, insulation, and interior framing. If the foundation requires extensive structural overhaul or the framing layout cannot accommodate your functional needs, tearing down and rebuilding from scratch is often more cost-effective.

    What is the difference between renovation and reconstruction?

    Renovation focuses on updating the visual, functional, and surface elements of an existing space—such as installing new kitchen cabinets, upgrading bathroom tile, or painting walls—without altering the primary structural skeleton. Reconstruction involves the technical dismantling, repairing, and rebuilding of load-bearing framing, foundation beams, roof trusses, and major utility systems to restore the structural integrity of a compromised property.

    How long does a typical home reconstruction take in Keller?

    A whole-home structural reconstruction in Keller generally takes several months to complete, depending on project scale, engineering complexity, and material lead times. The initial phase covers structural drafting, engineering stamps, and City of Keller plan review, followed by phased demolition, foundation corrections, structural framing, MEP rough-ins, municipal inspections, insulation, drywall, and interior trim finishes. Uncovering severe concealed rot or foundation settlement behind existing drywall can expand the construction schedule.

  • Outdoor Living in North Texas: Covered Patios, Outdoor Kitchens & Fire Features Built for Year-Round Use

    Outdoor Living in North Texas: Covered Patios, Outdoor Kitchens & Fire Features Built for Year-Round Use

    What good is a beautiful backyard if the North Texas heat makes it uncomfortable for much of the summer: and a spring storm can quickly turn an outdoor gathering into a scramble indoors?

    For homeowners in Keller, Southlake, Fort Worth, Colleyville, North Richland Hills, and nearby Denton County communities, outdoor living is most successful when it is planned as a durable extension of the home rather than a collection of separate features. A covered patio, pergola, outdoor kitchen, fire pit, or screened porch should work together as one well-coordinated space.

    At PRO Construction, we help homeowners plan these improvements around shade, drainage, structural integrity, comfort, and long-term maintenance. Bruce Laing brings more than 25 years of local North Texas experience to the process, and our team manages the work from design and material coordination through permitting, inspections, and contractor oversight.

    We are A Boomer Group Inc. Company, and our approach is simple: honest, steady work that protects your home and your investment.

    Key Takeaways

    • A covered patio or well-designed pergola should respond to North Texas heat, sun, wind, rain, and changing soil conditions.
    • Outdoor kitchens require early planning for electrical, gas, plumbing, ventilation, storage, and weather-resistant finishes.
    • Fire pits and fireplaces should be located with safety, circulation, seating, and overhead clearances in mind.
    • Screened porches can provide shade, airflow, and relief from insects while preserving an open connection to the yard.
    • Permitting and inspections vary by municipality, so the project should be reviewed according to the property’s actual location.
    • PRO Construction coordinates design, materials, permits, inspections, and the construction team so homeowners are not left carrying the administrative burden.

    Begin With How You Will Use the Space

    Before selecting finishes or choosing between a pergola and a solid roof, consider how your family will actually use the backyard.

    Will the space be used for quiet morning coffee, weeknight dinners, large gatherings, or all three? Do you want a dedicated cooking area, a place to watch television, or a fire feature that becomes the center of conversation during cooler evenings?

    These questions shape the layout. A practical outdoor living plan typically includes several connected zones:

    • A shaded living area for lounge seating and everyday use
    • A dining area positioned near the kitchen or serving counter
    • A cooking zone with enough clearance for appliances, food preparation, and movement
    • A fire feature area that feels inviting without obstructing traffic
    • A transition area connecting the patio to the home, pool, lawn, or garden

    The best designs feel natural. You should not have to cross the entire patio to carry food from the grill to the table, and guests should not need to walk through the cooking area to reach the seating.

    Covered Patios and Pergolas: Choosing the Right Overhead Structure

    A solid covered patio provides the greatest protection from direct sun and rain. It can also support ceiling fans, outdoor lighting, heaters, televisions, and other features that make the area feel more like an outdoor room.

    A pergola offers a more open architectural character. Depending on its design, it can provide filtered shade and strong airflow while preserving a lighter visual connection to the sky. However, an open pergola does not provide the same rain protection as a solid roof.

    The choice depends on your priorities:

    • Choose a covered patio when reliable shade, rain protection, and year-round furnishing are most important.
    • Choose a pergola when you prefer filtered light, a more open feel, and a lighter structure.
    • Consider a hybrid design when you want a fully covered living area combined with an open section for a grill, garden, or fire feature.
    • Consider a screened porch when insects, wind-driven rain, and evening comfort are major concerns.

    In each case, the structure must be evaluated in relation to the existing home. Roof connections, load-bearing points, footings, drainage, and the condition of the existing slab all matter. If the property has a post-tension slab, footing and utility planning deserve particular care before any work begins.

    For additional guidance, see our resources on outdoor living structures in North Texas and custom patio covers.

    Covered patio and outdoor seating area designed for North Texas gatherings

    Plan Outdoor Kitchens Around Real Cooking Habits

    An outdoor kitchen should be designed around how you cook: not just how you want the space to look in a rendering.

    Some homeowners need a built-in grill, refrigerator, and serving counter. Others want a smoker, sink, storage drawers, beverage center, or pizza oven. Each addition affects the required utilities, clearances, cabinetry, ventilation, and countertop layout.

    We begin by considering:

    • Where food will be stored and prepared
    • How guests will be served
    • Whether the kitchen is under a solid roof or an open pergola
    • Where gas, electrical, and plumbing connections can be routed
    • How appliances will be protected from weather and direct sunlight
    • Whether the counter height and seating arrangement fit the household

    Materials should be selected for exposure to heat, moisture, UV light, and temperature changes. Outdoor-rated appliances and fixtures are essential. Countertops and cabinetry also need to be appropriate for exterior use rather than adapted from an indoor kitchen without proper protection.

    Material coordination is part of our responsibility. We work with trusted local partners, including Builders FirstSource for building materials, ProSource for finish selections, and Sherwin-Williams for coatings and color coordination. This helps us maintain a consistent design from the roof structure and trim to the cabinetry, walls, and exterior details.

    Covered outdoor kitchen and patio structure with warm wood and metal finishes

    Fire Pits and Fire Features That Support Safe, Comfortable Gatherings

    A fire pit or outdoor fireplace can extend the life of your backyard into cooler fall and winter evenings. It also gives the space a natural focal point.

    The location matters as much as the appearance. We consider:

    • Distance from the home and other structures
    • Overhead roof or ceiling conditions
    • Seating circulation and walking paths
    • Wind direction and smoke movement
    • Fuel source and utility routing
    • The weight of masonry or stone construction
    • Access for maintenance and future service

    A heavy stone fireplace or masonry fire feature may require dedicated structural support. Gas-fueled features may also require trade coordination and inspection. Requirements vary based on the city, the property, the fuel source, and the scope of work, so we review those details before construction begins rather than making assumptions.

    A well-planned fire feature should feel integrated into the patio. It should not create a bottleneck or force seating too close to the cooking zone. Practical design protects both your family’s comfort and the long-term condition of the structure.

    Design for Heat, Storms, Drainage, and Changing Soil

    North Texas outdoor spaces must perform through intense summer sun, sudden spring storms, wind-driven rain, hail, and seasonal soil movement.

    That makes site feasibility one of the first steps in the process. We evaluate the existing yard, grade changes, drainage patterns, tree locations, utility routes, and the relationship between the new structure and the home.

    Important planning questions include:

    • Where will roof runoff go?
    • Will the new patio direct water toward the foundation?
    • Does the existing surface provide a suitable base?
    • Are new footings needed, and where can they be placed?
    • Will the structure affect gutters, downspouts, windows, or doors?
    • Are there easements, HOA requirements, or property constraints to review?

    Materials should also match the climate. Wood can provide warmth and character but may require ongoing sealing or staining. Metal can offer a clean, durable appearance but should be specified and finished for outdoor exposure. Stone, concrete, porcelain, and other hardscape materials each have different maintenance and installation considerations.

    We focus on a balanced solution: one that looks appropriate beside the existing home and remains practical to maintain.

    Covered porch and stone chimney illustrating a seamless indoor-outdoor transition

    Permitting, Inspections, and Contractor Oversight

    Outdoor living projects often involve more coordination than homeowners expect. A roofed patio, screened porch, outdoor kitchen, or fire feature may involve building, electrical, plumbing, or mechanical considerations. The exact requirements depend on the city or jurisdiction where the property is located.

    We do not rely on generic assumptions. Instead, we review the project scope and property location, prepare the necessary plans, coordinate with the appropriate professionals, and help manage inspections as required.

    Our process generally includes:

    1. Initial consultation and site review
    2. Concept planning and layout development
    3. Structural and utility coordination
    4. Material selection and ordering
    5. Permit and approval coordination
    6. Construction oversight
    7. Required inspections
    8. Final walkthrough and closeout

    This matters in Keller, Southlake, Fort Worth, Colleyville, North Richland Hills, and Denton County communities because neighboring jurisdictions can have different review processes and requirements. We carry that burden for you so you can make informed decisions without becoming the project administrator.

    A Local, Well-Coordinated Approach

    Bruce Laing’s 25 years of North Texas experience have provided a practical understanding of how local homes, materials, weather, and construction conditions come together. Whether the project is a covered patio in Keller, an outdoor kitchen in Southlake, or a screened porch near Denton, we believe the details should be explained clearly before work begins.

    We also understand that a project’s financial structure matters. PRO Construction offers flexible financing options to help homeowners manage their plans and priorities. We can also connect clients with local partners such as Gus Moreland at First United Bank when that resource is appropriate for their planning process. Financing options are subject to approval and individual terms.

    There is no need to rush a decision. A thoughtful conversation is the right place to begin.

    Frequently Asked Questions

    Can PRO Construction build a covered patio and outdoor kitchen as one project?

    Yes. Coordinating the structure, utilities, finishes, and appliances as one project can help prevent conflicts and produce a more cohesive result. We review the full scope before construction begins.

    Is a pergola enough for North Texas weather?

    A pergola can provide shade and airflow, but it does not offer the same rain protection as a solid roof. The right choice depends on how you plan to use the space and how much weather protection you need.

    Do outdoor kitchens require permits?

    Requirements vary by location and by the utilities involved. Gas, plumbing, electrical, structural, and roof-related work may require review or inspection. We evaluate the project according to the applicable jurisdiction rather than promising a blanket answer.

    Can you add a screened porch to an existing patio?

    Often, an existing patio can serve as part of the plan, but its condition, dimensions, drainage, and structural suitability must be evaluated first. We confirm what can be reused and what should be rebuilt.

    Do you offer financing for outdoor living improvements?

    PRO Construction offers flexible financing options for qualified homeowners. Terms, approval, and availability vary, so we discuss those details during the planning process without quoting guarantees.

    Start a Conversation About Your Outdoor Living Plans

    A year-round outdoor living space does not happen by accident. It comes from careful planning, durable materials, thoughtful utility coordination, and disciplined oversight from the first site review through final inspection.

    If you are considering a covered patio, pergola, outdoor kitchen, fire feature, or screened porch in Keller, Southlake, Fort Worth, Colleyville, North Richland Hills, or a nearby Denton County community, start a conversation with PRO Construction.

    You can also call 817-372-0211. We would be glad to listen to your goals, review your property, and help you determine what a well-planned outdoor living improvement could look like for your home.

    Covered outdoor living structure with a porch, fan, and natural material finishes