
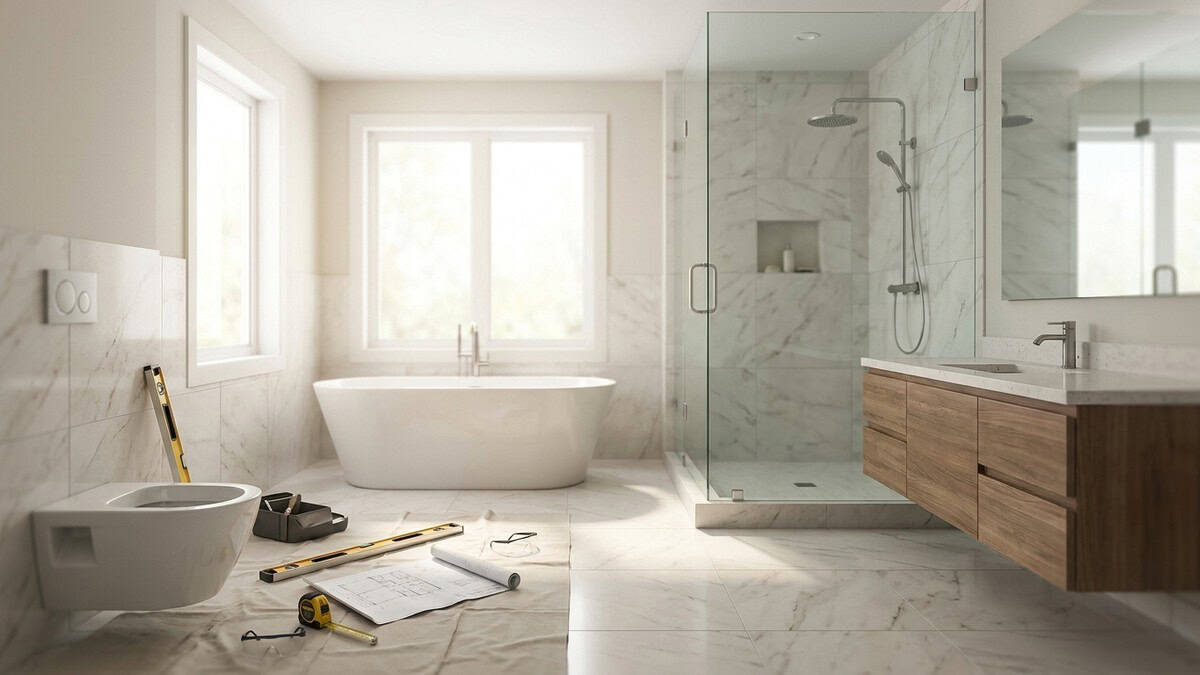
Planning a bathroom remodel near me requires evaluating structural framing, plumbing rough-ins, electrical load capacity, and continuous waterproofing behind the tile. A successful project strips away outdated surfaces to correct underlying subfloor or moisture issues while upgrading layout flow and ventilation. Working with an established local builder ensures your renovation complies with municipal building codes and delivers durable, everyday performance.

What Does a Full Bathroom Remodel Involve?
A complete bathroom renovation transforms both the visible surfaces and the underlying mechanical infrastructure. Unlike cosmetic updates that simply swap fixtures, a full remodel removes drywall and flooring down to the bare wall studs and subfloor. This teardown gives trade professionals direct access to inspect structural framing, reconfigure waste lines, and modernize electrical circuits.
Several critical building systems receive comprehensive updates during a structural remodel:
- Plumbing Supply and Drainage: Aging supply lines are replaced with modern PEX or copper piping, while drain and vent stacks are re-pitched to facilitate gravity-fed drainage toward the main sewer stack.
- Electrical Branch Circuits: High-draw appliances such as hair dryers, ventilation heaters, and illuminated mirrors require dedicated branch circuits protected by Ground Fault Circuit Interrupter (GFCI) devices.
- Ventilation and Moisture Management: Ducted exhaust fans sized for room volume carry humid air directly out through an exterior wall or roof cap rather than dumping moisture into the attic.
- Subfloor Reinforcement: Water damage frequently hides beneath older tub surrounds and sheet flooring, requiring crews to sister weakened joists and install rigid underlayment to prevent tile deflection.
Property owners planning major spatial changes alongside interior updates can explore luxury bathroom renovation design concepts to see how structural modifications enhance daily function.
Cosmetic Refresh vs. Complete Layout Reconstruction
Distinguishing between a surface upgrade and a structural reconstruction helps establish project scopes, trade requirements, and site timelines.
| Project Factor | Cosmetic Surface Refresh | Complete Layout Reconstruction |
|---|---|---|
| Demolition Scope | Fixtures, vanity, and mirrors removed; drywall left intact | Complete tear-out to bare wall studs and exposed floor joists |
| Plumbing Changes | Direct replacement of fixtures in existing locations | Relocation of supply lines, waste stacks, vents, and floor drains |
| Electrical Scope | Swapping light fixtures, switches, and decorative plates | Adding dedicated home-run circuits, GFCI outlets, and task lighting |
| Waterproofing | Topical caulking and standard moisture-resistant drywall | Continuous bonded sheet membranes, liquid barriers, and pan flood testing |
| Permits Required | Rarely required for basic surface replacements | Required for plumbing, electrical, and structural modifications |
Surface updates suit bathrooms where the existing layout works well, framing is sound, and supply lines show no signs of corrosion. Conversely, moving a shower, converting a fiberglass tub into a walk-in shower, or adding a double vanity requires opening walls to run new plumbing and electrical lines. Rebuilding from the framing outward guarantees that hidden leaks, moisture damage, or sagging floor joists are resolved before finish materials are installed.
How to Vet a Contractor for a Bathroom Remodel Near Me
Selecting a qualified builder requires looking beyond finished portfolio photos. Bathrooms represent high-risk wet environments where improper trade work causes structural rot and hidden moisture intrusion. Vetting local professionals demands verifying their licensing status, insurance coverage, trade coordination, and technical waterproofing protocols.
PRO Construction provides Accessory Dwelling Units (ADU), Garage Conversions, Garage Builds for Homeowners in Keller, TX and surrounding communities seeking additional living space, rental income, or guest accommodations.
Interviewing general contractors should center on their end-to-end operational process. A reliable builder manages architectural plans, pulls required municipal permits, schedules specialty subcontractors, and coordinates on-site inspections. Working with a team experienced in design-build project management eliminates communication gaps between initial layout sketches and trade execution.
Essential Contractor Credentials
Before signing an agreement, verify that your prospective builder satisfies core operational criteria:
- Active Licensing and Municipal Registration: Confirm that the general contractor and their specialty trades carry current municipal registrations and trade licenses within your local jurisdiction.
- Comprehensive Insurance: Require proof of current General Liability coverage and Worker’s Compensation certificates directly from the insurer.
- Structural and Framing Capability: Projects involving widened entries, recessed storage niches, or relocated partitions demand proven carpentry knowledge. Homeowners undertaking structural alterations should review removing load-bearing walls safely to understand structural load transfer.
- Waterproofing System Knowledge: Inquire about the exact waterproofing assemblies the contractor uses, such as bonded sheet membranes, liquid barriers, or foam backer systems, and verify installation adheres strictly to manufacturer specifications.
- Detailed Written Agreements: Ensure the contract defines the full scope of work, material allowances, inspection milestones, and warranty terms. Reviewing residential construction contracts helps safeguard your investment before demolition starts.
The Step-by-Step Bathroom Remodeling Process
Professional bathroom remodeling follows a sequential trade schedule. Skipping steps or rushing drying periods compromises installation quality and can lead to cracked tile, failed seals, or water damage.
PHASES OF A BATHROOM RENOVATION
1. Planning, Engineering, Permitting & Site Protection
2. Demolition, Stud Inspection & Subfloor Leveling
3. Rough-In Plumbing, Electrical Circuits & HVAC Ducts
4. Waterproofing Enclosure, Pan Flood Test & Inspections
5. Tile Setting, Grouting, Fixture Trim-Out & Final Walkthrough
Rough-In and Waterproofing Phase
Demolition clears the workspace so mechanical and structural trades can rough in primary systems:
- Plumbing Rough-Ins: Plumbers install thermostatic mixing valves, route supply lines, place shower drain assemblies, and connect waste pipes to existing stacks.
- Electrical Rough-Ins: Electricians pull dedicated wiring for vanity sconces, overhead recessed lighting, ventilation units, and GFCI outlets.
- Framing and Structural Blocking: Carpenters secure solid wood blocking between studs to provide anchoring for heavy glass doors, floating vanities, and grab bars.
- Exhaust Ducting: Mechanical crews run rigid, smooth ductwork from the exhaust housing to the building exterior via the shortest possible path.
- Subfloor Preparation: Installers secure structural underlayment, checking deflection ratings to ensure the floor supports tile weight without flexing.
- Waterproofing Application: Crews install cementitious or waterproof foam backer boards, tape seams, apply membrane barriers, and perform a multi-hour standing water flood test on the shower pan to confirm zero leakage.
Managing extensive home updates is easier when using a residential construction checklist to monitor trade milestones.
Finishes, Trim-Out, and Final Inspection
Once rough inspections and flood testing are approved, finish trades install decorative surfaces and fixtures:
- Tile Setting and Grouting: Tile setters apply modified thin-set mortar, align floor and wall patterns, pack joints with high-performance grout, and seal change-of-plane transitions with color-matched silicone.
- Vanity and Top Installation: Cabinet specialists anchor the vanity into structural wall blocking, shim for level, and secure stone counters with under-mount sinks.
- Fixture Trim-Out: Plumbers mount showerheads, valve trim, sink faucets, and set toilets. Electricians fit decorative lighting and install trim plates.
- Glass and Accessories: Installers mount custom glass shower doors, hang mirrors, and secure towel bars into pre-blocked wall locations.
- Final City Approvals: Municipal building inspectors review mechanical, electrical, and plumbing work to close open permits.
For broader property improvements that alter residential footprints, check our guide on major structural renovations to see how structural updates connect with interior remodeling.
Smart Layout and Material Choices for Long-Term Durability
Material selections for high-moisture rooms must balance aesthetic appeal with resistance to steam, humidity, and regular wear. Non-porous surfaces and proper ventilation protect underlying framing from water exposure over decades of daily use.
When choosing components, prioritize commercial-grade materials designed for wet zones:
- Porcelain Tile: Porcelain offers superior density and moisture resistance compared to standard ceramic, making it ideal for wet shower floors and surrounds.
- Engineered Quartz: Quartz slabs provide non-porous vanity surfaces that resist staining and etching without requiring periodic chemical sealers.
- Forged Brass Valves: Solid brass valve bodies equipped with ceramic disc cartridges prevent internal corrosion and withstand continuous hot water exposure far better than plastic alternatives.
- High-Capacity Ventilation: Low-sone exhaust fans remove humid air quietly, encouraging household members to operate them consistently during and after showers.
Optimizing Floor Plans for Flow and Storage
Careful spatial planning maximizes usable square footage and improves traffic flow through the room:
- Zero-Threshold Showers: Recessing shower floor framing creates a barrier-free entry that removes trip hazards and supports accessibility.
- Double Vanity Spacing: Establishing adequate clearance between dual basins ensures two people can use the vanity simultaneously without crowding.
- Private Water Closets: Enclosing the toilet in a dedicated compartment provides privacy in primary bathrooms while leaving the main area accessible.
- In-Wall Niches: Utilizing vertical space between wall studs creates recessed storage for shower essentials without encroaching on standing room.
What Mistakes Should You Avoid When Renovating a Bathroom?
Bathroom remodeling errors often lead to subfloor rot, mold growth, and costly structural repairs. Because moisture barriers and supply plumbing remain concealed behind tile, installation shortcuts quickly produce hidden property damage.
Critical Moisture and Permitting Pitfalls
Avoiding common renovation missteps protects your home and prevents premature fixture failure:
- Skipping Shower Pan Flood Tests: Setting tile over an unverified shower pan risks undetected pan leaks. Installers should always plug the drain, fill the pan with water, and let it stand to confirm complete watertight integrity before tiling.
- Venting Exhaust Fans into Attic Spaces: Exhaust ducts routed into unconditioned attics dump warm, moist air across roof framing, causing wood decay and mold formation. Ducts must vent directly outdoors.
- Ignoring Subfloor Flex: Heavy tile assemblies crack quickly if installed over bouncy or uneven subflooring. Contractors must verify joist spans and add structural underlayment to prevent movement.
- Bypassing Municipal Building Permits: Unpermitted electrical and plumbing work can complicate insurance claims and create hurdles during home resale. Proper permits verify that work meets code.
- Using Inadequate Wall Substrates: Standard drywall or basic green board should never serve as a direct tile backer in wet shower enclosures. Install cement backer boards or waterproof foam panels with continuous membrane barriers.
Evaluating long-term project value across a property is easier with our analysis on home renovation project returns. Additional guides on structural modifications and residential planning are available on our renovation insights blog.
Frequently Asked Questions
What is a realistic budget for a bathroom remodel?
A balanced bathroom remodel budget allocates the largest share to skilled trade labor, including licensed plumbing, electrical rough-ins, structural framing, and waterproofing. Rough infrastructure materials, such as cement backer units, sheet membranes, subfloor underlayment, and drain assemblies, form another key expense. The remaining funds cover finish materials, including vanities, quartz surfaces, porcelain tile, plumbing fixtures, and custom shower glass enclosures.
What does a basic budget bathroom remodel look like?
Lower-cost bathroom renovations focus strictly on surface-level cosmetic updates without altering underlying plumbing or electrical infrastructure. This typically involves repainting walls, swapping an existing vanity for a pre-assembled stock unit, replacing light fixtures in their current locations, and installing standard drop-in tub surrounds. Structural framing, wall demolition, layout changes, and custom tile work are excluded at this tier.
Can I renovate my bathroom on a very tight budget?
Renovating on a very restricted budget requires limiting work to cosmetic maintenance, do-it-yourself painting, and direct fixture swaps. Homeowners can re-caulk joints, install modern cabinet hardware, change sink faucets, and replace old mirrors without opening walls. Structural alterations, shower pan rebuilds, moving drain lines, or replacing wall tile require licensed trade labor and specialized materials that quickly exceed minimal budgets.
What to avoid when renovating a bathroom?
Homeowners should avoid skipping shower pan leak tests, terminating exhaust vents into attic spaces, and tiling over unreinforced, flexible subfloors. It is equally important to avoid working with unlicensed contractors who bypass municipal building permits. Choosing poor-quality plastic plumbing valves or using non-waterproof drywall inside shower enclosures should also be avoided, as these shortcuts frequently lead to hidden leaks and costly structural repairs.
Leave a Reply